Part 5: Hide, Hideaway
Main Walkthrough
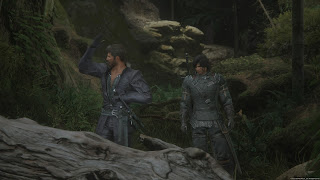
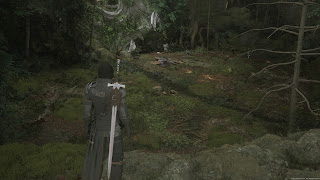
Cid has enlisted Clive's help - at least temporarily - in the cause of those living at The Hideaway. In order to reach your next destination you'll need to make your way through The Greatwood, a dangerous wooded area, and emerge on the other side. Cid joins the party for this excursion, as does a certain someone else.
Torgal
At this point in the game Torgal will join Clive's party, and he'll prove a constant, faithful companion throughout your journey. Torgal can be issued commands, unlike other party members, by using the directional buttons on the controller. Use the left button to toggle between Torgal's commands and your items. Torgal has three commands:
- Sic (up) - Torgal attacks enemies normally
- Heal (right) - Torgal uses Cure on Clive
- Ravage (down) - Torgal launches an enemy into the air
If you want Torgal to be useful you'll need to give him commands. If you can't be bothered you can equip the Ring of Timely Assistance, which will allow Torgal to react to battle in his own way - though you may find he's not always there when you need him if Torgal's acting on his own.
The Greatwood
Enemies
- Dragon Aevis
- Hornet
- Royal Sigfreyr
- Worgen
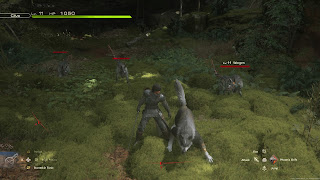
Follow Cid into the woods. After a while you're reach a clearing, and a pack of Worgen will come at you. They're simple melee enemies, and you can use the opportunity to test out Torgal's abiities in battle. The journey continues after they're gone, though you'll run into something... nasty... when you duck under a fallen log.
Hop down into the clearing once the larger threat is gone and you'll run into a group of Vampire Thorns. In addition to lashing you with their vines these things can hurl poisonous globs at you from afar. Still, they're no big deal. Follow Cid out of their nest once the Vampire Thorns are gone and you'll find some Wyrrite.
Shimmy past the log blocking the path and you'll get a brief, vague history lesson. Follow Cid to the left and you'll find two Sharp Fangs along the path. He'll lead you to a clearing, and, no surprise, you'll run into trouble.
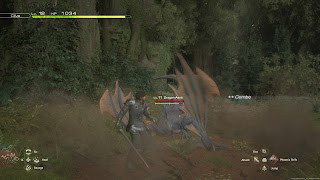
Your next enemy is a Dragon Aevis. In addition to its speedy attacks this thing can burp fireballs up at you, and though they aren't large their velocity can catch you by surprise. Stay close to the Dragon Aevis, slicing relentlessly, until it raises its wings or shows any sign of performing a move. You can Parry the wing slices, but otherwise you just want to dodge out of the way. Keep smacking and stunning the Dragon Aevis until it goes down. You'll receive a Dragon Talon and a bundle of Sharp Fangs for defeating the Dragon Aevis.
Keep following Cid after you take out the Dragon Aevis. Beyond a narrow cliff path you'll find a Potion, and a little ways down the next slope you'll find Steelsilk. Approach Cid when he admits to being lost and Torgal will find a path for you, off to your right. You can press down L3 (the left control stick) to send Torgal looking for a way forward if you get lost from this point on.
Up ahead are two more Sharp Fangs, and just past the items is a clearing guarded by Worgen and Vampire Thorns. The ranged attacks make the Vampire Thorns the greater threat, and they seem to go down quickly to Clive's Eikonic Abilities, so target these things first before going after their canine companions.
Hold down L3 after the battle and Torgal will point you to a hole in the rocks on the far side of the clearing. Beyond here is a slope, and you'll find a Potion on your left. At the bottom and on your right are two Bloody Hides. Grab them before jumping down into what is a very obvious battle arena, where the giant beastie you spotted before will come out to play.
Fafnir
A lizard-like beast that vaguely resembles a pinecone, Fafnir is a melee powerhouse. All of its moves are close-range - though its reach is so long that you can't count on distance to always work. Fafnir uses the following attacks:
- A charging headbutt / bite across a long distance
- A crushing claw attack where Fafnir rises into the air, then brings one foot down on you
- A lengthwise rolling attack
- A sweeping tail attack
- A leaping crush attack which sends Fafnir flying into the air, curling into a ball and then slamming down on you
- Spin Cycle, which sends Fafnir flying around the arena in a ball, traveling along the walls and eventually unwrapping to perform a heavy bellyflop
During the first phase of this battle Fafnir will rely on its 'normal' attacks, and which it uses depends on where you are relative to Fafnir's head. If you're up front it will try to crush you or smack you around; if you're at its side Fafnir will try to roll over you; and if you're behind it Fafnir will use its tail sweep. Going face-to-face with Fafnir is generally best, as these attacks are the easiest to dodge, though its rushing bite can prove problematic. If Fafnir's head rises into the air your best bet is to back off as far as you can and hope you have enough space. There's plenty of time between attacks to chew away at Fafnir's health and Will.
Stun Fafnir and it will begin using Spin Cycle. This attack lasts longer and hits harder than any of Fafnir's other attacks, but it's arguably one of the easiest to avoid. Get out of the way of the initial roll, then lock onto Fafnir as it zooms along the walls and wait for it to rush at you again. Dodge to the side, then keep dodging in that direction. You should have more than enough room to avoid the bellyflop, which hits the hardest. You can then get in close and whack Fafnir around until it recovers.
Defeat Fafnir and you'll received Gnarled Scales and a bundle of Wyrrite. Cid will reveal a surprising talent, and once he's done you can leave via a crack in the walls. You'll find a Potion in the cave beyond, and a High Potion on the cliff's edge once you're back outside. Two Bloody Hides wait a short walk to your right.
After a quick slide down a slope you'll run into a bunch of Hornets. Their ability to fly makes the Hornets a nuisance to fight, though if you order Torgal to Ravage a Hornet he'll bring it down to earth. You can also use ranged magic and Lock On to do damage.
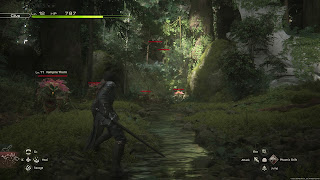
The path splits a bit ahead. If you take a left you'll find a clearing connected to two paths. A group of Vampire Thorns in the clearing protect some Wyrrite. Take a right, following the stream running through the area, and you'll find a Potion - as well as Hornets and Vampire Thorns. If you want to skip this second battle you can take a left near the Potion and find a ledge leading around their clearing.
Continue to follow the stream until you run into another Potion. If you turn around you'll see Magicked Ash behind you, snugged up beside a tree. Look to the right of the Potion and you'll find a side path. It leads up to some Vampire Thorns, true, but you'll also find two Sharp Fangs. You'll also get a look at the next large clearing, and the enemies containined within. Keep following this upper path and you'll fight a few Worgen, as well as find another Potion.
Ultimately you'll have to follow the stream and enter the clearing full of enemies, where you'll face off against another Dragon Aevis and several Worgen. Leave the Worgen to Cid and Torgal while you keep the Dragon Aevis occupied. It won't take long before all three of you are chipping away at the beast, and it won't survive under a sustained assault. Check the right side of this wide clearing for a Potion, and look to the left of the exit tunnel for a chest containing a Meteorite.
The stream will lead you beneath the ruins of fallen stonework, and on the other side you'll find a High Potion. The crew will spot trouble ahead, and a cut scene will pit them against a new foe.
Midnight Raven
Accompanied by several Royals who are comparatively minor threats, the Midnight Raven is a reasonably powerful foe. He favors quick shortsword attacks, and can move around the field faster than he initially appears. The Midnight Raven uses the following attacks:
- A variety of acrobatic sword strikes
- A teleporting attack heralded by wisps of green magic
- A Cinematic Clash where you'll have to rapidly tape the Square button to avoid damage
- Katon, a stream of fire
- Raiton, a lightning attack that strikes multiple marks on the ground
- Assassinate, where the Midnight Raven disappears in a puff of smoke and then dashes at you, trying to grab you
The Midnight Raven will move slowly towards you at first, then performing a series of whirling slashes that can catch you off-guard. Get far enough away and the Midnight Raven will teleport over and try to slash you. The first phase of the fight is almost entirely a matter of dodging the Midnight Raven's sword slices and anticipating when he will teleport. As soon as you see wisps of green magic you should dodge, as he's about to come right for you. Parrying him is not too difficult, so long as you catch him when his sword is just coming around.
After you Stagger the Midnight Raven once he'll start to use his special abilities more often. Raiton is easy to avoid, but Katon can catch you off guard and has quite a range. Dodge as soon as you see the word 'Katon' appear on the screen. Assassinate is particularly harsh - not an instant-kill, but painful - so keep your finger on the dodge button the second the Midnight Raven disappears into brown smoke. It won't take long before he tries to grab you.
At a few points in this battle you'll get into rapidfire Cinematic Clashes with the Midnight Raven. Once he's low on health and this happens you'll be more or less home free. Keep tapping the Square button and Clive will finish him off. You'll receive a Madge of Might, Steelsilk, and a Meteorite for defeating the Midnight Raven.
In addition to making your way out of The Greatwood, you'll unlock two modes for surviving the battle against the Midnight Raven, both of which are accessibe via The Arete Stone in The Hideaway:
- First up is Stage Replay. This allows you to rechallenge areas like The Greatwood, and pick up items you missed or grind for money and experience. Your current level and gear are retained.
- Second is Arcade Mode. This also allows you to rechallenge areas from the main story, but gear and level restrictions are applied to keep you from steamrolling the place. The game keeps track of your score and assigns a rating based on how well you do.
On top of all that, this should mark the point where you revisit The Hideaway between areas. The new features of The Arete Stone aside, you can now purchase and forge new equipment at The Hideaway. Given all the stuff you picked up in The Greatwood, you should head back to your home base and get outfitted for the next area.
Part 7: Louder than Words
Main Walkthrough

