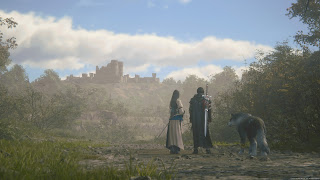
One lengthy trek through farmland later, Clive and Jill have arrived on the doorstep of the Phoenix Gate Ruins, the place where Clive's old life came to a crashing end. The equipment you picked up in Eastpool will outrank anything you can buy at this point in the game, so all you'll likely need to grab before heading in are Potions and High Potions.
Trek up to the ruins and you'll quickly catch sight of a familiar someone. Follow them into the nearby courtyard and through the doorway on the other side of the ruins. Clive will explain what lays below, and the path into the next area will open.
The Hall of the Ancestors - Enemies
- Bomb
- Defense Node
- Fallen Bug
- Fallen Guardian
- Fallen Hunter
- Lich
- Specter
- Wraith
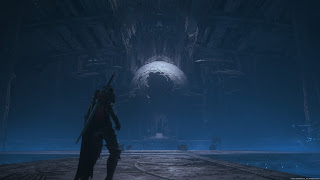
Head down the entrance hallway and through the first gate. After a cut scene you'll wind up on an elevator, surrounded by Fallen Bugs. The limited space of this placeform makes this the perform spot for AOE attacks, and you can likely wipe out one or two Bugs if you use one immediately. Watch out for their laser attacks.
At the bottom of the elevator shaft you'll run into Fallen Hunters and a Defense Nodes. The Defense Nodes will shoot at you from afar while the Hunters try to close in for melee combat. Jill and Torgal will likely handle the Defense Nodes on their own, so lure the Hunters in close and use an AOE attack on them as well.
Head through the next active door. There's Magicked Ash on your right in the next corridor, and beyond is a room with a few Fallen Bugs and a Defense Node. No big deal. Next to the exit is a chest containing 50 gil and five Sharp Fangs. Continue your descent to the next door.
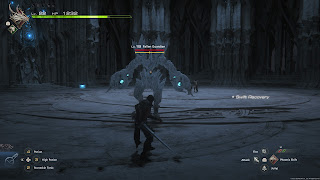
Your next challenge is a Fallen Guardian. This rather nasty customer uses the following attacks:
- A long-range stab
- Various long-range sword swipes
- Long-ranged energy balls
- An AOE shockwave attack
- A two-bladed whirling AOE attack that moves towards you at a slow speed
Unlike most larger enemies, where you want to stay back and wait for an opening, the Fallen Guardian practically begs for a close-quarters offensive. The majority of its sword attacks are easy to spot, but they will catch you with little trouble if you remain at a medium range. Stay in close and you shouldn't have any trouble dodging out of the way. You should only back off if the Fallen Guardian uses either of its AOE attacks, and you'll have penty of time to get out of the way before they go off. It's possible to Parry the Fallen Guardian's stabbing attack, but the timing is difficult (when it pulls its arm back).
You'll receive Wyrrite for defeating the Fallen Guardian, and next to the exit door you'll find a chest containing The Favor of Wind (Gouge).
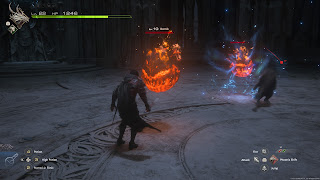
In the adjoining corridor you'll find a Potion and a High Potion, which will come in handy in the next room, when you run into three Bombs. These fiery foes spend most of the battle lobbing flames at you, though when their health is low they will bloat up and eventually explode if you can't kill them. Back well away when the Bombs start to glow or you'll take some heavy damage.
There's a Potion to your left in the next corridor. Step on the central light in the next room to activate an elevator. At the top you'll find the next door, and beside it is a chest containing 1,200 gil. Beyond the door is another Fallen Guardian. This time, however, it will be joined by four Defense Nodes, and once you Stagger the Fallen Guardian some Fallen Hunters will join in. Immediately use an AOE attack to take out two of the Defense Nodes, then engage the Fallen Guardian while Jill and Torgal handle the other two Defense Nodes. You should similarly save some AOE Eikonic Abilities to take care of the Hunters when they appear.
The next room over contains a Potion, and when you grab it you'll activate a group of Fallen Bugs. Wipe them out and a few more will appear, along with some Bombs. The Bombs should take priority - or at least you shouldn't let them out of your sight. Defeat all the enemies and you can get at a chest on your left, containing The Will of Wind (Rook's Gambit).
Another door awaits, along with a High Potion. Prepare yourself before entering, as things are about to get nasty.
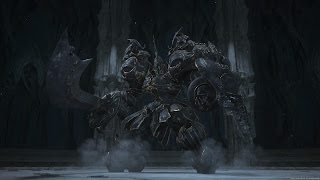
Iron Giant
Hoo boy. Significantly larger and more dangerous than everything else you've fought in The Hall of Ancestors, the Iron Giant isn't messing around. It uses the following attacks:
- A leaping chop attack that can bring it across the room at you
- A charge attack that slides the Iron Giant across the floor towards Clive, grinding its sword along the ground
- An overhead chop
- A backhand slice
- A powered stab with its shield
- A powered stomp
- A spinning ground slice
- A powered shockwave that travels in a straight line across the floor
- Atomic Ray, a charged attack that inflicts heavy damage if allowed to go off
During the first phase of this battle the Iron Giant will use a variety of melee attacks, as well as some long-range shockwaves, to try and split Clive's skull in two. It has a propensity for using attacks concentrated in a single spot, and is quick to set them off. Similar to the Fallen Guardian you may find it easiest to stick close to the Iron Giant, smack away at it, and dodge when it moves its arms or legs in a suspicious manner. Any time you see a golden-orange glow you want to immediately get out of the way. Parries are quite effective here, if you can catch the Iron Giant in one of its occasional sideways slashes.
Stagger the Iron Giant once and it will start using Atomic Ray. This is a special charging attack that will unleash an arena-wide, unavoidable, extremely painful shockwave if it goes off. You need to maximize your damage on the Iron Giant before it can use Atomic Ray. Conserve your Eikonic Abilities until it starts to charge up, then unleash them to quickly deplete the Iron Giant's health gauge. There are still fiery shockwaves traveling along the floor during this time, so don't put all of your focus into the offensive - just most of it. Stop Atomic Ray and the fight will go back to normal, though expect more varied attacks from this point on. Still, if you got this far you can go the whole way.
You'll receive Fallen Iron, Wyrrite, and Meteorites for defeating the Iron Giant. After the fight an elevator in the room will take you to a new location, and if you look around your starting point you'll find two Potions, a High Potion, and a chest containing The Favor of Wind (Wicked Wheel). Use the doorways on the sides of the room to descend to a lower platform, where a cut scene will interrupt.
Your next challenge is a Lich. Not quite a full boss, the Lich is nevertheless a more powerful enemy with some strong attacks:
- A sweeping scythe slice
- A scythe hurl that leaves behind an AOE shockwave
- A long-range shockwave attack
- Thresh, a combo attack consisting of many short-range scythe slices
The Lich will spend the majority of the battle teleporting around, either zipping out to a distance to launch attacks at you or getting in close to blindside you with its scythe. Your best friend here is Phoenix Shift, which will allow you to avoid attacks and get in close to maul the Lich. It telegraphs its scythe slices so much that dodging them is not too difficult, and you'll have plenty of room to unleash Eikonic Abilities right in its face. The only attack that requires some distance is Thresh, and you won't see it until after you've Staggered the Lich once.
With the Lich gone a pair of gates will open up, each leading to a Potion and a door. You'll need to enter both to progress.
- Through the door on the left you'll find a battle against a group of Specters. These little creeps unleash long-range attacks and AOEs, but are weak to close-range combat. Zip over and deal with them quickly.
- Through the door on the right you'll find a battle against a group of Wraiths. They're nimble combatants, but otherwise your standard melee foes. AOE attacks will take them down.
There's a glowing blue switch in both rooms. Touching both will activate a third switch in the arena where you battled the Lich. Press it to reveal the path forward. There's a High Potion waiting in the next room, which should be a sign of what's waiting if you continue forward.
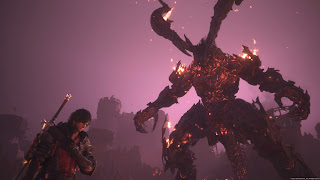
Infernal Eikon
Yeah, this battle was inevitable. The Infernal Eikon is a massive foe, on a similar scale to Garuda, and Clive needs to fight it alone. You'll be facing down the following attacks in this battle:
- A foot stomp
- A low-to-the-ground, sweeping punch
- A tail sweep (behind Ifrit only)
- A hurled cluster of Fire bombs
- Scorched Earth, a long-range, fast-moving line of Fire
- Vulcan Boost, a charging AOE attack that leaves the Eikon's head vulnerable for a few moments
- Crimson Rush, a quick charging attack towards Clive
This fight looks tougher than it is. The Infernal Eikon will spend the fight trying to create distance with Clive, then use either Scorched Earth or its Fire bombs to hit him at a range. Get in close, hack at its feet, and wait for the Eikon to use Vulcan Boost. Dodge out of the blast radius, wait for the explosion to go off, and use Phoenix Shift to zip in. The Eikon's head will be near the ground, and you can pummel it with Eikonic Abilities until it rises to a standing position. Repeat until it runs out of health. Staggering the Eikon doesn't change its attack pattern, unlike most bosses.
Alas, things aren't settled yet...
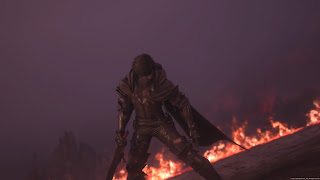
Infernal Shadow
The dark manifestation of Clive's other self, the Infernal Shadow is, well, Clive. He fights very similarly to you, though with some other, surprise moves thrown in. Expect the following moves from the Infernal Shadow, during his first phase:
- A swift stab and Magic Burst combo
- A spread of three fireballs that come flying towards Clive
- Fira, a long-range Fire attack that will knock Clive over if it hits
- Crimson Thrust, a fiery charging attack
- Molten Thrust, a lunging stab that carries him across the field at you
- Phoenix Shift, used to narrow the distance between the two of you, and to dodge your attacks
During this section of the battle the Infernal Shadow is quite evasive, and he'll keep at a distance when not using Molten Thrust or his melee combos. He's good at avoiding your attacks with his own Phoenix Shift - which, appropriately, is a great move for you to use when getting in close. Dodge his fireballs, close the gap, and unleash your Eikonic Abilities right in his face, before he can flee.
(Interestingly enough the easiest time to Parry him is when the Infernal Shadow is using Molten Thrust. Zip right up to him when you see the words appear on the screen and you can catch him before he gets a chance to move.)
Stagger the Infernal Shadow once and he'll shift forms, similar to Benedikta earlier in the game. This changes up his attack patterns and adds a few new moves:
- A flaming melee combo
- A fireball attack that launches five balls rather than three
- Fira, which now follows up with a second fireball from the sky after the first
- Incinerate, a fan-shaped AOE attack highlighted on the ground
- Hammer and Anvil, where the Shadow teleports above Clive, waits a second, and then plummets to the ground, creating an AOE explosion
The Infernal Shadow spends a great deal more time getting in your face in this round, and all of his melee attacks have a fiery aftereffect that you want to avoid. Wait for the Infernal Shadow to zip at Clive, dodge out of the way, and hit him from the side. Dance out of the way of Incinerate and Hammer and Anvil or you're in for some pain.
Stagger the Infernal Shadow again and he'll immediately use Hellfire, an arena-wide attack that triggers Fire eruptions all over the place. It will also drag Clive slowly towards the Infernal Shadow, and you'll need to fight the drag effect the whole time the move is active. You'll need to watch the ground to avoid getting fried, dodge out of the way of any fire effects that appear beneath Clive's feet, and stay near the edge of the battlefield. A huge AOE explosion ends the move, and you don't want to get caught in the blast radius.
After the Infernal Shadow uses Hellfire he'll add another move to his repertoire:
- Eruption, which creates AOE blasts near Clive that take a few seconds to go off
Not a huge difference, but Eruption can prove rather annoying if you're trying to avoid other attacks. Still, your strategy shouldn't change all that much. Keep hitting the Infernal Shadow...
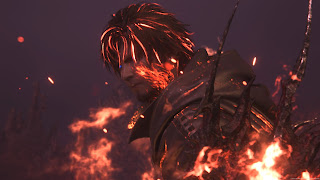
... and eventually, you'll be prompted to press the L3 and R3 buttons (the joysticks). This will activate Clive's Limit Break, which turns him into a combat god. Your attacks will be faster and hit harder, and you'll stay that way for the rest of the fight. The Infernal Shadow shouldn't last too long under this sustained assault. From this point on you can freely use Limit Break, which will build up during combat, though it will wear off after a while. The Limit Break Gauge is located beneath your health bar.
The battle ends with a series of simple - but awesome - Cinematic Clashes. Defeat the Infernal Shadow and you'll receive a Fire Shard, a heap of Magicked Ash, and access to the Eikonic Abilities of Ifrit. These share slots with Clive's Phoenix Abilities, so you'll need to pick and choose between the two Eikons of Fire.

