

Enjoying Octopath Traveler II? Try out Octopath Traveler 0, the newest game in the franchise, available now on Amazon for the Nintendo Switch! As an Amazon Affiliate I earn from qualifying purchases, at no additional cost to you.
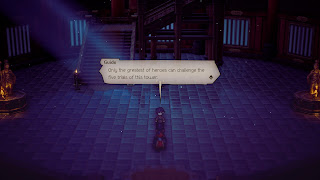

A fixture of Ku that you probably overlooked during your first trip to the city, the Five-Tiered Tower is a special kind of dungeon. Rather than facing hordes of monsters and finding treasure you'll instead battle five powerful opponents, one on each floor of the tower. Defeat the final opponent - no small feat - and you'll receive a prize that is worth all the effort.
The Five-Tiered Tower is on the east side of Castle Ku: Entrance. In order to gain entrance to the tower, and Ku itself. you'll need to complete the fifth and final chapter of Hikari's story. You can come and go as you please once you defeat your opponents, so you should make liberal use of Ku's restorative services between battles if you find the climb difficult.

First Floor - Gken
Shields: 6
Weakness: Dagger, Bow, Wind
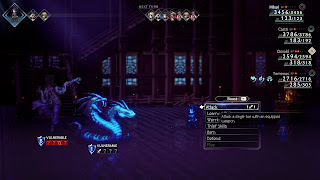
Your first challenge is Gken. He's a swordsman who can use Fluid Movement to reflect spells back at your party. Ignore his Wind element weakness and focus on the Dagger and Bow. Gken knows the powerful Purple Lightning Skill, which hits your party very hard with Lightning Damage, as well as a few other powerful Sword Skills. Gken's nevertheless a bit light on shelds, and not that difficult to defeat once you Break him.
Defeating Gken will not only open up the second floor, but it will unlock the A Tower of Trials Side Story, which you'll complete by making your way through the Five-Tiered Tower.

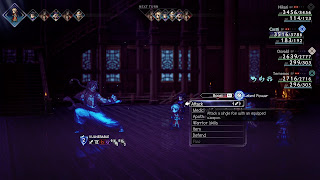
Second Floor - Ichchadhari the Snake Charmer
Shields: 8 (Ichchadhari the Snake Charmer) / 4 (Ivory Snake)
Weaknesses:
- Polearm, Dagger, Bow, Lightning (Ichchadhari the Snake Charmer)
- Sword, Axe, Ice, Light (Ivory Snake)
Drop: Refreshing Jam
Steal: Nothing
Eesh, you'd better believe I copied and pasted that name each time. Despite being only the second challenger in the tower Ichchadhari the Snake Charmer is quite powerful, and she can put your team down hard if you're slow to Break her side of the fight. Ichchadhari the Snake Charmer knows the following attacks:
- Normal melee attacks
- Enfeebling Fang, which debuffs one characters' defense
- Paralyzing Fang, which inflicts Unconsciousness on one character
- Snakeshield Strut, which buffs the defenses of Ichchadhari's Ivory Snakes (or herself, if there are no snakes around)
- Venomous Fang, which Poisons one character (Ivory Snake)
- Befuddling Fang, which Confuses one character (Ivory Snake)
- Blinding Fang, which Blinds one character (Ivory Snake)
- Twin Snake Spin, an attack against your whole party that drains HP and SP
- Snake Session, a charged attack that hits your whole party and can Blind party members (Ivory Snake)
Starting with two attacks per round, Ichchadhari will promptly summon an Ivory Snake to help her. Between the two of them they use most of the status ailments in the game, and can dish out plenty of hurt besides. While the Ivory Snake is alive Ichchadhari's weaknesses are completely covered. Break Ichchadhari once and the next time she'll summon two Ivory Snakes, and will begin buffing her party. All three enemies will charge up, and if you don't Break them you'll get hit by some nasty attacks.
Defeat the second two Ivory Snakes and Ichchadhari will remain a solo opponent. This sounds easier, in theory, though Ichchadhari has a nasty habit of going into her charge move and then instantly using Twin Snake Spin on her next turn. If the timing is bad you may be facing a terrible amount of damage, and the SP drain can prevent you from healing up in preparation for Ichchadhari's next assault. Otherwise she's about the same as before.
In the first half of this fight you need to focus everything you've got on taking out Ichchadhari's Ivory Snakes. They're fairly easy to Break, and since every enemy uses melee attacks in this battle you can throw up defenses to deaden the damage. Unless you're dishing out a ton of damage each round it's unlikely that you'll stop Ichchadhari from charging up while her Ivory Snakes are around, so heal your party up and put your weaker members on the defensive to prevent KOs.
Unsurprisingly, the status ailments will prove the most annoying part of this battle. Aside from equipping accessories that prevent status ailments, your best defense is either an Apothecary who can use Dohter's Charity to extend the effects of healing items to the whole party, or just putting Castti on the team and using Cleansing Leaf Concoctions. Don't wait for the status ailments to just wear off, as your team will be at a disadvantage the whole time.

Third Floor - Tyran the Seeker
Shields: 8 / 10
Weakness: Sword, Bow, Fire, Dark
Drop: Tonfa
Steal: Nothing
A master of the martial arts, Tyran the Seeker is somewhat similar to the final battles in Hikari's chapter. He relies exclusively on melee attacks, and despite his high damage output there are some easy ways around the pain if your team is properly equipped. Still, you need to approach this battle with caution, as Tyran isn't messing around. Tyran the Seeker uses the following attacks:
- A normal melee strike
- Focus Force, a melee strike against a single target that also drains SP
- Ruinous Fist, a heavy melee strike against a single target
- Whirlwind Strike, a melee attack against your whole party
- I See All, which grants Tyran a permanent attack buff
- I See All (2), which grants Tyran more shields and a Reflective status that bounces spells back at your characters
- Explosive Power, which damages a character and removes some SP
- A charged move which, if not interrupted, hits your characters with six attacks in a row
Tyran is 100% focused on melee attacks throughout the battle. Given two attacks per round from the start, he'll spend the first part of the fight using normal strikes, Focus Force, the occasional Ruinous Fist, and, most often, Whirlwind Strike, all of which can hit your characters pretty hard. Break him once and Tyran will give himself a stat buff. Get him down to half health and Tyran will give himself two more shields for the rest of the battle, as well as apply a buff that reflects magic back at the caster.
Partway through the battle Tyran will begin to charge up. If he is not interrupted Tyran will use six moves in succession, each targeted either at one character, the whole party, or a random assortment. If this goes off the chances that your team will survive without preparation are... remote. Suffice it to say that Tyran needs to be stopped before he can do this.
All that said, Tyran is one of the easier bosses in the Five-Tiered Tower. Yes, he hits hard, and yes, he has lots of health, but the fact that he relies on melee attacks gives you plenty of room to manuever. Buff your defences, debuff Tyran's hitting power, and apply Blind to stunt his damage output considerably. Sidestep appied to the whole party also works rather well.
As far as Breaking Tyran goes your Warriors will have an easy time with Aggressive Slice, which can carve huge chunks out of Tyran's shield count with little effort. Magic works decently, as well, though be careful not to use it when Tyran has his reflective buff applied. Hold back BP each round so you can Break Tyran and this fight shouldn't be a huge problem.

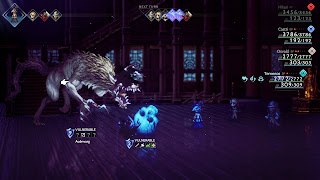
Fourth Floor - Audnvarg
Shields: 9, 11 (Audnvarg) / 2 (Skull Roller)
Weakness:
- Axe, Bow, Fire, Light (Audnvarg, phase one)
- Sword, Staff, Lightning, Wind (Audnvarg, phase two)
- Polearm, Axe, Wind, Light (Skull Roller)
Drop: Nourishing Nut (M)
Steal: Nothing
A beast that appears to be thoroughly out of place in this tower, the Audnvarg is a heavily-updated reprise of the boss from Temenos's first chapter. (And yes, I know, its name isn't spelled like that.) It has a terribly high attack stat, and can quickly wipe out characters in one or two hits. The Audnvarg uses the following attacks:
- Beastly Diet, which removes a character from the battlefield until the Audnvarg is Broken
- Whirlwind Claw, a heavy melee attack against every character in your party
- Shear Meat, which reduces a single target's maximum HP by 400 for the duration of the battle
- Shred Leg, which applies a permanent debuff to one target's speed
- Observe, which changes the Audvarg's weaknesses and boosts it to 11 shields
- Killer Poison Claw, a melee attack that Poisons one target permanently (unless dispelled)
- Gouge Eyes, a melee attack which Blinds one character
- Slice Off, a charged attack which reduces the whole party's maximum HP by 800 for the duration of the battle
The Audnvarg will begin the battle by eating one of your party members, removing them from the fight. From that point on it will use two melee attacks per turn, either slashing your party for massive amounts of damage, performing the odd debuff, or shearing HP permanently off of HP totals. Your missing party member won't return until the Audnvarg is Broken.
Do enough damage and the Audnvarg will boost its shield total, change its weaknesses, add a few more attacks, eat another one of your party members, and begin charging up. If the Audnvarg is allowed to complete its charge it will use Slice Off, removing 800 HP off of everyone's max health. It will then go back to using its normal array of awful, awful moves.
This battle is brutal, but more doable than it seems at first. Despite its high shield count and ridiculous offensive capabilities the Audnvarg has a few highly-exploitable weaknesses that you can use to quickly Break it, so long as you're careful with your BP:
- During the first phase the Hunter Skill Precise Shot is great at carving up shields. If you get the Double Tomahawk from On the Water you can also get in an extra shot at the Audnvarg's Axe weakness when performing normal attacks. The Scholar Skill Elemental Barrage can hit the Fire weakness a few times, if you're lucky, though don't rely on this in a pinch.
- The second phase makes the Audnvarg easy prey for Warriors with Aggressive Slice. Conserve BP and a single Warrior can knock off six shields on their own. If you have any Clerics (which you probably should) they can use Mystical Staff to knock away two more shields. Temenos is a good choice here, as he not only knows Mystical Staff, but his Latent Power allows him to get rid of shields regardless of the weapon he's using.
While the Audnvarg is Broken you should keep BP expenditure at an absolute minimum. Use one point per character at most, and stick to attacks that hit hard without Boosting. EX Skills will help you in this regard, as well as a lot of Learned / Provokable Skill.
That leaves surviving the Audnvarg's horrible attacks. If you're keeping it Broken your characters shouldn't lose too much HP from their max amounts, though you'll still need to remain healed every round. Sidesteping the whole party will allow you to avoid every attack by the Audnvarg, and Blinding the beast will grant immunity to some of its attacks. Dampening its attack power is an option, though it won't do a whole lot. Ultimately your best defense is a good offense, and keeping the Audnvarg Broken at all times will get you through the battle.
(And, uh, no, I have no idea what the Skull Roller is doing here. A reference to something, maybe...?)

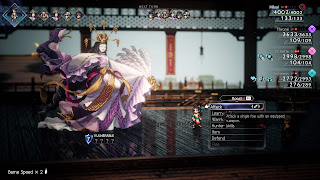
Top Floor - Priestess Hinoekagura
Shields: 7 / 10 / 13
Weakness:
- Polearm, Bow, Ice, Dark (Young Woman)
- Axe, Staff, Wind, Light (Sword Form)
Drop: Nothing
Steal: Nothing
The mistress of the tower, Priestess Hinoekagura is awful. Just awful. Sporting 200,000 HP, a ton of strong attacks, and two forms that will bedevil you in different ways, Hinoekagura will put your Octopath Traveler II skills to a true test. (And she's not even the hardest boss in the game. Good lord did they go overboard.) Priestess Hinoekagura knows the following attacks:
- Normal melee strikes
- Conjure Flames, adding a Fire effect to Hinoekagura's normal attacks (Young Woman)
- Divine Wind, a Wind attack against the whole party (Young Woman)
- Sealing Ceremony, which I think reduces a character's Latent Power count (Young Woman)
- Tripartite Dance, a multi-part melee attack against a single target (Sword Form)
- Two-Step, a heavy melee attack against two characters (Sword Form)
- Conjure Ice, adding an Ice effect to Hinoekagura's normal attacks that saps SP (Young Woman)
- Dance of Immunity, preventing enfeebling effects for five turns (Young Woman)
- Ill Omen, which triggers a multi-hit Light attack on Hinoekagura's next turn (Young Woman)
- Ill Omen, which will strip characters of their BP on Hinoekagura's next turn (Young Woman)
- Ill Omen, which will knock out the character with the most HP on Hinoekagura's next turn (Young Woman)
- Blade Flourish, a two-part melee strike against the whole party (Sword Form)
- Conjure Lightning, adding a Lightning effect to Hinoekagura's normal attacks which may inflict Unconsciousness (Young Woman)
- Prayer For Rain, a healing spell that restores 5,000 HP to Hinoekagura (Young Woman)
During the first half of this battle Hinoekagura will spend roughly half of her time in her Young Woman form, then switch to her Sword Form. These two forms have radically different movesets, with the Young Woman preferring magic and single melee attacks while the Sword Form slashes multiple characters with its swords at a time. The two forms have different weaknesses but the same amount of shields, and breaking the Sword Form will change Hinoekagura back into her Young Woman form.
Do enough damage and Hinoekagura will gain more shields and add a second extra effect to her melee attacks. She'll thereafter spend more time in her Young Woman form, only occasionally transforming. Continue to damage Hinoekagura and she'll bump her shields up to 13 (though this seems to be a one-time thing). She'll also buff herself with Prayer For Rain, restoring her HP and SP until you dispel the effect. Her Ill Omens seem to come more frequently later in the fight, and they get quite a bit nastier. Breaking Hinoekagura will stop the Ill Omens from taking effect.
Hinoekagura is a terrible enemy if you can't quickly, consistently Break her. Your team should consist of characters who can hit her multiple times in a round, without using much BP, as well as at least one or two backup members who can provide a bit of offensive support while feeding HP, SP, and BP to the attackers. Jobs and characters of particular use are as follows:
- Ochette is one of your best choices for this fight, and Hunters in general are also great. Precise Shot is an excellent Skill for getting through Hinoekagura's shields in her Young Woman form. Ochette also has a wide array of great Provoke monsters that can dish out lots of damage when Hinoekagura is Broken.
- Hikari is a solid damage-dealer, given that he'll have at least one of his EX Skills when you enter this battle, and his Polearms can help chip away at Hinoekagura's Young Woman form before she can transform. He also tends to have more than enough HP to survive a few attacks from the Sword Form if it squeaks past you.
- Temenos is an excellent choice for a party member. Not only can he heal everyone, Temenos's Latent Power allows him to smash through Hinoekagura's shields in either form. He can also use Mystical Staff to get rid of Hinoekagura's shields once she changes to her Sword Form.
- Partitio is great for backup, as are any other Merchants. He can Lend BP to your attackers so they're always ready to tear up shields. Partitio can also target Hinoekagura's Polearm and Bow weaknesses in her Young Woman form.
- Throné has some useful debuffs, and HP Thief is a good move for damaging Hinoekagura when she's Broken, but she's useful primarily because she's fast. Depending on her Job Throné can provide offensive support or be a great item slinger / Merchant.
- Castti is useful for quickly spreading buffs to your whole party, and her Axe is handy if Hinoekagura manages to change into her Sword Form. She also gets a ton of HP as an Apothecary, and is a solid survivor.
- Agnea is another useful support character, and her Latent Power can spread buffs to other characters quickly. Similar to Throné Agnea is generally fast, and can fill more or less the same role.
- Osvald is perhaps the least useful character in this fight, as weapons will get through Hinoekagura's shields much more quickly than magic. He can still be useful as a Cleric alternative if you don't want to use Temenos.
Regardless of your team composition, the key to winning this battle is to Break Hinoekagura before she can transform - or at least lower her shields enough that you'll Break her before her Sword Form gets a chance to attack. Preserve BP by using multi-hitting Skills (and weapons, if you can find them), then unleash a few EX Skills or Latent Powers whenever Hinoekagura is vulnerable. As long as your team can consistently outpace Hinoekagura, this fight is not as difficult as it initially seems... though it will still take a long, long time.
(And if you can't beat her, come back later. Seriously. A dozen levels or so makes a huge difference.)

Defeat Princess Hinoekagura and she will give you Proof of the Conjurer. This will allow you to turn your characters into Conjurers, a Job that bestows extra elemental effects onto your party. Very useful. You'll also earn 20,000 leaves and the Conjurer's Raiment for making it to the top of the tower, completing A Tower of Trials. Well done! That was brutal!