Main Walkthrough
Enjoying Octopath Traveler II? Try out Octopath Traveler 0, the newest game in the franchise, available now on Amazon for the Nintendo Switch! As an Amazon Affiliate I earn from qualifying purchases, at no additional cost to you.
Danger Level: 55
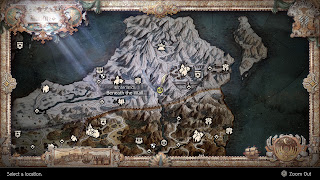
Likely the easiest dungeon to miss in Octopath Traveler II, the Infernal Castle is located just outside Stormhail, in the Southern Stormhail Snows. To reach the entrance you must head south of Stormhail to the giant perimeter wall safefuarding the city. There's a hole at the bottom that allows people passage south, and if you check on the left side of the wall's interior before crossing through you'll find a small area called Beneath the Wall.
Beneath the Wall consists of a save point, a rope bridge, and a chest containing a Stone. It's otherwise unimportant... unless you try to cross the bridge with seven people in your party. You can accomplish this by using Path Actions (Partitio's Hire, Temenos's Guide, Ochette's Befriend, and Agnea's Allure) to recruit NPCs in towns. Step onto the bridge with at least seven people and it will give way, dumping you into the Infernal Castle. You can use the remains of the bridge to climb back up to Beneath the Wall.
Enemies
- Ancient Lizardking I - Weak to Polearm, Dagger, Fire - Drop / Steal Healing Grape (M)
- Ancient Lizardking II - Weak to Polearm, Dagger, Fire - Drop / Steal Plum Leaf
- Ancient Lizardking III - Weak to Bow, Staff, Dark - Drop / Steal Inspiriting Plum (M)
- Ancient Lizardman V - Weak to Dagger, Axe, Staff, Fire - Drop / Steal Plum Leaf
- Ancient Lizardman VI - Weak to Bow, Staff, Dark - Drop / Steal Healing Grape (M)
- Black Panther - Weak to Sword, Dagger, Dark - Drop / Steal Diffusing Serum
- Chubby Cait - Weak to Sword, Dagger, Axe, Staff - Drop Revitalizing Jam
- Dark Elemental - Weak to Fire, Light - Drop / Steal Almighty Soulstone
- Dark Revenant - Weak to Sword, Bow, Staff, Light - Drop / Steal Inspiriting Plum Basket
- Dreadwolf (must defeat area boss) - Weak to Polearm, Axe, Bow, Fire, Wind - Drop / Steal
- Frost Moleking - Weak to Sword, Polearm, Dark - Drop / Steal Inspiriting Plum Basket
- Thunder Remnant Mk. II - Weak to Sword, Polearm, Axe, Wind - Drop / Steal Thunder Soulstone (L)
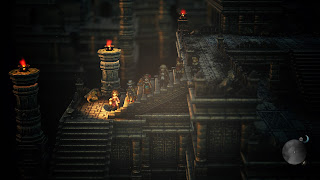
When first entering the Infernal Castle you'll land on a broken floor above the bottom of the bridge exit. There are stairs on your right leading to the bridge, and on your left is a chest containing an Inspiriting Plum Basket.
Head south of the entrance. There are stairs on your right, and a bit further south are stairs on your left. Go down the stairs to the right first and you'll find a chest containing a Blizzard Amulet. To the left you'll stick to the main path. Follow it until you see a longer staircase leading south. Dip down the stairs and check on your right to find a chest containing an Energizing Pomegranate (M). If you check to the left of the stairs you'll find a small, semi-hidden room. Inside the room is a chest containing a Lost Tribe's Staff.
Follow the main path west, then south. You'll arrive at a crossroads with stairs on either side of you. Go down the stairs on the left and you'll find a ladder up to a chest. The chest contains a Serpent Slayer. This is an amazing weapon if you also equip a Blessing in Disguise. The stairs on the right lead to a save point, which should tell you what's in store if you keep following the main path.
Dreadwolf
Shields:
- 9 (Dreadwolf, first phase)
- 11 (Dreadwolf, second phase)
- 3 (War Wolves)
Weaknesses:
- Polearm, Axe, Bow, Fire, Wind (Dreadwolf)
- Sword, Dagger, Bow, Fire (War Wolves)
Drop: High Priest's Book of Scripture
Steal: Strengthening Serum (War Wolves)
The Dreadwolf uses the following attacks:
- Howl, which summons two War Wolves in to support the Dreadwolf and cover its weaknesses
- Normal melee attacks
- Crunch, a single-target physical attack that debuffs defenses
- Frigid Flurry, an Ice attack against the whole party
- Heightened Senses, which allows the Dreadwolf to automatically evade and counter any Boosted attacks or Latent Powers that you try to use on it
- Vengeful Fang, an extreme physical counterattack used by the Dreadwolf
- Observe, which raises the Dreadwolf's shields to 11
- Vorpal Fang, a heavy physical attack against a single target
- Pressure, a debuff to the party's elemental attack
- Mortal Fang, a charged, three-hit physical attack to your entire party
- Lightning Speed, which increases the Dreadwolf's attacks to three per round
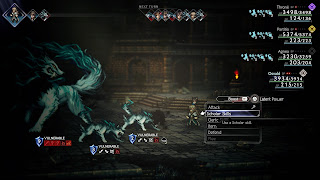
The Dreadwolf begins the battle by whistling up two War Wolves. Not only will they help attack your party, they cover all but one of the Dreadwolf's weaknesses, that to Fire. The enemy will then go on the offensive, picking away at you until you've defeated the Dreadwolf's companions, revealed its weaknesses, and Broken it.
Do enough damage and the Dreadwolf will boost its shield count and activate Heightened Senses. From this point on any attack targeted at the Dreadwolf will miss if it is Boosted or makes use of a Latent Power, such as Temenos's Judgment ability. This will also trigger a powerful counterattack called Vengeful Fang from the Dreadwolf, so you need to be careful how you attack the beast from this point on. Mess this up and the Dreadwolf is likely to OHKO your character.
Continue to damage and / or Break the Dreadwolf and it will summon in two more War Wolves, lock its weaknesses, and begin to charge up an attack. Let it sneak through and the Dreadwolf will use Mortal Fang to heavily damage the whole party. Get the Dreadwolf into the red and it will bump its attacks per round up to three. It will then mix up its normal attacks with charging up to Mortal Fang.
The first half of this battle is annoying, but not terribly complicated. Put one person on healing duty while everyone else demolishes the War Wolves and Breaks the Dreadwolf. Defensive buffs are useful if you have them. Things get trickier once the Dreadwolf implements Heightened Senses, an ability that will bedevil you throughout the fight, and you'll need to use Skills and weapons that hit multiple times without relying on Boost. You have options:
- The Double Tomahawk, an Axe that hits twice per round
- The Sea God's Spear, a Polearm that hits twice per round
- Precise Shot, a Hunter Skill
- Elemental Barrage, a Scholar Skill
- Advanced Magic, a Scholar Skill that will allow the classes' other spells to hit twice rather than once
- Hikari's Learnable Skills
- Ochette's Provokes, particularly her Provoke Beasts EX Skill
The simplest option is to use two Hunters and pepper the Dreadwolf with Precise Shots over and over. This will also allow you to use Leghold Trap on the Dreadwolf, shoving it to the end of the turn order and giving you more time to Break it. If you don't think you can Break the Dreadwolf quickly enough then you'd best throw up some physical defenses, as Mortal Fang stings quite a bit.
The one major plus side to this fight is that Heightened Senses prevents your attackers from using their BP. This means that you will have a juicy stockpile of the stuff once you manage to Break the Dreadwolf. Don't be afraid to throw your everything into your following attacks, as the stunned Dreadwolf won't be able to evade or counter your attacks. That said, make sure your healer doesn't toss their BP around with the same reckless abandon, as the Dreadwolf will still hit hard once it returns to its senses.
Defeating the Dreadwolf will earn you the High Priest's Book of Scripture, a quest item that will earn you another Cleric's License when you visit the Clerics Guild. You can also open the treasure chest the Dreadwolf was guarding, which contains a Stone of Truth. This is an amazing accessory that permanently intensifies its bearer's spells, without the need to use Advanced Magic. Osvald will be nigh-unstoppable with the Stone of Truth equipped.
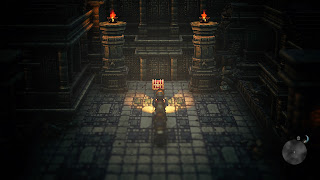
This chest is the final stop in the Infernal Castle, so once you've snagged it you can teleport out and continue on your journey.
Main Walkthrough


