Recommended Level: 17
The second chapter of Castti's story is split into two parts, and you can choose to do either once you've completed her introductory chapter. If you choose to take the slightly shorter, slightly easier route then you're headed to Sai, a city in Hinoeuma. Head west from Canalbrine to the Canalbrine bridge, then south to the Western Conning Creek Coast, then west to the Southern Sai Sands. The exit to Sai is in the north of that final route.
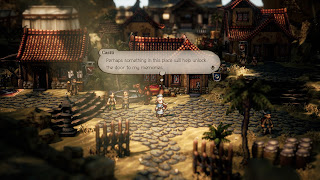
Upon arrival in Sai, assuming you have Castti in your active party, you'll be prompted to begin the chapter right away. If you decide to hold off you can visit the tavern and choose Hear a Tale when speaking to the barman. Castti's will be here.
Following the details written down in her treatment log, Castti believes - hopes, at least - that Sai, which is mentioned in the log, will help jog her memories. She arrives just in time, as someone rushes in yelling of an injury. It appears that Sai has poor relations with their neighbors, and there's no apparent reason why. A Townsperson will point Castti towards the local hospital.
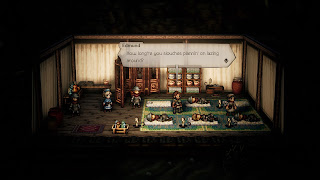
Head northwest until you see a large, white tent. Use the 'door' on the left side to enter, where Castti will find a cruel man named Edmund demanding his troops get back into the field, despite their injures. Speak to the Apothecary once Edmund leaves - her name is Mao - and Castti will help mend the soldiers. Mao recognizes Castti, and if you Inquire her she'll fill Castti in on a few things - namely, that Castti was higher-ranked in Eir's Apothecaries than she might have thought.
A man will run up and ask for help on the front lines. Castti is quick to respond, as usual. Stock up on essentials - the item shop is in the East District, if that's what you need - then make for the Sandflow Pass. The exit is south of the hospital tent.
Sandflow Pass
Enemies
- Assassin Bug - Weak to Spear, Dagger, Fire, Ice - Drop / Steal Inspiriting Plum
- Desert Ape V (day only) - Weak to Sword, Staff, Ice, Wind - Drop / Steal Grape Leaf
- Giant Scorpion - Weak to Spear, Dagger, Axe, Wind - Drop / Steal Cleansing Leaf
- Sandworm - Weak to Spear, Axe, Wind, Light - Drop / Steal Dual Flower
- Withered Wanderweed - Weak to Sword, Axe, Fire, Wind - Drop / Steal Herb of Awakening
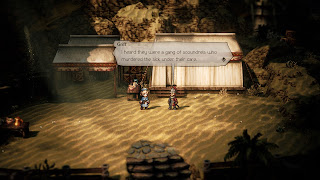
Upon entering this area you'll see Edmund gloating that the enemy soldiers have been buried in quicksand. Castti treks out to help. Before you continue west into the Sandflow Pass, however, check the house on your right. The Soldier out front is the only one here who is susceptible to Path Actions, and he's carrying a Healing Grape, a Healing Grape (M), and a Healing Grape Bunch. Get him away from the house he's guarding and inside you'll find chests containing a Quartz Blade, a Steel Lance, and Bone Mail. Nice haul.
Save near the house, then begin trekking west. There's a chest ahead containing an Empowering Lychee (M), just as the path veers north. Follow the stairs until they become slightly rounded, then check the rocks on your right as you climb. There's a hidden path to a chest containing a Stimulating Bracelet.
At the top of the steps you'll hit a cut scene, and Castti will locate the victims. She proves to be quite authoritarian when needed, and presses Edmund into service. Once the soldiers are saved their commander, Griff, will explain that a monster attacked them. Edmund assumes a Sand Lion is responsible. Castti and Edmund decide they will deal with the threat.
Continue west a bit further. As the road turns south you'll see a huge rock in the foreground on your left. Check behind it and you'll find a hidden path to a chest containing Strengthening Syrum. Return to the main path and it will take you to the next area.
Old Campsite
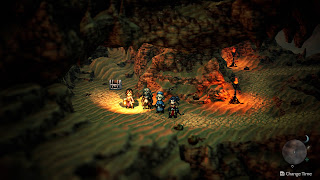
Upon arrival at the ruined campsite Castti and Edmund will spot one survivor - though when Edmund tries to help, both men get swallowed by the sand. Well done. Check the ruined flooring on the right side of the camp to find a chest containing a Dual Flower, then save and enter the cave to the north.
Sand Lion's Den
Enemies
- Assassin Bug - Weak to Spear, Dagger, Fire, Ice - Drop / Steal Inspiriting Plum
- Giant Scorpion - Weak to Spear, Dagger, Axe, Wind - Drop / Steal Cleansing Leaf
- Sandworm - Weak to Spear, Axe, Wind, Light - Drop / Steal Dual Flower
- Savage Scorpion - Weak to Spear, Axe, Ice, Light - Drop / Steal Herb of Light
- Vice Grip, a powerful melee attack on one character
- Great Sandstorm, which damages the whole party and inflicts Blind
- Shifting Sand / Drag Below, which temporarily removes one character from the battle and absorbs their HP while they're trapped
- Quick Sand, which temporarily removes two characters from the battle and absorbs their HP while they're trapped
- Turbid Stream, a charing attack that damages the whole party and traps two party members

