Part 28: Castle Wyndia and the Portal Drives
Main Walkthrough
Get your own copy of Breath of Fire III on Amazon! As an Amazon Associate I earn from qualifying purchases, at no extra cost to you.
Despite some... complications... regarding Wyndia's royal family, Ryu and friends have successfully procured a passport and made their way back to the Rhapala Region. It looks more or less the same as during their previous visit, and when you visit Rhapala itself you'll discover that one very tiring fact remains true.
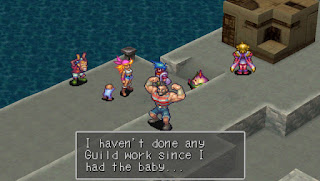
Check out the Wharf. Beyd, Shadis, Zig, and Iggy still hang out here, and they've been joined by someone else, as well. Tiny baby! Speak to Beyd - or everyone around him, rather - and it'll become quickly clear that the Porter Guild's ship still isn't available. Geez. Fortunately, the path around Mt. Zublo has been cleared, allowing you to walk northeast to Angel Tower without having to go through the volcano again. Small favors.
Put Garr in the party and head to Angel Tower. Go straight to the top of the tower this time. Garr will attempt to communicate with his God, but his prayers will be interrupted by someone who may look vaguely familiar. Her name is Deis, and says that you need to free her if you wish to speak with God. Deis tells you to seek out Gaist, another Guardian, before disappearing.
Make your way to Urkan Tapa and enter the town with Garr leading the party. Visit Sudama, the elder of the Urkans, in his room. It's at the top of the ladder behind Hondara, the Master who's preaching in the Hall of Prayers, north of the entrance of Urkan Tapa. Sudama will wake up only for Garr, and tell you that Gaist - or another Guardian, anyway - lives to the west of Urkan Tapa.
Pay Junk Town a quick visit if you have money to spend, as their weapons continue to be very powerful for this part of the game. You can also find Wynn here, if you're playing hide-and-seek with the four Masters from Wyndia. She's hiding behind a house on the west side of Junk Town's lower level. Seek her out in Wyndia and she'll teach you the Refuge Formation if you appentice under her for three levels.
Otherwise, head southwest of Angel Tower. You'll find a path along the coast that leads to your next destination, the Tidal Caves.
Tidal Caves
Monsters
- Barb Bulb - Steal Croc Tear, Drop Vodka Shot
- Bomb Seed - Steal Vitamin, Drop Ivory Dice, Learn Sacrifice
- Slasher - Steal Berries, Drop Swallow Eye, Learn Mind Flay
- Sleepy - Steal Baby Frog, Drop Fat Frog
- Spiker - Steal Antidote, Drop Soul Gem
The Tidal Caves are fairly small, as far as dungeons go, though there's a trick to this place that can make it a bit annoying to navigate. Before you enter, ensure that at least one character in your party can use Electric attacks (likely Nina or Rei), as most of the enemies here are vulnerable to electricity. Several of the weapons available in Junk Town bear the Electric property, if you feel like spending money.
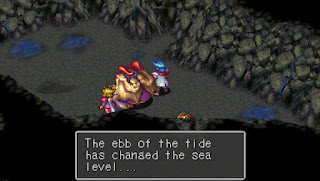
When you first arrive at Tidal Caves a Manillo will tell you about the rising and falling tide of the caves, which will fall when you try to walk past. Depending on which part of the caves you're in the tide will change periodically, heralded by a rumbling sound. The parts of the caves that you can access change based on the level of the tide, and you'll probably need to let it change a few times to grab everything.
Walk southwest through the first section of the caves. You'll find a doorway on your right that will take you into a side area, and as you explore through here the sea levels will likely change. Head northeast and you'll find a chamber with a few puddles. Tilt the camera around to find a chest containing a Fish-head. To the west are several more passages, and along the southern passages you can find an exit to the main chamber, where you'll find a chest containing a Coin.
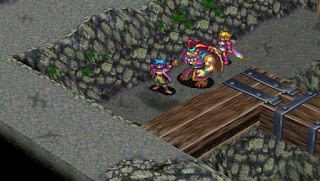
Follow these rear passages all the way west and you'll find another exit back to the main chamber. Waste time until the tide has ebbed, then use this doorway. To the south you'll find a stretch of wooden walkways, leading to a plank of wood that is tied in a stationary position. Use Ryu to cut the rope holding it up and it will drop down. Once the water rises you can use this as a spot to hop on a raft, creating a shortcut back to the entrance.

Head back north and go down the ladder to the northeast of the doorway. Follow the path to the east of the ladder and you'll eventually come to a chest. It contains a Thunder Ring. Return to the ladder and use the next ladder to the east to descend to the lowest level of the Tidal Caves. Here you'll find a raft that will ferry you around to three different spots, if you keep hopping off and on. If you ride the raft twice it will take you to an exit outdoors, and if you check on your right when you emerge you'll find a chest containing a Deadly Blade.
Hop back on the raft and ride it northwest. You'll wind up beside two exits. Go through the upper exit first, then walk west until you hit a dead-end passage with a skeletal corpse. Check the corpse for a Hawk's Ring. Backtrack the way you came once you have the ring, returning to the raft, then check the other exit. It leads to a ladder...
... and the ladder will bring you to the exit. Nice. On your way out you'll find the Gross Gene, which amplifies Ryu's stats when he transforms into a dragon.
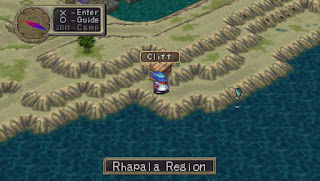
A short ways southwest of the Tidal Caves you'll find a Fishing Spot, and if you toss a Coin into the water a Manillo merchant will show up to grab it. This shop specializes in accessories, all of which can prove handy under the right circumstances. Right next to this Fishing Spot is your destination, the remote town of Cliff.
Cliff
Home of outsiders, criminals, and refugees, Cliff isn't the friendliest place in the world. There are no items to collect here just yet, though if you make your way north along the rocky pathways you'll find a home with an item vendor and an inn. Save at the inn before you check out the west side of the village.
In the western-most home of Cliff you'll find Gaist, who seems to have contented himself with a life of self-loathing and contemplation. He doesn't seem that willing to help, though after chatting with Ryu Gaist will tell you to talk to Garr. Do so and Garr will assume that Gaist plans to test Ryu.
Equip Ryu with at least one thing that protects against Flame damage - the Ring of Fire from Mt. Zublo is a great choice, if you picked it up - and unequip anything that inflicts Flame damage, such as a Flare Sword. Then head back inside. Speak to Gaist, then stand between the two braziers.
Gaist
Steal: Nothing
Drop: Nothing
Learn: Nothing
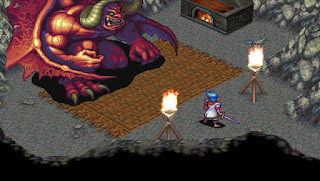
Eh... his first form looked cooler. Gaist is difficult primarily because Ryu needs to face him alone, and the Guardian can slam you around pretty hard. He uses the following attacks:
- A melee strike
- Flare, a light Flame attack that heals Gaist (Torches only)
- Risky Blow, which lands a critical if it hits
- Sanctuary, which dispels any support magic
- Howling, which Confuses Ryu
- Corona, a strong Flame attack
Gaist is accompanied by a pair of Torches that regularly cast Flare on him, restoring a small amount of his health. Any Flame attacks used by Ryu on Gaist will similarly restore his health.
Unless you've worked hard on making human Ryu a force with his Skills, you'll probably want to use Accession immediately. You can either change him into a Frost Dragon, which will allow you to capitalize on Gaist's weakness to Frost, or you can change him into a Flame Dragon and just hit Gaist with normal attacks, which will more or less negate the damage inflicted by Corona. Be careful using the Frost Gene, as Corona does a lot of damage to Frost forms.
Use a Breath attack to wipe out the Torches, then lay into Gaist with your strongest Skills / melee attacks. Heal as necessary, preferably with Vitamins / Multivitamins so you can save Ryu's AP for attacking. Don't bother with buffing spells, as Gaist will wipe them out with Sanctuary. You'll win in time. It's not a terribly difficult fight, but it can take a little while since Ryu has to do all the work on his own.
Gaist will spend his last few moments pondering the Brood, then crumble into ashes as the party rejoins Ryu. Before you leave the room, check Gaist's ashes to receive the Beast Spear. This is Garr's most powerful weapon in the game, and will make him an absolute monster in combat - though it will drain a small portion of his life each turn. If you're willing to tolerate the constant drain, the Beast Spear is invaluable.
A WARNING! Gaist's ashes will disappear from his room once you leave. If you didn't get the Beast Spear immediately after defeating him, it will be gone forever. Whether you plan on using the spear or not, check Gaist's ashes before you leave.
Return to Angel Tower, go through the railing on the right side of the stairs, and drop down the tower to the southeast. There's an underground area that you may have visited before, and it's the prison of Deis, who has now been freed thanks to Gaist's death. She'll give Garr what's coming to him, then tell the group to meet her at the base of Mt. Zublo.
Head to the Rhapala Region side of Mt. Zublo and check out the shrine by the entrance. If Ryu inspects the monolith inside the shrine he'll be teleported to Deis' new home, and she'll appear in her normal, serpentine form. When prompted, tell her 'I like you this way' and you will unlock her as a Master later in the game. She's a powerful Master, as well, so you don't want to mess this up.
Deis will unlock Ryu's prana, a beam that points the way towards God. She'll then kick Ryu and Garr out of her sanctuary before making some cryptic remarks. Back in the shrine, the group will realize that they need to cross an ocean to reach God... and that means finding a boat. Not this again.
Main Walkthrough

