Get your own copy of Breath of Fire III on Amazon! As an Amazon Associate I earn from qualifying purchases, at no extra cost to you.
Though they are once again on the run, Ryu's party has nevertheless managed to successfully make their way to the eastern lands. Their next stop is Rhapala, a portside town that's home to a guild of sailors - not to mention a love triangle that will take up a substantial portion of the upcoming plot. (Okay, not that substantial, but it still lingers for a while.)
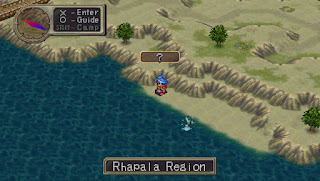
Before you head to Rhapala itself, have a quick look around the Rhapala Region.
- There are two Fishing Spots nearby, one to the west and one to the south of Rhapala. There are some good fish to catch hereabouts, but neither Fishing Spot is home to a Manillo merchant, so you won't be trading anything you catch.
- Next to the southern Fishing Spot, down on the beach, you'll find a ? mark. Check it out and you'll meet Giotto, an unusually trim Manillo who has an odd, poetic manner of speaking. Giotto is a Master, and if you become a Rodmaster (reach 2,000+ points while fishing) he'll apprentice your party members. Giotto is great for quickly raising a character's HP and AP, but every other stat rises more slowly under his tutelage. Your mileage will vary.
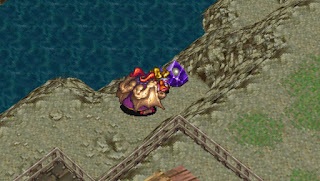
- Northwest of Rhapala is a lonely fishing hut, not far from a settlement that you can only reach by sea. Check the cabinet inside the hut for a Life Shard. If you go down the stairs behind the hut to the seashore you can find the Thunder Gene to the northeast, partially hidden behind the rock ledge. The Thunder Gene will allow Ryu to transform into Thunder Dragons.
- If you follow the long road that snakes northeast of Rhapala you'll reach Mt. Zublo. The road through here is currently blocked by lava, making this area impassable for the moment. Check along the eastern path while still on the ground and you'll eventually come to a chest containing a Protein.
That leaves Rhapala itself. Time for some urban exploration.
Rhapala
Rhapala is a bit bigger than you might expect of a fishing town, and there's plenty to see, grab, and buy. Let's have a look around.
- To the northwest of the entrance you'll find a line of houses. One takes shipping orders, which is no use to you; one is a clinic for innoculations, which will be quite handy two dungeons from now; and the last sells weapons, armor, and items. Very handy. Check the bookshelf by the desk in the item shop for a Molotov.
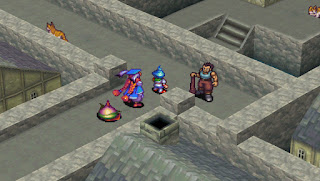
- On the east side of Rhapala's southern section is an inn. Go down the stairs in the inn and you'll find an underground pub, where the head of the Porter Guild, Sinkar, spends all of his time. He's the fellow in the red vest, and you'll need to remember his location for later. Head up the stairs near Sinkar to find a bedroom with a cabinet. The cabinet contains a Panacea.
And surprisingly, that's... everything. There are plenty of sailors hereabouts, but only a small handful of them turn out to be important, and they're found in the northwest of Rhapala, at the Wharf. (Note that you can jump right to the Wharf via the world map, if you like. Walk straight through Rhapala.)
Check out the northeast of the Wharf and you'll find a mighty, muscular man and his monkey arguing with a bookwormish fellow. A woman, clearly unimpressed, watches from the sidelines. Speak to everyone and the sailor, Zig, will push down the nerd, Beyd, and leave with his buddy Iggy, the monkey. Shadis, the woman, will also leave in a huff, and Beyd will stay behind to answer any questions you may have about what just happened. The important thing here is that the boat you need to take isn't coming back any time soon.
As you try to leave the way you came you'll be intercepted by Shadis, who will answer more questions. She'll suggest you speak to Sinkar, her father, about using the Porter Guild's road through Mt. Zublo. Head down to the pub and speak to Sinkar and he'll tell you what you probably already know: The road is closed due to an eruption. Bah. Out of leads, you might as well depart Rhapala for now.
Once you're back in the field the team will automatically set up camp, and as everyone else discusses the situation Nina asks the really important question: Is there a thing between Shadis and Beyd? She proposes talking to Beyd about it, and, well, you don't have anything better to do right now, so... head back to the Wharf.
Speak to Beyd and Nina will employ all of her tact - which is to say, none - to ask Beyd if he likes Shadis, right in front of her face. One thing will lead to another, and Zig will declare that he plans to fix the nearby Lighthouse, which will presumably bring the ship back and fix all of Rhapala's problems. Then Shadis will have to marry him. Beyd, distraught, will ask the team to train him in combat, so he can fix the Lighthouse first.
Yep. Love triangle. Care for a minigame?
Training Beyd
Ever wanted to turn a weakling into a muscle man? Now's your chance... sorta. The next part of Breath of Fire III involves meeting Beyd by night and smacking him around until he's strong enough to approach the Lighthouse, which is infested with monsters. First, though, Beyd needs the proper attire.
Beyd will give you 1,000 zenny, then ask you to buy him some equipment that he can use for training. He can equip anything that Ryu can use, though he can only equip a sword and a piece of armor. What you buy Beyd is important, as the reward for completing this side quest is an upgrade to the weapon and armor. You should probably give Beyd whatever Ryu is using, as his stuff will get stronger once you're done training Beyd. If not, grab him a Moon Sword and Scale Mail from the shops in Rhapala.
Speak to Beyd at the Wharf when you're ready to train. The team will meet him in the town square at night, and you can hand over his new equipment. You can also change your team composition, and for your first training session you should probably put your weaker physical hitters (likely Nina and Momo) in your party. Choose Let's Go! to begin training.
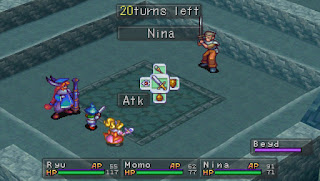
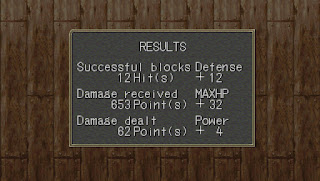
Training with Beyd consists of a battle that takes place over 20 rounds, though it can also end whenever Beyd gets knocked out. In order to make Beyd a better fighter you need to raise his stats:
- Beyd's Pwr goes up whenever he successfully hits one of your characters, and rises based on how much damage he did
- Beyd's Def goes up whenever he's hit while defending, and rises based on how many hits he took
- Beyd's HP goes up whenever he takes damage, and rises based on how much damage he took
Pretty simple... though Beyd starts out very weak. You'll need to condition him over a series of several training sessions to get him into fighting shape. You can bumble your way through this minigame just by doing whatever you like, but there are a few ways to speed up the process:
- Start out attacking Beyd with your weaker fighters, like Nina. Don't use Skills until Beyd's HP is in the hundreds.
- Put someone with lots of HP at the front of an Attack Formation and remove their defensive equipment. Beyd is more likely to hit the lead character, and with no armor he will do more damage. (You can remove everyone's armor, if you prefer, but this gets a bit annoying when the time comes to put everything back on.)
- Examine Beyd rather than defending. This way he'll do more damage with his attacks.
- Have your characters hit Beyd one per round, at least at first. There's a decent chance that Beyd's attacks will trigger a Reprisal, and if this happens he could accidentally get knocked out.
- Heal Beyd regularly. You can target him with items or spells. One character should probably be healing Beyd every round to make the training session last longer.
- Replace your weaker physical attackers with stronger fighters as Beyd becomes more fearsome. Ryu can raise Beyd's HP really quickly if he turns into a dragon and slashes him.
- Help Beyd when Zig is distracted. You can either heal Beyd or take shots at Zig. Zig will pay attention again once he's been hit, so make sure your slowest character hits him (or only take one action).
- Sit back and watch, using either Defend or Examine to remain neutral. If you trained Beyd well enough - and it doesn't take too much training - he'll topple Zig on his own. (And if your team was having trouble with Beyd by the end, this fight will be an absolute slaughter.)

