Part 1: Mysterious Island Exploration
After having a meal at Adio's place - or watching Luffy have a meal, anyway - the crew decides they need to work towards reclaiming their lost power. Adio's recommended course of action is exploring a nearby cave. Sounds as good a plan as any. Before you do anything else, poke around Adio's hut to find a chest on the northern balcony containing Sazae Kancho Pescatore and another chest on the upper floor containing Bronze Bat Soup.
Speak to Adio outside his hut and he'll point you towards the cave he mentioned, joining the party in the process. He's not controllable, but Adio will help you out in battle all the same. Onward!
Circular Inland Sea
Monsters
- Eisa - Weak to Technique
- Sazae Kancho - Weak to Power
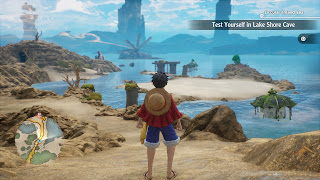
Head north away from Adio's hut, collecting items as you go, until you're overlooking the sea. Here you'll start running into enemies again, and now that you've hit 'optional' battles you'll have to deal with approaching encounters properly. Sneak up on an enemy and your crew will receive a bonus. Allow an enemy to sneak up on you and they get the bonus instead. Simple enough.
While you're fighting here you are bound to gain a level or two. It's good to note that you do not need to swap in all of the members of your crew for them to gain experience. Your whole party will be strengthened whether they helped out or not.
There are a few side routes along the Circular Inland Sea, but you're more or less forced into the cave at the end of the path. You'll get to explore later. Adio will ditch the party at the cave's entrance.
Lake Shore Cave
Monsters
- Bronze Bat - Weak to Power
- Death Squirrel - Weak to Technique
- Eisa - Weak to Technique
- Golden Bat - Weak to Power
- Hoisa - Weak to Power
- Smiley Squirrel - Weak to Technique
Random Items
- Angel Seed
- Bronze Bat Wing
- Gondola Shroom
- Kaen Kabuto Shell
- Lost Petal
- Panic Stone
- Smooth Shroom
- Unlucky Herb
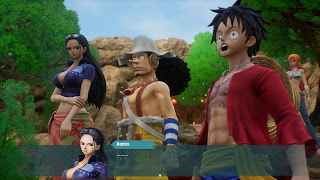
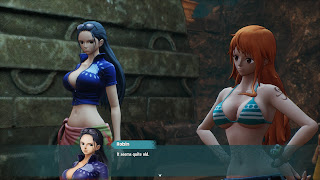
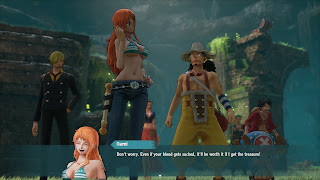
After a bit of conjecture on the crew's part you'll get to explore Lake Shore Cave. It's hardly enormous, being the game's first proper dungeon, but you'll still have to poke around a bit. Head straight north to start to find a save point, check behind the pillar on your left for a random item, then go up the ramp beside the save point to find a wall to climb.
At the top is a chest containing a DEF +48 Badge. You can equip this accessory on one of your party members to boost their DEF stat. Zoro, Nami, and Robin are all good candidates since their DEF is on the low side. Accessories and other equipment take up space on a grid, and you can equip multiple pieces of equipment on a character so long as they don't eat up the entire grid. (Which Badges currently do.)
Take a right from the chest to hit another cut scene, then climb down the ruins and head east, snagging the random item on your left before you cross the bridge. The bridge will collapse, stranding the party and forcing you into a fight against a Death Squirrel and a handful of cronies. Target their weaknesses and you shouldn't have any trouble.
The Death Squirrel will scurry off after you win, allowing the crew to collect the green cube the Death Squirrel was guarding. This is a Cube Fragment, and finding it will restore a ton of Skills to the whole crew, giving you more options in combat. Nice! In the future you can use Cube Fragments to learn more Skills, and to upgrade your existing Skills.
Collecting the Cube Fragment also unlocks Luffy's exploratory abilities in the field, allowing you to move around more freely. Destroy the line of walls near you with Luffy's punches to reveal three Luffy's Cube Fragments, all of which you should apply to Skills immediately, as well as a random item... and a grappling point. Using the grappling point will zip you over to a chest containing a Guts +42 Badge.
Zip one more ledge over to fight an enemy, then turn around and look up the pillar with the chest. You can grapple up to the top of it to find a chest containing an HP +130 Badge, as well as a Nami's Cube Fragment.
Grapple down to the next pillar to the west, then zip over to the horde of Bronze Bats swarming a chest. Your Power members can take these things down without much trouble. The chest contains an ATK +87 Badge. Bash through the walls on your right to find a chest containing an Energy Apple.
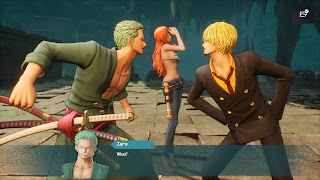
Climb the ladder beside the walls you just bashed. At the top is a Zoro's Cube Fragment. Grapple to the next ledge up and you'll find a locked gate back to the entrance. Inspect the gate and you can put Zoro at the front of the party to slice it to pieces. On the other side you'll find walls to bash that will lead you to a battle, a chest containing an Energy Apple, and a Luffy's Cube Fragment. You'll need to swap in Luffy (directional arrows to change party leader) to grab the Fragment.
Drop down the ledge near the gate and you'll find a path back to the entrance of the cave. There are a few things you can do here before you leave:
- Grapple over to the ledge just above the save point and you can grab an Usopp's Cube Fragment.
- Look up and to the east of where you grabbed Usopp's Cube Fragment to see a Chopper's Cube Fragment, just within reach on an upper ledge.
- Make your way back to the broken bridge. With your new grappling skills you can access areas that were visible but previously unreachable. The eastern path up here will bring you to a Robin's Cube Fragment, up on a pillar, and a chest containing an Excite Apple, behind some breakable walls.
- If you go along the northern paths from the broken bridge you'll find a hidden ladder on your right. At the bottom are chests containing an Excite Apple and 6,200 Berry.
- West of the broken bridge is a grapple point that you can just barely reach. On the other side you'll find a chest containing an Energy Apple.
- When you exit Lake Shore Cave and start heading south you may see a path on your right. Follow it and you'll find a cave that only Chopper can enter. On the other side you'll find a number of randomized items, and you can grapple over to a small island. On the island is a chest containing a Burst Brew, as well as the Inland Sea Tablet.
- On the east side of the path back to Adio's hut are several pillars and a wide, open island. Grapple across the pillars to the island, then check the slope up to the tree on the island's east side. Behind a grave next to the tree you'll find a Nami's Cube Fragment. On the north end of this island you'll find more pillars leading to a treasure chest, but it's locked tight. On the way back to the main path you'll find a Sanji's Cube Fragment at the base of the first pillar.

