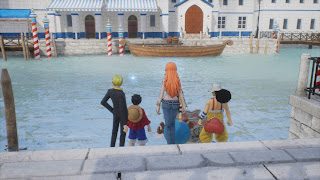
Location: Water Seven City Area
Participants: Luffy, Nami, Sanji
Reward: Luffy, Nami, and Sanji's Bond art, Shock Element Jewelry
In order to make this Frayed Memory appear you must first complete the main story events of Water Seven. Once you've defeated Rob Lucci a bunch of side content will appear in Water Seven City Area, including this Frayed Memory. You'll find it along the front of Canal Restaurant, in the east of Water Seven.
Part 1
Luffy, Nami, and Sanji all jump into the Frayed Memory this time, and they find a bunch of Marines on the hunt for... someone. Apparently whomever it is can use the Clone-Clone Fruit, allowing the fugitive to hide wherever they like. The only possible person is Bon Clay, whom you fought earlier in Alabasta. He may or may not be the subject of the Frayed Memory, though, and the team needs to find the ring to figure out who's in charge of Hysteria this time around.
Head west through Water Seven, following NPC clues, and you'll find Bon Clay on Main Street, just west of Plaza Square. He's desperate to flee the city, and Luffy is only too happy to provide cover. Head south from Main Street and you'll start running into Sailors and Navy Officers. They're no big deal, especially if you use Nami's Happiness Punch to Charm them.
On the way out of Cafe Park you'll run into Tashigi, and you'll have to defeat her with a pack of Sailors. Sanji and Luffy can handle the majority of the Sailors while Nami takes down Tashigi. You'll need to get her down to about one-quarter of her health to end the battle, and Hysteria will fade away around you. You aren't done with this Memory Link yet, though.
Part 2
A Memory Remnant of Bon Clay will linger at Canal Restaurant after the first part of the Memory Link ends, and it will point you towards the coast. Use Yoisa Travel to jump to Water Seven Lower Coast, where you started out in the city. The second Frayed Memory is inside the Rental Bull area in the north.
Head south towards the port and you'll run into more Sailors. A quick Thunder Lance Tempo from Nami and some attacks from the guys will put them down. Another group will get in your way as you approach the port, and when you arrive you'll find Bon Clay pitted against another familiar face.
Smoker
Weaknesses:
- Technique (Smoker)
- Power (Sailors)
- Speed (Sailors)
This fight is straightforward, but given your limited party it can also be fairly dangerous. Smoker hits very hard, especially when he's targeting Nami, and takes a while to whittle down since you can't target his weakness. White Launcher can be downright fatal to your characters under the right (wrong?) circumstances. Smoker's Sailors are run-of-the-mill, though their occasional use of Paralysis Bag gets annoying.
Try to get Nami in an area on her own so she can blast the field with either of her AOE attacks, then have Luffy and Sanji clear out the sailors and gang up on Smoker. Nami can provide healing support from afar if you have items on hand. So long as Smoker is contained by Luffy, Sanji, or both, he can't maul Nami with his melee attacks. Use Luffy's Gum-Gum Bazooka if Nami gets cornered to push Smoker out of her area. Mirage Tempo can also keep her safe in a pinch.
Beat Smoker and you'll have to fight him again, though this time the trio will learn the Gum-Gum Mouton Gatling Tempo Bond Arts move. Use it with Luffy or Sanji to wipe out most of the Sailors, and have Nami use Thunderbolt Tempo or Thunderlance Tempo to take care of any survivors. You'll need to take Smoker out again, but that shouldn't be a huge deal with all of his cronies gone. He'll give up once his health reaches one-quarter. The Memory Link will end successfully once you take Smoker down a second time.

