

Location
Tombsward Cave is located on the Weeping Peninsula, in the south of Limgrave. Head to the west side of the peninsula and you'll find the Fourth Church of Marika, a set of ruins sitting more or less in plain sight on one side of a large, grassy, hilly field. If you see a Walking Mausoleum you'll know you're headed in the right direction.
There's a small cliff surrounded by trees in front of the church. If you head into the trees you'll see a lit brazier in front of the cave. This is the entrance to Tombsward Cave.

Tombsward Cave
Trigger the Site of Grace and the Summoning Pool just inside the entrance, then trek into the cave. Like most caves in Elden Ring you may want a light source to illuminate your surroundings, though it's less necessary here. Pretty soon you'll enter a larger chamber, and it'll be filled with poisonous goop. Past this point you'll start running into Servants of Rot, spellcasters that will Poison you at a distance. Between the magic and the sludge at your feet you'll be hard pressed to get through this area without being Poisoned. There are also a few creeping goo piles in this area, but they're easy to kill even with normal weapons.
There are two Servants of Rot ahead, and you can use the safe ground on your right to attack them if you don't have a ranged weapon. Beside the second Servant of Rot is a Golden Rune [2]. West of here the chamber opens further, and you'll see five more Servants of Rot. Run to the left side of the cave to kill the first one, as well as use the rock formation beside it to avoid incoming fire from the other four. Use this ground to hit the two out in the muck, then go after the last two in the west. They should still be ignoring you.

The path branches in two directions from here. If you take the northeastern path you'll find a sludgy passage populated by a few Rats, with a Giant Rat at the end. Beyond the rats you'll find an Immunizing White Cured Meat and the Nomadic Warrior's Cookbook [8]. The side passage along this route will take you to a ledge guarded by a few Miranda Sproutes, which, like most things here, can Poison you. Check the corpse hanging over the ledge for an Arteria Leaf.
Drop off the ledge and you'll find up in the chamber connected to the other exit from the larger chamber from earlier. Kill the two Servants of Rot in the pool to your right to get at the six Poisonbone Darts they're guarding, and briefly dip back into the large chamber to find a Furlcalling Finger Remedy on your left. To the south is one final passage, leading to the master of Tombsward Cave.
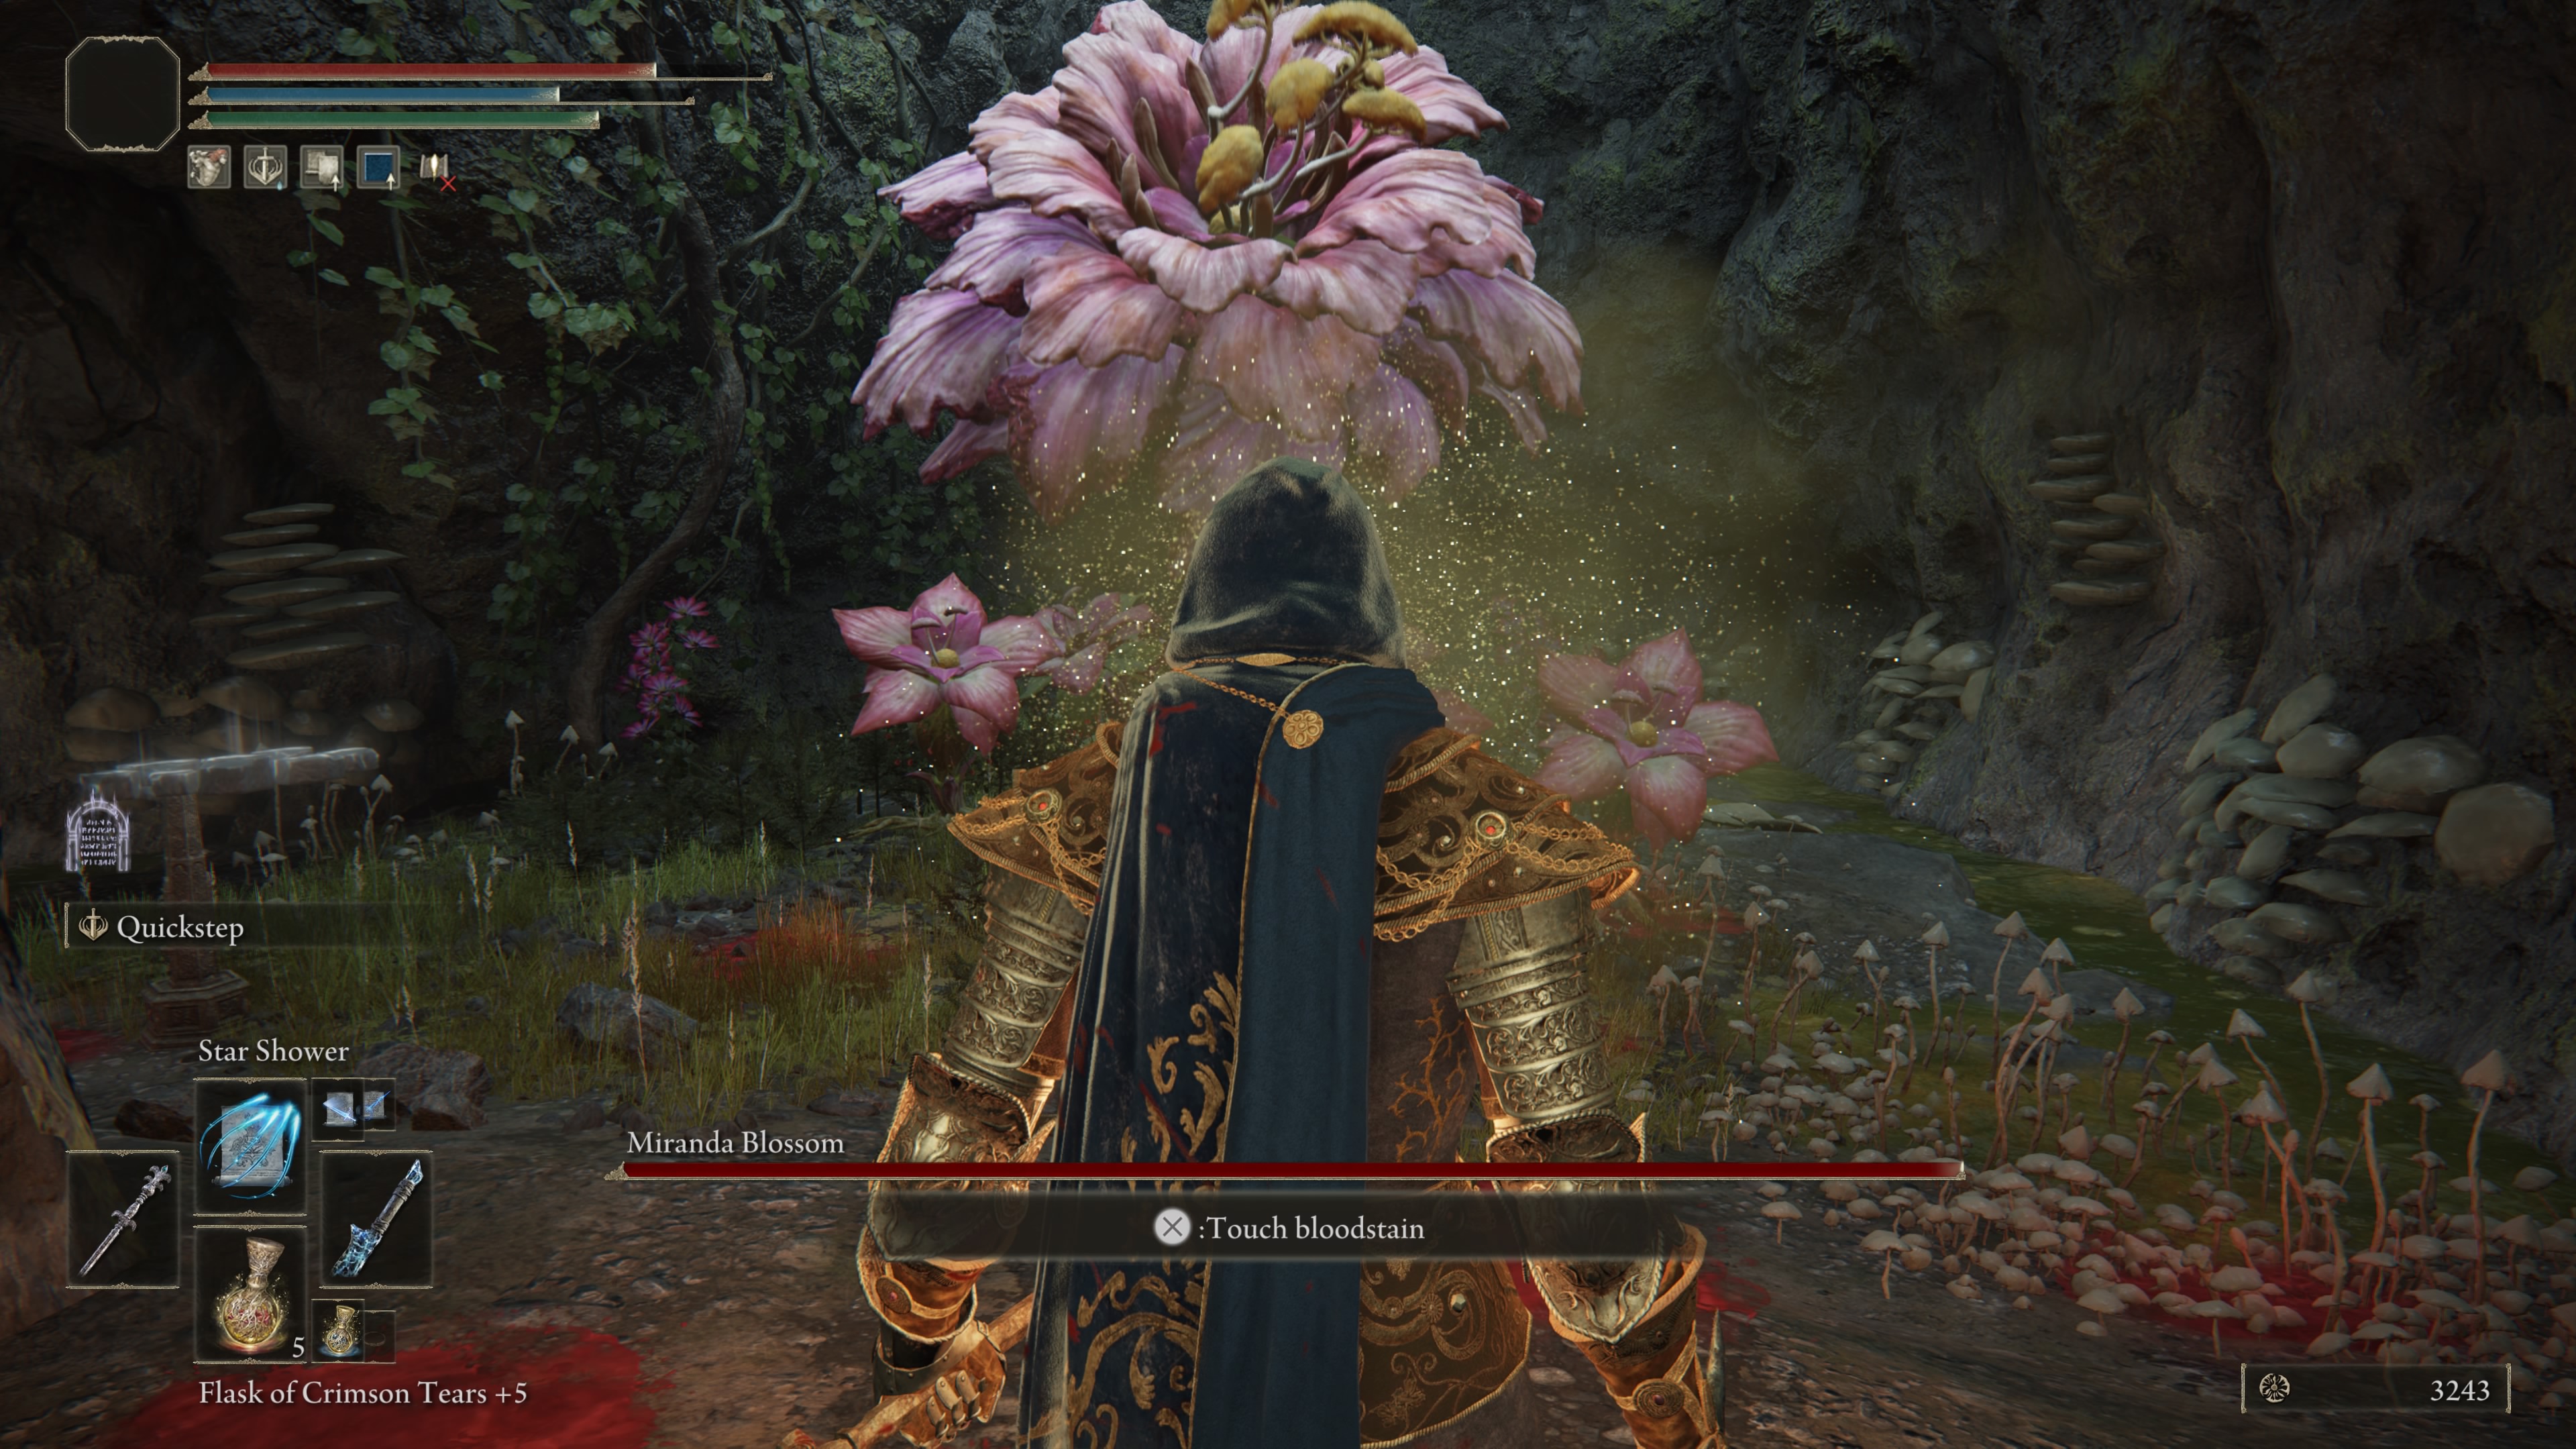
Miranda Blossom
As far as bosses go, the Miranda Blossom is pretty easy. Guarded by several Miranda Sprouts, the Miranda Blossom is entirely immobile and will spend most of the battle spewing poisonous clouds at you. Between the Sprouts and the Blossom you're pretty much guaranteed to get hit with Poison status, so just ignore it, kill the Sprouts, and then go to work on the Blossom.
Occasionally the Blossom will rain down white light on you, but you can see the attack coming from a mile away. Run around the Blossom to avoid getting pelted from above, then go back to attacking once it's done. If you fear this attack - or being Poisoned - call in summons. They will hack the Miranda Blossom to pieces in no time.
You'll receive 2,100 Runes and a Viridian Amber Medallion for defeating the Miranda Blossom. Use the teleporter in the room to zip back to the entrance and leave.