

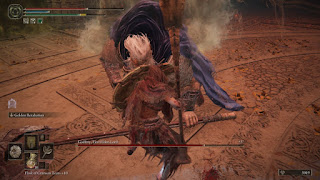
After you finish Crumbling Farum Azula you'll wind up back at Leyndell, and it looks... quite different. Much sandier. Follow the sand dunes to the southeast and you'll find a path into the sanctuary where you fought Godfrey earlier in the game. Here you'll fight a known NPC - we won't spoil who it is - and get on the path back to the base of the Erdtree. Godfrey is waiting for you in the same wide arena where you fought Morgott the Omen King earlier in the game.

Godfrey's Moveset
During the first half of the battle, you'll be facing off against Godfrey, First Elden Lord. This Godfrey fights similarly to the golden Godfrey you fought earlier in the game, though he has a more advanced moveset that makes him a bit tougher. You can expect the following moves from Godfrey:

Beating Godfrey and Hoarah Loux
The first half of this battle is slow, plodding, and methodical. Godfrey's attacks are painful but relatively predictable, and once you get a feel for how he reacts you can dance around his axe and hit him whenever you see an opening. Your best chances are whenever Godfrey slams his axe into the ground, as it will take him a second to pull it back out again. If you're a ranged fighter you'll have an easier time with this fight, and should just keep away from Godfrey; if you need to fight at melee range, however, circle around him and wait for opportunities to strike.
Once Hoarah Loux takes over the fight gets crazier, and this phase won't last nearly as long, as Hoarah Loux seems to take damage more quickly than Godfrey, and offers more openings to strike. Keep rolling backward to avoid the majority of his attacks and be ready to hop out of the way if he starts to use shockwave attacks. His claw swipes aren't so bad, but if Hoarah Loux manages to fling you upwards, the fight is usually over. Given how quickly Hoarah Loux moves he'll constantly be in your face, so melee fighters will probably have an easier time with the second phase.
Godfrey and Hoarah Loux become much easier to manage if you summon a friend or a Spirit Ash. Aside from their shockwaves and fissures both bosses tend to strike in one direction, and you can slip up and hit them in the back while they're dealing with your buddy. Bounce the boss back and forth between the two of you so neither person is taking too much abuse. Both Nepheli Loux and Shabriri can be summoned for the fight, though you need to have completed their respective questlines for their summon signs to appear.
You'll earn 300,000 Runes and the Remembrance of Hoarah Loux for defeating Godfrey, First Elden Lord and Hoarah Loux, Warrior. You'll also open the path to the final battle in Elden Ring. Congratulations!
During the first half of the battle, you'll be facing off against Godfrey, First Elden Lord. This Godfrey fights similarly to the golden Godfrey you fought earlier in the game, though he has a more advanced moveset that makes him a bit tougher. You can expect the following moves from Godfrey:
- Godfrey starts most rematches by leaping into the sky, hurling his axe at the ground, and then following it down. The somewhat slow recovery time makes this more of an opportunity to run over and whack Godfrey several times. You won't see this attack if you rush right up to Godfrey at the start of the match and prompt him into using a different move. Godfrey will occasionally use this move if you try to remain at a distance.
- Godfrey will use regular axe swipes. These hit hard but you shouldn't have much trouble seeing them coming. Block or roll away to avoid them. These often turn into combos that can end with other moves.
- Godfrey will slam his axe into the ground and slide it towards you, performing an upward slice after about two seconds. Either stay away from him or try to roll towards and through the slice.
- If you're near him Godfrey can nudge you with his axe and throw you off balance. This is a tough move to block if you aren't already blocking, though it does little damage. Godfrey will almost always follow up with another attack immediately after this, assuming he connected with the nudge.
- Godfrey will raise his axe and perform a strong downward chop. He'll then spin the axe around in a circle, return it to its original position, and perform a second downward chop. You can get close to Godfrey to avoid the spin, though the second chop will probably get you if you try to hit him.
- Godfrey will raise his axe and force it into the ground, attempting to crush you. Roll to avoid. This attack is slow enough that you should typically see it coming well in advance, though he follows it up with a much faster upward flick. Get far enough away and the flick shouldn't be a problem.
- Godfrey performs a stomping attack that will raise a cone of spikes from the ground in front of him. Unlike before, however, Godfrey can pursue you while doing this and perform it multiple times. Keep moving or he'll catch up to you. Godfrey often finishes this move by trying to crack your skull with his axe. Roll to the side to avoid the skull splitter.
- Godfrey slams his foot into the ground, creating a vast shockwave that radiates outward and hits basically the entire battlefield. Watch the foot go up and roll just before it starts to come down to avoid the shockwave. Jumping also works. Godfrey will occasionally use this move multiple times in a row. Once you carve enough out of Godfrey's health meter this move will replace the conical spike foot slam.
- Godfrey slams his axe into the ground, creating an enormous, glowing fissure that stretches across the battlefield. A few seconds later it will erupt upward and damage anything along the fissure. If you can get away from the fissure, great; if not, you can still avoid damage by rolling after about a second.

Hoarah Loux's Moveset
Where Godfrey uses measured, careful attacks, Hoarah Loux is wild. Throwing aside any idea of defense, Hoarah Loux will doggedly pursue you around the battlefield at great speeds, trying to slice you or pummel you to death. You'll need to stay on your toes constantly to avoid his attacks. You can expect the following moves from Hoarah Loux:
Where Godfrey uses measured, careful attacks, Hoarah Loux is wild. Throwing aside any idea of defense, Hoarah Loux will doggedly pursue you around the battlefield at great speeds, trying to slice you or pummel you to death. You'll need to stay on your toes constantly to avoid his attacks. You can expect the following moves from Hoarah Loux:
- Hoarah Loux will use a series of claw swipes to deal normal damage. These are faster than Godfrey's attacks, but they don't hurt as much and are generally less of a problem. Roll away from them or block the assault.
- Hoarah Loux will rush at you with his hands out. If he manages to fling you upward he'll follow you into the air and slam you into the ground, wrestling-style. Your chances of survival are very small. Roll back to avoid getting grabbed.
- Hoarah Loux will slam his foot into the ground, triggering an arena-wide shockwave. He'll follow this up with a second one. Occasionally Hoarah Loux will also leap into the air, and his meteoric descent will also cause a shockwave. Time your jumps or rolls as best you can with the motion of his leg.
- Hoarah Loux will trigger two shockwaves, then perform a similar fissure attack as Godrey, though this time the arena will be pock-marked with smaller, circular fissures. Avoid any spot that glows or looks otherwise rocky.
- Hoarah Loux will scream. If you're close enough this will shake you but not do any damage. This is an attack to throw you off balance for any follow-ups, so be ready to roll the second you recover from the shock.

The first half of this battle is slow, plodding, and methodical. Godfrey's attacks are painful but relatively predictable, and once you get a feel for how he reacts you can dance around his axe and hit him whenever you see an opening. Your best chances are whenever Godfrey slams his axe into the ground, as it will take him a second to pull it back out again. If you're a ranged fighter you'll have an easier time with this fight, and should just keep away from Godfrey; if you need to fight at melee range, however, circle around him and wait for opportunities to strike.
Once Hoarah Loux takes over the fight gets crazier, and this phase won't last nearly as long, as Hoarah Loux seems to take damage more quickly than Godfrey, and offers more openings to strike. Keep rolling backward to avoid the majority of his attacks and be ready to hop out of the way if he starts to use shockwave attacks. His claw swipes aren't so bad, but if Hoarah Loux manages to fling you upwards, the fight is usually over. Given how quickly Hoarah Loux moves he'll constantly be in your face, so melee fighters will probably have an easier time with the second phase.
Godfrey and Hoarah Loux become much easier to manage if you summon a friend or a Spirit Ash. Aside from their shockwaves and fissures both bosses tend to strike in one direction, and you can slip up and hit them in the back while they're dealing with your buddy. Bounce the boss back and forth between the two of you so neither person is taking too much abuse. Both Nepheli Loux and Shabriri can be summoned for the fight, though you need to have completed their respective questlines for their summon signs to appear.
You'll earn 300,000 Runes and the Remembrance of Hoarah Loux for defeating Godfrey, First Elden Lord and Hoarah Loux, Warrior. You'll also open the path to the final battle in Elden Ring. Congratulations!