

TWO DAYS LEFT, Part 5: UNDERWATER HIGHWAY
Want to display your love of OMORI for all the world? Get a collection of OMORI stickers, straight from Amazon! As an Amazon Associate I earn from qualifying purchases, at no extra cost to you.
DEEPER WELL
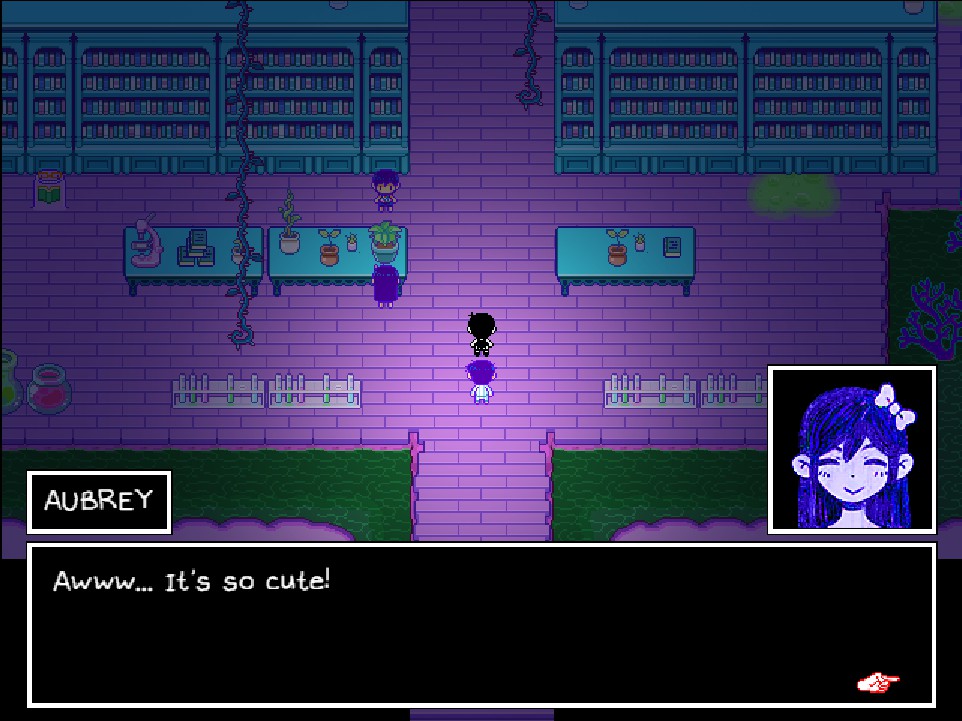
North of the west end of UNDERWATER HIGHWAY you'll find a bridge. This leads to DEEPER WELL, which, when you cross the bridge, seems... a little anticlimactic. The group will talk about BASIL a bit - what they remember of him, anyway - and you'll be given control again.
Step onto the red-and-purple spot and you'll be teleported into a cavern. You'll find odd, blob-life NPCs throughout this area, and though none of them provide anything concrete their dialogue is... interesting. Proceed to the next teleport pad to jump back outside, where you'll be on a larger platform, near a teleport pad. Hop onto it and you'll find a lengthy trail that eventually leads to a dead end with a face dug into a rock wall. If you've been to ORANGE OASIS you can use AUBREY to bash the face open. There are JAM PACKETS behind it.
Make the trek back to the larger platform, then head east. You'll find two more pads. Hop on the lower pad first. You'll appear at an intersection. To the south is a RAIN CLOUD, as well as a teleport pad out to an NPC. To the east is another teleport pad that leads to two more cryptic NPCs. Enlightening, but not that useful.
Head back the way you came and jump on the upper pad. You'll appear just north of a small body of water. Hop in to find a LIFE JAM. Walk northeast of here to find another teleport pad that will take you to a small island with a cavern. Trek through the narrow waters within until you reach a split.

To the north of this intersection you'll see a phantom on a swing, and if you inspect the BRANCH CORAL the swing is hanging from it will offer answers to some plot-related questions. Ask all three questions and OMORI will earn the opportunity to be teleported to a small, red room with a tree. Eat the APPLE off of the tree and OMORI will gain 50 HEART, 50 JUICE, 10 ATTACK, 10 DEFENSE, and 10 SPEED. Dang.
Take a left at the intersection and you'll eventually be guided to a series of cliffs with a big, ominous skull at the top. Head inside to find a save point, and past that... a friendly whale? This is HUMPHREY, and he apparently has multiple people - among them sea witches and SWEETHEART - inside his body. Following them into the whale seems unwise, but... you're at a dead end otherwise...

HUMPHREY
Yes, you're now inside a cartoon whale. HUMPHREY is a sizable dungeon, and you'll need to navigate his guts to complete the area. You can, fortunately, still exit HUMPHREY via the dent in the wall just south of where you start, so you're in less of a predicament than it first appears.
Hop on the raft near the entrance. If you debark at the central island and speak to the largest 'HUMPHREY' he'll tell you that he can't help you unless you bring him a SLIMY KEYCARD. This leaves you with three choices of destination: North, east, and west. We'll start in the north, though you can go in any order you like.

North
Head north and eventually you'll wind up on bridges in a pinkish sea. Take a right when you reach the first intersection to find a LIFE JAM, then put AUBREY in front and smash the growth that's blocking the northern path. Notice that the path to the LIFE JAM is now blocked by a growth. You'll need to create and block paths like this throughout this area.
Go north in the next area and smack the HUMPHREY growth to the left of the cages. This will fill in the bridge on your right, allowing you to cross. The RECEPTIONIST HUMPHREY ahead is not that helpful, so continue east off the screen. Note the talk of 'experiments'. You'll be speaking to - and fighting - a lot of them in the next few areas.
Continue east on the next screen and you'll start running into enemies:
- LAB RAT - Can make your characters HAPPY. Its attacks then do more damage. Has little health, and is worth taking down quickly.
- SPROUT MOLE?? - Weird experiment that can give your characters random EMOTIONS. Has a lot of health but isn't a huge threat.
- WATERMIMIC - Creature masquerading as an item melon. Will use a variety of items that either hurt characters, heal them, or change their EMOTIONS. Annoying, but not a big deal - and they give you lots of EXP.
Carry on east until you reach an island with stacked cages and a bridge headed north. Head down onto the beach. To the right you'll find a WATERMIMIC, and if you wander to the left for a ways you'll find a COMBO MEAL behind a barrel. AUBREY can clear the way. While you have AUBREY in the lead, have her smack the nearby HUMPHREY bridge.

Cross the northern bridge. You'll find MARI'S picnic blanket on your right, and you can save, restore yourself, and picnic, per usual. To the left is a HUMPHREY bridge to cross, and on the other side the path splits again. Go south and down to the beach. To the east you'll find a barrel to destroy that's blocking a WHOLE CHICKEN. Smack the HUMPHREY bridge to the north before you leave.
Head back to the western intersection and follow the path north, then east. Get down on the beach and follow it to the right to find a barrel with an AIR HORN behind it. Return to the main path and continue east to find a door.
In the next corridor you'll find a FLOWER CROWN. No one seems to remember to whom it might have belonged. Oh well. Ignore the HUMPHREY nubs - hitting them will just block your way - and follow the path to the next area.

To the north of the entrance you'll find the 667TH EXPERIMENT of MARINA, one of the sea witches. If you tap the glass encasing the creature it will break out and attack the party, chomping away half of their health instantly. When you head north it will smash its way out and chase you through a labyrinth of HUMPHREY nodes, and you'll need to smack them out of your way with AUBREY. There's a process to getting through here:
- In the first area you need to hit the HUMPHREY blob that's sitting out by itself on a little island to the south. This will create a bridge to the north. You'll need to lead the EXPERIMENT a ways north before you can safely hit this node.
- The next section is more straight forward, though again, you'll need to hit a HUMPHREY node that's out on a little island to extend a bridge. It's further north along the path this time. Partway along the path you'll find a HEART STRING, though getting it requires taking a few swings that could get you caught.
- This path leads straight to the exit, though there are multiple HUMPHREY nodes in your way at the end. Budget for time so you can escape. You can find a BLENDER that will teach HERO REFRESH shortly after crossing the first bridge, and a WATERMELON to the left of the northbound path leading to your destination.
After this final section you'll be cornered by the EXPERIMENT, though a savior will... save you... at the last second. (You may also receive a HOT DOG. Depends. You'll understand if it happens.) Beyond here you'll find the lab of MARINA, and she'll be chatting with SWEETHEART, who is displeased. Because of course she is. Check the hatch on the wall and you'll be sent back to the beginning of HUMPHREY.

East
Head east from the entrance and you'll wind up on a long, straight river. You'll start running into enemies as you sail:
- SNOT BUBBLE - Simple enemy that inflates and explodes, inflicting lots of damage to your whole party. They have almost 900 HP, so use your strongest attacks to quickly take them down. Using KEL'S MEGAPHONE SKILL to make everyone ANGRY is recommended for maximizing damage. They also explode when killed, though they will do less damage if you managed to defeat them quickly.
- SLIME BUNNY - Can make itself SAD. Otherwise just attacks. Pretty simple enemy if you become ANGRY.
Sail east until you're forced to debark. Check along the boardwalk that leads back west for a FISH TACO, then wander east. You'll find a waterfall with two HUMPHRIES, and they - well, one of them, anyway - will reveal that you can use them to form a bridge. You'll need more. Head north up the stairs and you'll find MARI and a picnic blanket waiting. Be sure to picnic before you leave.

Head west. The path will split. Go north, slicing the traffic cones out of your way, and you'll find an area with some cordial HUMPRIES. Check to the right of the entrance and you'll find a HUMPHREY in the water who will join the lineup of HUMPHRIES at the waterfall. To the north is a tall platform that KEL can use to target an object on his left, opening a gate in the water to the south.
Head back to the intersection and take a left to find a raft point. Head north, through the gate you opened, to find another HUMPHREY for the waterfall bridge. Sail east of here to find a CHEESEBURGER, blocked by four traffic cones, as well as a door that leads into a sizable library. Sail south before entering the library and you'll find another HUMPHREY, as well as a WATERMIMIC.
On to the library. After some conversation the group can explore. Take a left from the entrance and you can climb up onto the book shelves. Use KEL to fire to the left, sending a HUMPHREY down some rapids to an unknown fate. Return to the entrance and head north, then take a right. Get up on the bookshelves and you'll find DYNAMITE to the left.
There are more shelves to climb to the northwest. Go left on top of them to find a GLOBE, then south to find a LIFE JAM. Return to the ground and head east. Between two shelves you'll find a face indented in the wall, and if you've visited ORANGE OASIS you can mash it open with AUBREY to find JAM PACKETS inside.
Finish your trek through the library and you'll find another spot for KEL in the east. Fire him off to the right to send another HUMPHREY on its way, then backtrack to the entrance of the library and leave. You'll find this HUMPHREY, and the one you send flying earlier, just outside the library.
Return to the waterfall at the beginning of this area. The six HUMPHRIES will now be in place, forming a bridge for you. Cross it to find another raft. Go east to find a MELON SMOOTHIE, then head north. In the next two areas you'll be pelted from above by falling food, and if you get hit you'll take some damage. Sail north, dodging food by avoiding the shadows.

(In the second area you'll see a giant SPROUT MOLE descending slowly, and if you get under him you'll save him from the water. This is BIG MOLIO, and he promises to reward you for saving him. He'll help out with the 667TH EXPERIMENT if you come through here first. You'll also see him back at the SPROUT MOLE COLONY once you leave HUMPHREY.)
Once you're out of danger you'll be in an area with several smaller landing spots for your raft. Debark at the two northern ladders and you'll see HUMPHRIES. KEL can fire at them. Keep hitting the western HUMPHRIES until they're all blue to make an ONION RING fall down from the sky, and make the eastern HUMPHRIES all blurry to make a WHOLE PIZZA descend.
There are HUMPHRIES to chat up near here, though ultimately you need to go down the rapids to the east. Take two lefts along the rapids to find the U key for HANGMAN, and go right and then down to find an APPENDIX. You can't get both items on the same trip, so sail west to loop back around once you reach the end of the rapids.
Head west in the next area. You'll find another waterfall bridge that needs completing, and any HUMPHRIES you hit as you went down the rapids can fill the gaps. Speak to them once the first HUMPHREY is in place - they're all floating in the water - and you can make a bridge for yourself. You'll need eight total HUMPHRIES to create the bridge, so make sure you try out all the paths through the rapids.
Cross the bridge and follow the path to another library. There's a single door in the middle of it. Check the top-left side of the library to find CONFETTI at the top of a ladder, then head back down and go through the door. You'll see SWEETHEART irritating another of the sea witches, MEDUSA. Once she's done wasting MEDUSA's time you can use the nearby hatch to return to the entrance.

West
Down the western path through HUMPHREY you'll come to a blue disc once you land your raft. This is a teleporter, and it will send you to another nearby island with a tube. Step into the tube and it will shunt you upwards. On your way you'll receive a message from MOLLY, one of the three sea witches, who mistakes you for MARINA - and has a surprise ready.
When you emerge you'll be in a room with what appears to be a huge wad of dynamite. The three consoles in front of the dynamite activate puzzles, accessible via teleportation pads on a lower level. Also down here is MARI with her picnic blanket. Choose the puzzle you wish to activate and the pads near MARI will also activate. We'll start with the blue puzzle.

Blue Puzzle (Easy)
When you activate the blue puzzle teleporter the dynamite will lower into the flower, replaced by nine blue tiles. You need to step on these tiles in a specific order to solve the puzzle. You can solve this puzzle through trial-and-error, but there's a more efficient way to get it done.
The blue teleportation pad will take you to a hallway filled with HUMPHRIES. Head east and you'll find a testing area with four experiments. The HUMPHRIES are trying to figure out why the experiments aren't working. Each experiment has a faulty pad on it that corresponds to the code you need to complete the overall puzzle:
- In the first experiment the HUMPHREY is trying to teleport a SPROUT MOLE. The tile the SPROUT MOLE appears on is the tile for the puzzle.
- In the second experiment the HUMPHREY accidentally merges a bunch of other HUMPHRIES into a single entity. The tile it's sitting on is the tile you want.
- In the third experiment you need to send someone to step on tiles with spike traps. The tile that doesn't hurt your character is the one you want.
- The fourth experiment features a series of holographic HUMPHRIES. The pad with a HUMPHREY you can't step through is your answer.
(If you don't want to go through all that yourself, the answer is always the same. Step on the middle-left tile, the bottom-middle tile, the middle-right tile, and the top-middle tile, in that order. Think of the tiles like the keypad on a phone and the answer would be 4-8-6-2.)
Green Puzzle (Medium)
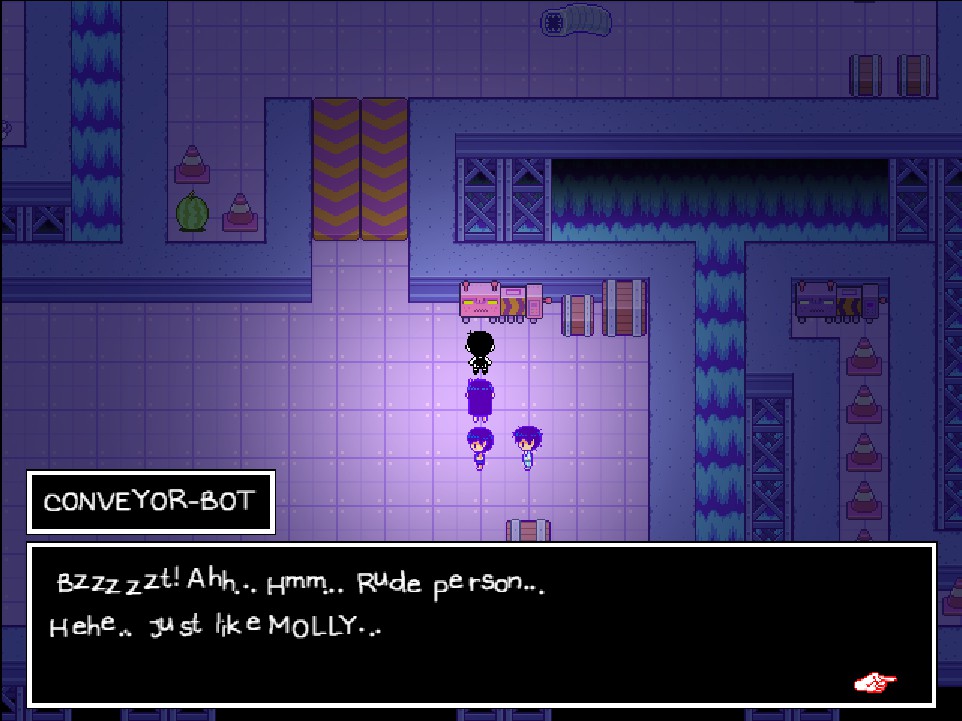
Step on the green teleporter and you'll be taken to a maze filled with CONVEYOR-BOTS. You'll also run into WORM-BOTS that will attempt to take you down, though they only attack and are pretty easy to defeat.
East of the entrance you'll find a MAILBOX behind a traffic cone. North of here is a CONVEYOR-BOT, and unlike before they will only respond to KEL. (Though he doesn't need to be leader.) Hop on the conveyor once it switches directions. There's an item on your left behind more traffic cones, though it's a WATERMIMIC.
North of the conveyor belt is a cage. Smack it open with AUBREY and you'll find the letter V key for HANGMAN inside. Trigger the CONVEYOR-BOT near the cage, then head east. Hop on the teleport pad you find and it will take you to the conveyor belt you just changed. Grab the HOMEWORK behind the traffic cone to the north, then hop onto the other conveyor belt.
Trigger the CONVEYOR-BOT at the end of the conveyor belt, then jump on the teleport pad. It'll take you to a room with a security camera that triggers a kinda sad scene. There are stairs near the entrance teleporter, and up them to the north you'll find a face indented in the wall. If you've been to ORANGE OASIS you can bust through it to find many items, including six SPAGHETTIS and a JAM PACKET.

Hop on the teleporter to the east of the security camera. You'll appear in an open area with three paths forward. Slice through the traffic cones to the east to access a CONVEYOR-BOT first, which will allow you to get to a second CONVEYOR-BOT to the north of the teleporter. This in turn will allow you to take the northwestern path to a lift tube. (Avoid the teleporter along the way. It will send you back to the start of the maze.)
After jumping on a long conveyor belt you'll wind up near four HUMPHRIES. Each one has a letter on its back, spelling out 'OBOM' - or, if you heed the second HUMPHREY'S confused suggestion, 'BOOM'. Hop on the last conveyor belt in the west to find a teleporter back to the dynamite, and enter 'BOOM' into the computer to solve the puzzle. Two down!

Red Puzzle (Hard)
Hop on the red teleporter and you'll wind up in a room with a computer console, two WORM-BOTS, and four teleporter pads. Check the computer and you'll see a diagram with circles on it, and each circle has lines underneath. The number of WORM-BOTS in the room indicates the teleporter you need to step on, corresponding to the picture on the computer console in the first room. In the first room, for example, there are two WORM-BOTS, so you need to use the top teleporter.
As you proceed through the rooms you'll notice that the colored wall tiles in the back of the room change color depending on the room you're in. These tiles reveal the solution to the puzzle back at the bomb room, where you need to cut wires in a specific order. The order is blue, green, red, and white. (Or, if you're color blind, the second wire, the fourth wire, the first wire, and the third wire.)
Completing all three puzzles will activate a teleporter to the north of the now-inactive dynamite wad. Beyond it you'll find SWEETHEART, who is dissatisfied with MOLLY'S work. You'll also find a latch that leads back to the entrance of HUMPHREY.

THE DEPTHS OF HUMPHREY
Once you've been through all three routes in HUMPHREY you'll find the SLIMY KEYCARD, sitting in the last lab where you see SWEETHEART complaining about the ineptitude of scientists. Give the card to the big HUMPHREY and it will shuttle you 'downstairs', where you'll find a save point and some food to restore your party.
North of here you'll find SWEETHEART and the three sea witches - sea scientists? - who clearly have not been paid for their services by the bratty ex-princess. She rushes off... but the sisters - and HUMPHREY, who is hungry for CLAMS - still want their payment of 1,000,000 CLAMS. The kids either can't or won't pay that much, and the fight is on.

SLIME GIRLS
Tricky fight. The SLIME GIRLS start off using a combination of a triple-hitting chainsaw attack and a variety of lobbed bottles that can either hurt everyone or randomize everyone's EMOTION. They can also greatly decrease a single target's SPEED. Once they take enough damage the SLIME GIRLS will become ANGRY, and eventually they will perform a SWAP attack that changes your whole party's HEART and JUICE counts. When the SLIME GIRLS are on their last legs... tentacles... whatever... they'll use SLIME ULTIMATE ATTACK, which damages the whole party, randomizes their EMOTION, depletes their JUICE, and debuffs their ATTACK, DEFENSE, and SPEED. Yeouch.
Unlike a lot of major bosses the SLIME GIRLS do not lock into a permanent EMOTION, so your best bet here is to pick one that's advantageous to your strategy and prep your characters accordingly. KEL'S MEGAPHONE SKILL is quite handy for making everyone in the party ANGRY, and if you make the SLIME GIRLS SAD you can lay on a ton of damage. More important, however, is to not use up too much of anyone's JUICE before the SLIME GIRLS use SWAP, as anyone with a low JUICE score will suddenly have a low HEART score instead. Try and conserve your ENERGY for the end of the fight when everyone is out of JUICE and you can use FOLLOW-UPs to finish the SLIME GIRLS off. (Though make sure you have someone fast - probably KEL - heal your party first. Don't take chances.)
Defeating the SLIME GIRLS will see them retire from sea-witching, though you're still in a predicament, as HUMPHREY is huuuuuungry. Put AUBREY in front once you're in control of the party again and head south, smacking HUMPHREY nubs out of your way as you run. HUMPHREY will corner the party - pretty easy when it's his body - and you'll be in another fight. (Don't worry about healing beforehand, everyone will be restored to full health.)

HUMPHREY
The final obligatory boss of HEADSPACE, HUMPHREY consists of four phases, three of which will take you a little while to defeat:
- The first phase is a group of HUMPHREY blobs, eagerly trying to eat you. They'll either go after one party member or strike multiple party members in a row. Expect damage in the low hundreds with each hit.
- The second phase is a singular HUMPHREY blob. It attacks one character at a time. Hits hard, but is somewhat easier than the first phase.
- The third phase is HUMPHREY'S stomach. In addition to a single-hitting attack, HUMPHREY will inflict damage to the party every turn, usually around 70 or 80 points to each character.
- The fourth phase is HUMPHREY'S uvula. You won't see it for long.
This fight is one of endurance. All HUMPHREY does is inflict damage on the party, and won't throw any major curveballs - or change his own EMOTIONS. As such you can use any strategy you like to maximize your damage to the whale's guts, so long as you're keeping your party healthy. (I went with making everyone ANGRY, personally. Makes their multi-hitting SKILLS very potent.) HEART maintenance is especially crucial during the third phase, as HUMPHREY's constant swallowing will inflict damage on everyone without fail. Once you reach the third phase one of your party members - likely HERO, with SNACK TIME - should be healing everyone's pains away while the rest attack. Preserving your JUICE for the third phase isn't a bad idea, either, as it will allow you to shorten the amount of time that you're sustaining constant damage.
Once you've defeated HUMPHREY'S third phase you'll have a short breather before facing the uvula. One hit will end the fight, launching everyone out of the rapacious whale - along with the T and W HANGMAN keys. Collecting the keys will reveal your next, final destination in HEADSPACE.

Hop into the holes the keys left behind for one final, awful visual, then use the whirlpool HUMPHREY left behind. You'll wind up in a winding passage, and something will provide cryptic hints as to what's really going on. When you reach the end of this passage you'll find a marking on the northern wall. Inspect it and you'll be shot away from DEEPER WELL...
... and back to NEIGHBOR'S ROOM, at the beginning of HEADSPACE. You can reenter WHITE SPACE while you're here, now that you've bested HUMPHREY, and the little black space in the cabinet will take you back to DEEPER WELL. Neither is very useful anymore, however, and you have a clear destination ahead of you.