Main Walkthrough
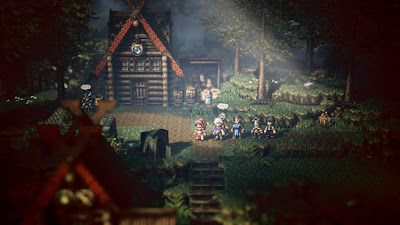
The final section of Cyrus' story takes place in Duskbarrow, a small, log cabin settlement in the northwest of Orsterra. To reach Duskbarrow you need to head north of Victors Hollow to the East Duskbarrow Trail. Follow it west and you'll be in Duskbarrow in no time, assuming you can survive the higher-level enemies along the way.
Duskbarrow exists for Cyrus' final chapter, so the chances are good you've never come this way before. Let's have a quick look around the settlement before we begin Cyrus' chapter:
- There's an Elderly Woman right at the entrance of Duskbarrow who has a Sturdy Sapphire Rod and a Refreshing Jam to Purchase / Steal. You can also Scrutinize / Inquire her for the More Plentiful Provisions info.
- To the right of the General Store is an Obliging Merchant who will give you a Side Story. He has an Old Coin and a Curious Antique to Purchase / Steal. To the left of the General Store is a Smirking Townsperson who has a Marvelous Memento, which is a key item in a Side Story.
- In the middle of Duskbarrow is the remains of a stone structure. A purple chest on the cobblestones central contains 30,000 leaves, and a chest down and to the left of the main altar contains a Bottle of Poison Dust. The Village Headman standing near the purple chest has a Tough Nut (M) to Purchase / Steal. He'll also give you the Discount at the Inn info if Scrutinized / Inquired.
- There's a cabin on the west side of town that's blocked by a Villager. She has a Viper Dagger to Purchase / Steal, and doing so is highly recommended. Inquire / Scrutinize her and an Improved Bow of the Eagle will appear inside her house. If you Challenge / Provoke her you'll find her a powerful opponent, though she doesn't throw any major curveballs besides the ability to confuse your character. Knock her out to gain access to her home.
- North of the western cabin is a chest that contains a Curious Antique.
That's all for Duskbarrow. Yep, pretty small. Head to the Tavern and speak to the Tavern Keeper. Choose Hear a Tale to begin Cyrus' chapter.
After defeating his former headmaster in combat, Cyrus has finished his journey in Duskbarrow, trying to figure out who manipulated Yvon. It doesn't take long before Cyrus figures it out, as Yvon's assistant, Lucia, is loitering nearby. Follow her to the conspicuous stone door to the left of the Inn and Cyrus will be stumped, as Lucia has vanished. Gee, wonder where she went.
Pressing the button on the door does no good, though if you decide not to push it when prompted you'll receive another option instead, to pull it. Turn this down as well to receive three more options, then choose to twist the button. This will open the door, revealing the path to the Ruins of Eld. Dungeon already? Sounds good.
Befitting the end of Cyrus' story, the enemies within the Ruins of Eld lean towards elemental attacks, and Cyrus will find himself a bit outclasses if he doesn't bring a few characters with martial classes along for the ride. Warriors in particular are quite useful. You'll run into the following foes as you head into the Ruins of Eld:
- Vampire Bat - Weak to Sword, Polearm, Bow, and Ice. Can suck out health and put your party to sleep. Easy to knock out, so do it quickly.
- Sentinel Mk.II - Weak to Sword, Polearm, Axe, Bow, and Staff. Can buff its party and attack normally, but is at its most dangerous when it blows itself up. Pretty easy to stun.
- Guardian Mk.II - Weak to Sword, Polearm, Dagger, and Bow. More or less a stronger version of the Sentinel Mk.II, but stronger and harder to kill.
- Curator Mk.II - Weak to Polearm, Dagger, and Bow. A more magically-inclined version of the Sentinel Mk.II.
- Wind Sentinel Mk.II - Weak to Sword, Polearm, Axe, Staff, and Lightning. Favors Wind Skills, unsurprisingly. Very easy to stun in large groups.
- Wind Guardian Mk.II - Weak to Sword, Dagger, Bow, and Lightning. Melee-oriented Wind user. Tough, but not terrible.
- Wind Curator Mk.II - Weak to Polearm, Bow, and Lightning. Another Wind lover. Stun and kill.
Head west from the entrance. Neither of the doorways ahead contain anything of value, so stay on the main path as it leads you north. Skim along the right side of the path and you'll find a hidden passage leading to a purple chest. It contains a Rune Bow. Up the next set of stairs the path will split, and if you go into the room on your left you'll find a chest containing a Refreshing Jam.
Head up the next set of stairs, then check down the stairs on the right for a Shadow Soulstone (L). The primary path is up the stairs on the right, though there's more to see along other paths first. Check in the lit spot to the north to find a chest containing 20,000 leaves, then swing left at the torch. You'll find a path leading south to the next area, where new enemies abound. This particular spot is a dead end, but you'll find a purple chest containing 50,000 leaves.
Return to the previous area and take the eastern stairs up, following the path of the torches. Head east and you'll eventually hit a cut scene where Cyrus checks out a large wall fresco. Seems important, but Cyrus has things to do. Check behind the fallen pillar to the left of the fresco for a well-hidden chest containing a Vivifying Stone once the cut scene is done, then carry on east. You'll find a save point in front of a large, obvious doorway. All the way east of here you'll find stairs, again leading to the second half of the ruins, and you'll find a chest containing a Void Amulet in a nearby room. Another dead end.
Through the doorway by the save point you'll make a more official entrance into the second half of the Ruins of Eld, where you'll start running into the following new enemies:
- Blood Revenant - Weak to Sword, Bow, Staff, and Ice. Substantial melee enemy that will buff itself and then hit you with some harsh attacks. Get these stunned as promptly as you can.
- Dark Revenant - Weak to Sword, Bow, Staff, and Light. More or less the same as the Blood Revenant, though with an elemental learning towards Dark attacks.
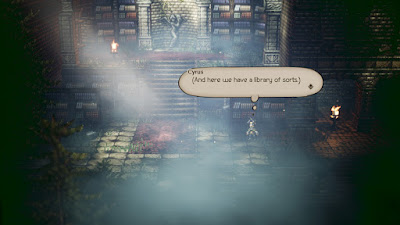
Dead ahead from the entrance to this area is a chest containing a Healing Grape Bunch. Just west of this chest is another one, in another small room, containing an Energizing Pomegranate (L). A short walk west of this second room Cyrus will discover a library, filled with books long thought lost. The path forward is through the top-left wall of the library, near the statue.
Down the next set of stairs and on your right is a chest containing an Ice Soulstone (L). You'll similarly find another chest down the next next set of stairs and on your right, this one containing a Knight's Shield. This is the final chest you can find in the Ruins of Eld, so carry on west and north until you find a save point. Your final destination is just up the ominous set of stairs to the north. Lucia is waiting up here, and Cyrus gives her a rather brutal estimation of her academic sensibilities. She's not impressed. Battle on!
Lucia
Weakness: Sword, Polearm, Dagger, Axe, Bow or Fire, Ice, Lightning, Wind, Light or Sword, Axe, Lightning, Light
Jeez. This is a tough, somewhat-complicated-but-not-really-complicated battle. Unlike most boss battles in Octopath Traveler, which are split into more or less two phases of action, this one contains three very distinct sections:
- During the first section Lucia will gain thirty defensive shields. Geez. During this time she'll only be vulnerable to melee Skills, and will only use melee Skills herself. All of her attacks do a fair amount of damage, though Wallop also can inflict unconsciousness, while Pulverize will drain the target of all of its BP. Woof. Moves like Rain of Arrows and Thousand Spears are great here.
- Once you break Lucia she'll gain fifteen defensive shields, and her weaknesses will shift to all elements. At this point she'll use physical and elemental Skills. Notable are Shadow Slash, which can inflict silence, and Shatter Soul, which will decimate the target's SP. Very annoying. Cyrus shines during this section, as does anyone with Scholar or Sorcerer as their job.
- Break Lucia again and she'll move to eight defensive shields, and the third, more balanced set of weaknesses. This round is sort of a compromise between the other two rounds, focusing primarily on physical attacks and giving Lucia three moves per round. One of those moves will always be health regeneration, giving Lucia back some of her HP. During this time Lucia will go into Boost mode, and if she's not stopped she'll use Almighty Curse, reducing everyone's HP to one while giving Lucia a huge health boost.
Given the physical nature of Lucia's attacks both Shackle Foe (Thief) and Hired Help - Mercenary (Merchant) are great Skills for this fight, as they'll prevent her from doing too much damage. Otherwise the battle is pretty straightforward, though for the first two sections you'll be horribly exposed given how many defensive shields you'll need to cut through. Though Lucia is more dangerous in the third section this is perhaps the easiest part of the fight, as getting through eight defensive shields - assuming you've saved up some BP - is pretty easy. So long as you can consistently heal up your party and prevent Lucia from using Almighty Curse the fight shouldn't go too badly.
You'll receive an Energizing Pomegranate (L) for defeating Lucia. Cyrus will locate the missing tome in the aftermath of the battle, though now he needs to check out the tomes for himself. Return to the library with the statue from earlier and check out the bank of books in the top-right corner of the room, as well as the two marked shelves on the lower floor. You'll receive the High Hornburgian Dictionary from the upper shield, allowing you to Scrutinize the other shelves for the Forbidden Gold info and the Trial of the Twelve, Volume VII info. Return to the spot where you fought Lucia and Scrutinize From the Far Reaches of Hell for the info of the same name.
Almost done. Return to the first area of the Ruins of Eld and Scrutinize the wall mural. You'll receive The Mural's Meaning, which is... dire, to say the least. You'll now have to perform one last quiz. Choose 'Sealed power away beyond the edge of the world' and 'The Power of life and death' to give Cyrus what he needs to finish deciphering the mural. Choose 'A warning' when prompted to finish up Cyrus' investigation, and he'll be zipped back to Atlasdam, back where it all began. Story complete.
... though there's one last thing you should do before you head elsewhere. Go to the Royal Academy of Atlasdam. Now that the chapter's complete you'll find Therese on the ground floor. You can Purchase / Steal a Slippery Nut (M) and an Elemental Augmentor from her.
Main Walkthrough


