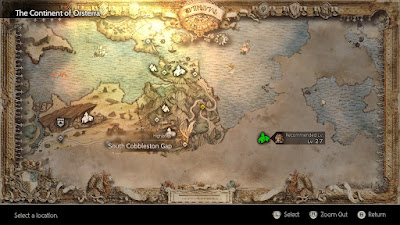
A rocky path linking grasslands to a vast desert, the Cobbleston Gap is home to the remote village of roughly the same name. If you start your game as Olberic you'll become familiar with this area first and foremost. We'll start off this guide assuming you just left Cobbleston, and check out both the south and the north of Cobbleston Gap.
This is a rough land, so it stands to reason that there would be rough enemies to go along with it:
- Highland Ratkin I - Weak to Sword, Dagger, Bow, and Light. A simple enemy that will fall to Olberic's sword.
- Highland Ratkin II - Weak to Sword, Dagger, Bow, and Light. A stronger version of the Highland Ratkin I. No sweat.
- Highland Ratkin III - Weak to Polearm, Bow, and Dark. Another version of the Ratkin with fewer weaknesses and the ability to buff itself. Can use Silencing Slash to lock away your Skills for a few turns. Switch to Olberic's spear for the best results.
- Rockadillo - Weak to Sword, Axe, and Dark. A sturdy beast that can do decent damage with Body Bash. Use Boosted sword attacks to pick it apart.
- Giant Falcon - Weak to Polearm, Dagger, Bow, Wind, and Dark. Fairly basic enemy that can use Wind Slash on one target. Olberic's spear will bring one down.
- Dread Falcon - Weak to Polearm, Dagger, Bow, Wind, and Dark. A stronger version of the Giant Falcon that can also use Thousand Scythes, a version of Wind Slash that hits the whole party instead. Spears are still your best friend.
- Highland Goat - Weak to Sword, Polearm, and Light. A beefy, powerful foe that can clobber a single character pretty easily if not kept stunned. Use sword and spear attacks to break the Highland Goat until you've taken care the rest of its entourage.
South Cobbleston Gap
As with every character's starting town, when you first leave Cobbleston you'll see a young man at the side of the road. He's been injured, and needs a Healing Grape. Hand one over and he'll identify himself as Kit. He's on a trip to find his father. Helping him out here will complete the Kit, the Traveler Side Story and earn you 1,500 leaves. Not a bad start.
Just south of the save point the path will split in two directions. Go south and you'll pass under a rocky archway. Just beyond it and on your left is a chest containing an Herb of Clamor. Trek east from here and you'll find a split in the path. Go south from here and the path will wind to the west. Once you see sand on your left, check to the right to find a chest containing an Herb of Awakening. If you continue walking to the west you'll reach the Eastern Sunshade Sands.
Return to the intersection and take a right. The northbound path ahead will take you back to Cobbleston, while the southbound path leads to a three-way split. Walk onto the grass to the south, then check to the right for a Healing Grape and to the left for a path through the rocks that leads to a purple chest containing 1,000 leaves. Follow the road to the north to find a chest containing an Olive of Life on the left side and the path to North Cobbleston Gap.
North Cobbleston Gap
There's a save point straight ahead when you enter this area. Use it and head south. Follow the eastbound path and you'll see a side path covered in grass about halfway along. It leads to a Healing Grape that's sitting out in the open, as well as a hidden path on the left that will take you to a purple chest. Inside is a Magic Nut.
The path veers south if you continue east. Check along the rocks to your right to find a side path leading to an Inspiriting Plum in a chest. To the right of the chest is a cave entrance that will take you into the Untouched Sanctum, a Danger Level 15 beginner's dungeon. This is a great place to earn some levels before taking on the 'outer' areas of Orsterra.
To the south of the main path you'll come to a road sign and a crossroads. If you go west from here you'll wind up at the North Stonegard Pass. To the south is a chest containing 1,200 leaves, as well as the bridge to the East Rippletide Coast. Check nearby for a chest containing a Light Soulstone before you leave the area.


