H'aanit's third step towards returning her master safely home will take you to Stillsnow, an icy town in the far north of Orsterra. Your path there is via the East Victors Hollow Trail, north of the West S'warkii Trail, on the west side of Orsterra. Trek steadily east through the Western Stillsnow Wilds to reach Stillsnow.
There's a decent chance you've come to Stillsnow before, as Primrose's second chapter takes place in the chilly village. If not, you should have a look around before you get started on H'aanit's chapter:
- In the northeast of town is a luxurious-looking home. Inside is a chest containing an Inspiriting Plum. Right next to this house is a path north to the Trail to the Whitewood, your destination during H'aanit's chapter.
- Next to the opulent house is a chapel. Inside is a chest containing a Healing Grape (M). The Cleric who runs the chapel has a Jaguar Lance that's worth Stealing / Purchasing.
- Next to the chapel is a home guarded by a Townsperson who won't let you inside. You can Steal / Purchase a Horned Helm, a Spiked Armor, and a Spiked Shield from her. Challenge / Provoke her and you'll receive a Spirit Sword for winning the fight. Inside the house is a chest containing a Swordbreaker.
- Follow the southern path east through Stillsnow to find the Tavern. Inside is a chest containing an Olive of Life. The Ingenious Inventor in here has an Empowering Ring that's worth Stealing / Purchasing. The Pensive Girl just outside the Tavern has a Crescent Dagger that you can Steal / Purchase.
- In the east of town is a house with a Shadow Soulstone (M) inside. The Dancer here has a Forbidden Dagger that is massively expensive to Purchase (72,000 leaves!) and nigh impossible to Steal early on, but you should keep her in mind for later. The Old Man out front has a Bishop's Hat that is much easier to Steal / Purchase.
That's all for Stillsnow. Time to see if H'aanit can do something about her petrified master. Head to the Tavern and speak to the Tavern Keeper, then choose Hear a Tale to trigger H'aanit's chapter.
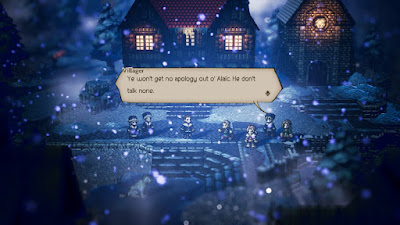
H'aanit's chapter begins with a bit of levity, as Linde, her snow leopard companion, seems very happy to be back in her native climate. She attracts the attention of some kids, and they tell H'aanit about Susanna, the woman Z'aanta bid H'aanit to find. She lives in a large house with a red roof, just to the north, and there's a crowd gathered out front. Susanna appears to be popular, though her bodyguard, Alaic, keeps most people from going in to see her.
H'aanit only has one option: Provoke. Challenge Alaic to a battle and he'll prove a decent foe, though not that difficult. He's weak to Sword, Polearm, Dagger, Staff, and Dark, and even if you only have Linde available you can hit his weaknesses every time. Once the battle is over Susanna will reveal that she's no oracle, but she can help H'aanit nonetheless. The only way to free Z'aanta is to kill the creature who petrified him in the first place - and the only way for H'aanit to protect herself from Redeye's gaze is a plant called Herb-of-Grace. It can be found nearby, in the Whitewood.
Heal up H'aanit, then head for the Trail to the Whitewood. You'll need to circumvent this little area before you can reach the Whitewood itself.
Trail to the Whitewood
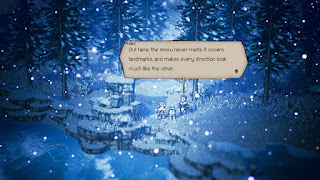
A breezy path through the wilderness, the Trail to the Whitewood is subjected to constant, near-whiteout conditions at all times. Fun stuff. You'll run into the following foes as you wander through the area:
- Majestic Snow Marmot - Weak to Dagger, Lightning, and Dark. Can silence your party members. Worth killing early since they don't have a ton of health.
- Hoary Bear - Weak to Polearm, Axe, and Wind. Powerful foe that buffs itself, then mauls your team. Can also use Horrific Claw to inflict terror and lock away your Boosting. Stun these things first and foremost or you'll soon be in trouble.
- Snow Leopard - Weak to Bow, Fire, and Dark. Linde? Mainly annoying because they can heal other enemies with Grooming. Has high defense, so magic Skills are probably your best bet.
- Ice Elemental - Weak to Fire and Lightning. Uses Ice Skills, and has high physical defenses. A pain in the butt if you can't target their defenses with a Scholar, though H'aanit at least has Thunderbird to do some decent damage.
- Hoary Howler - Weak to Sword, Polearm, Bow, and Wind. Nasty owl that can put your party members to sleep. Not a huge menace, and fairly easy to stun to boot.
- Snow Lizard - Weak to Bow, Lightning, and Dark. Quite rare enemy that can buff its speed and has some other fairly standard attacks. The chances that you'll see one are pretty small.
- Winter Wanderweed - Weak to Sword and Wind. Can put party members to sleep, and can inflict a fair amount of Ice damage to boot. Worth targeting first.
- Frostwing Serpent - Weak to Polearm, Bow, Fire, and Wind. Nasty creature that can poison you and hit the whole party with Wind damage. They are, fortunately, on the rarer side, and easy to stun.
- Avalance Mushroom - Weak to Dagger, Fire, and Lightning. High HP enemy that can do a lot of harm to your party - silence and sleep are two painful contenders - though it's very easy to stun. Do your best to keep it that way.


