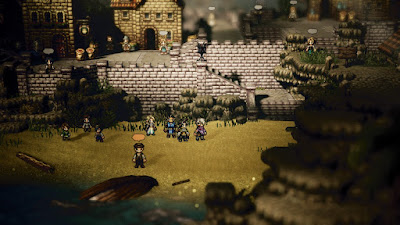
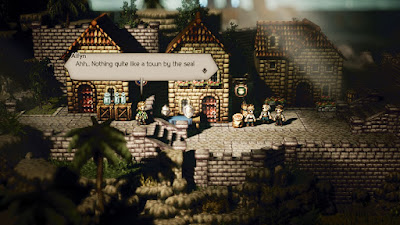
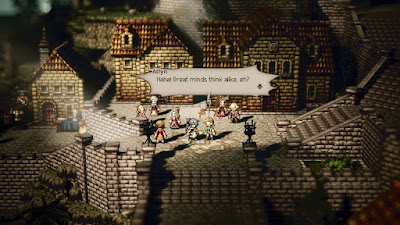
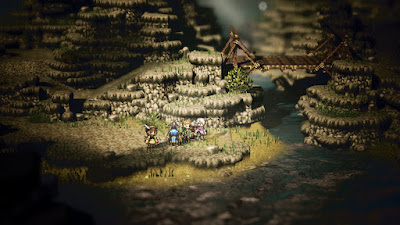
The second step on Alfyn's journey takes place in Goldshore, in the far northeast of Orsterra. To reach this remote (yet popular) port town you'll need to travel south from Rippletide to the North Cobbleston Gap, continue south to the North Stonegard Pass, head northeast to the Moonstruck Coast, and then keep traveling northeast to the West Goldshore Coast. Goldshore is east from here. (It sounds like a longer trek than it is, honestly.)
Goldshore is a location teeming with people, so you might as well have a look around before you start up Alfyn's story:
- The Old Man beside the Inn, right at the entrance of Goldshore, has a Dragon's Vest that you can Purchase / Steal. It's a costly, but very useful, piece of equipment.
- The Fisherman's Sweetheart out front of the third building in Goldshore has a Starlight Hat to Purchase / Steal. The house behind her has a chest containing an Inspiriting Plum. Next to this home is the bridge to Goldshore's Manor District, which we'll visit in a moment.
- There's a beach south of the bridge to the cathedral. On it is a Crest-bearing Ruffian who gloats about being strong, and if you Challenge / Provoke him he's certainly no slouch. Beat him and you'll earn a Mercenary Crest that's part of a Side Story.
- The Tavern is to the right of the bridge leading north through Goldshore. There's a chest hidden behind the tree on the left side of the Tavern that contains a Thunder Soulstone (M). The Townsperson out front of the Tavern gives the Discount at the Inn info when Inquired / Scrutinized. Look inside the Tavern, in the bottom-right corner, for a chest containing an Olive of Life.
- The Elderly Woman standing near the bridge to the Manor District will reveal a hidden Copper-filled Pouch near the Provisioner if you Inquire / Scrutinize her.
- The Townsperson standing at the entrance to the district has the Guide with Ease info if you Inquire / Scrutinize him.
- On the left side of the Manor District is the Armorer. The Stonemonger out front holds an Orewell Whetstone that you can Steal / Purchase as part of a Side Story.
- Just down the road from the save point is a Fledgling Fisherman who is part of a Side Story. He holds a Leviathan Egg that you can Steal / Purchase.
- Up the stairs from the save point you'll find a chest containing 4,500 leaves. The Townsperson standing in front of the nearby house has a Copper-filled Purse that you can Steal / Purchase. Get him out of the way - Challenge / Provoke work nicely, as the Townsperson is quite weak - and you'll find an Old Man inside. You can Steal / Purchase three Cat's Eyes from him, each worth 20,000 leaves if sold. Yeesh. He is very powerful if Challenged / Provoked, and doesn't drop anything great for your trouble.
- In the northeast of the Manor District is a mansion with a chest outside containing an Herb of Clamor.
- There are three NPCs out front of the Goldshore Cathedral with good items to Steal / Purchase, though best among them are the Wizard's Rod from the woman on the left and the Imperial Armor from the Knight Ardante. Check behind the trees on the left side of the cathedral to find a hidden chest containing an Energizing Pomegranate (M).
One last stop:
- The Cleric standing right near the entrance of the Cathedral will teach you the New Weapons for Sale info if Scrutinized / Inquired.
- The Cleric standing near the candlelit altar has an Inspiriting Plum Basket to Steal / Purchase.
- There's an Olive of Life in a chest between the columns on the right side of the cathedral. If you look to the right of the Sacred Flame in the north of the cathedral you'll find a chest containing an Herb of Light.
- There's an Inspiriting Plum Basket in the room on the left side of the cathedral
That's all for looking around. Time to check out what Alfyn has planned for Goldshore. If you ignored his chapter prompt earlier, you can trigger it again by speaking to the Tavern Keeper and choosing Hear a Tale.
Alfyn's Chapter
Alfyn treks first to Goldshore, hoping to ply his trade pro bono. Just in time, too, as a group of townsfolk immediately begin to talk about a fever going around - and another Apothecary who is already on the case. A little girl then rushes in, scrapes her knee, and asks Alfyn to tend to her sister in the nearby house. He's too late, however, as the other Apothecary has already come and gone, and seems just as generous as him. Shame the mom is a total jerk.
(Before you leave, check Ellen, the little girl. She has a Tough Nut (L) that you can Purchase / Steal.)
Head into Goldshore Manor District. The Traveling Apothecary is here - her name is Vanessa - and while she seems nice, there's just something a little off about her. Head to the beach after speaking to Vanessa and Alfyn will spot Ellen again, and they'll share a cute moment.
Head back to Goldshore Manor District and check up the stairs on the right from the bridge. Vanessa is again surrounded by admirers, and this time she's charging a ridiculous amount for her curative tonics. She also stiffs Ellen's mother, Marlene, though Alfyn jumps to the rescue - and quickly realizes that Vanessa has been poisoning people so she can sell them a cure. Alfyn needs a glowing blue moss to cure the daughter's malady.
Check outside the Tavern. There's a Coachman here who knows Vanessa's Destination if Alfyn Inquires. Next, head to Goldshore Manor District and speak to the Aristocrat outside the northeast manor. (If you knocked him out you'll need to leave town and come back.) Inquire him to learn about Gossip of Glowworm Moss. Alyfn will conclude that Vanessa has headed to the Caves of Azure, to the east of Goldshore. Gather an adventuring party and leave Goldshore to the east.
As per usual, the road to the dungeon is fraught with almost as much peril as the dungeon itself. You'll run into the following monsters on the Road to the Caves of Azure:
- Sea Birdian VI - Weak to Sword, Fire, and Wind. Can use Befuddling Arrow to confuse a target. Otherwise nothing terribly special. Trade Tempest is your best bet for stunning them, as most of the enemies in the area are weak to Wind.
- Sea Birdking I - Weak to Polearm, Axe, Bow, and Lightning. Boosts its party and smacks yours around, both one-at-a-time and simultaneously. Pretty dangerous, and worth stunning early in a match so you can deal with the mooks first.
- Rock Tortoise - Weak to Sword and Wind. Buffs itself and hits relatively hard, but is slow and doesn't have much health. Pretty easy compared to other enemies here.
- Scissor Crab - Weak to Dagger, Axe, and Wind. Can poison your characters, but usually just attacks. The least of the threats in this area.
Alfyn's destination, the Caves of Azure are teeming with beasties that want to rip you to shreds before you can right Vanessa's wrongs. You'll run into the following monsters within:
- Buccaneer III - Weak to Polearm, Bow, Lightning, and Light. Can poison a character, otherwise uses standard melee Skills.
- Buccaneer IV - Weak to Polearm, Bow, Lightning, and Light. Can confuse a character, otherwise uses standard melee Skills. Basically an upgraded Buccaneer III, as confused characters are very annoying.
- Sea Slug - Weak to Fire, Wind, and Dark. Aside from physical Skills it uses Blinding Cloud to lower everyone's accuracy, and will occasionally use Hydration to restore its own health. Having all-elemental weaknesses makes these things a bit of a pain.
- Barnacle Bat - Weak to Sword, Polearm, Bow, and Lightning. Can put one or more characters to sleep, as well as refill its health with Drink Blood. Slumberwave alone makes killing Barnacle Bats a priority.
- Barnacle Crab - Weak to Dagger, Axe, and Wind. Can use Toxic Breath to poison your characters, but is otherwise a minor nuisance.
- Barnacle Tortoise - Weak to Sword, Axe, and Wind. Basically the same as the Rock Tortoises you fought in the previous area, just with an additional weakness.
Trek inside until you come to a save point. The path branches in multiple directions. Go southwest from the save point to find a chest containing Purifying Dust, then look north of the save point to find a purple chest containing a Falcon Garb. Follow the northern path to the east until you see a few plants. There's a path behind these plants leading up to another purple chest. This one contains Spiked Armor.
The path will lead you south and join up with the rest of the cavern that you skipped. Check the southeastern corner for a chest containing Ruinous Dust, then head north towards the save point. Vanessa is just past here, and she's not willing to give up on her scam without a fight.
Weakness: Polearm, Axe, Fire, Wind, Dark
Weakness (Sellswords): Sword, Bow, Ice, Light
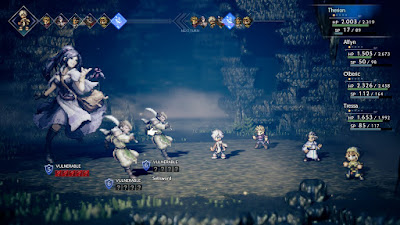
Befitting her foul attitude, Vanessa fights nasty. Aside from hitting your characters with single-target attacks and the all-hitting Concoct Explosive, Vanessa can both put characters to sleep and inflict poison. She's also protected by two Sellswords who will keep you from targeting her weaknesses, and once they're gone she can bring them back once and seal off her weaknesses again. The Sellswords are pretty basic enemies, hitting either one or all members of your party, but they're more than enough to put your characters down if you're not careful, especially if Vanessa buffs everyone with Concoct Stimulant (and she will).
The key to this fight is getting rid of Vanessa's Sellswords. She has some painful attacks, but on her own Vanessa is not terribly dangerous. Power your way through one of the Sellswords as best you can and the second won't take that long to defeat. Have Alfyn cure anyone who's put to sleep or poisoned in the process. Once both Sellswords are gone, lay all your attacks in Vanessa, breaking her flimsy five shields of defense before she can revive her Sellswords. If your attacks are strong enough - and if you're lucky - you can get through the fight without Vanessa bringing the Sellswords back. If not, well, stun them quickly and begin the process over. It takes a while, but it's not that difficult a fight compared to some of the other bosses in Octopath Traveler.
You'll earn an Olive of Life (L) for defeating Vanessa. Alfyn will prove that he's no chump in the aftermath of the battle, and you'll be shot back to Goldshore. Visit Ellen's home and Alfyn will wrap things up nicely. Sniff. Next stop: Saintsbridge.

