 |
| Final Fantasy VI copyright Square Enix. Images used for educational purposes only. |
Cyan's Dream - Train Enemies
Cyan's Dream - Mines Enemies
Cyan's Dream - Doma Castle Enemies
Important Note: This dungeon is a slight point of no return. Once you enter, you must complete it before you’re allowed to leave again. Make a separate save file outside Doma Castle, just in case you get stuck or find it too difficult. (Though it’s really not that bad.) You also don’t get to buy items in this place, so you should purchase a bunch of Tents and Phoenix Downs before entering.
Put Cyan and three other powerful party members into your team, then fly to Doma Castle. It’s on a solitary island in the northeast of the World of Ruin. Look inside the main building for a room where your party can sleep, through the two doors to the south of the throne room. Doing so will put you in a cut scene that chucks Cyan out of your party...
... and shoves everyone else into his head, courtesy of three pint-sized demons. You’re now stripped of two of your members and left with only one in a strange dream dungeon. Your first goal is to get the other two team members back. This area has enemies who aren’t terribly tough, but you should still consider running from battle with your solo character unless they're very strong. Smoke Bombs and / or Teleport Stones can also save them from danger.
You start off by a save point. Use it, then walk over to the three doors on your left. Go through the right door, then the next right door. This brings you to another party member. Wake them up, then go through the nearest door on your left. Pass through the next nearest door, on your right, to pop back to the save point.
This puts you back at the three doors. The left door takes you to the third party member. Collect them for a semi-full team, then go through the door in the north. Take the next northern door to loop, eventually, back to the save point.
Three doors! Go through the central door this time. It leads to a long, northwestern staircase up to a door that stands out from the rest. Slip through and head south to find one final door. Approaching it brings the three demons responsible for this place out to play.
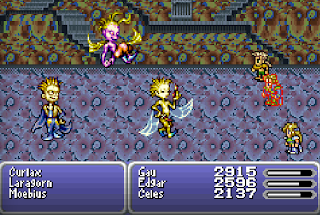
Curlax, Laragorn, and Moebius
HP:
- 15,000 (Curlax)
- 10,000 (Laragorn)
- 12,500 (Moebius)
Weakness:
- Ice, Water (Curlax)
- Fire (Laragorn)
The Three Dream Stooges! Curlax, Laragorn, and Moebius are here to stop you from getting any deeper into Cyan's subconscious, and they're a powerful roadblock if you approach this battle blindly. They use the following attacks:
- Normal physical attacks (all)
- Delta Attack, a combo move that always Petrifies its target (all combined)
- Reflect, which bounces spells back at your party (all
- Slow, Silence, Stop, all status-changing spells (Curlax)
- White Wind, a healing spell for their whole party (Curlax)
- Arise, a reviving spell that fully restores one of the other two demons (Curlax)
- Blizzara / Blizzaga, Ice spells (Laragorn)
- Thundara / Thundaga, Lightning spells (Moebius)
- Haste, Shell, Protect, all status-changing spells (Moebius)
- Cura, a healing spell (Moebius)
The three demons each rely on elemental attacks of moderate strength, and when all three are alive they can use Delta Attack, which unfailingly Petrifies one character. If you use spells too often on the demons they will use Reflect on themselves, preventing further magic attacks unless you bounce spells off of your own characters with Reflect. If you defeat the other two first, Curlax uses Arise to bring them back.
Concentrate on Curlax (the floating brother) first, smashing him with Ice moves. Curlax must be destroyed first, or he'll just keep using Arise. Moebius (the brother in the front) goes next, as he likes to heal and otherwise buff his team. You can bring him down with any attack that’s not Lightning-elemental. Laragorn tends towards Ice magic, and you can take him out with Fire attacks. The remaining Dream Stooge may run away if he's left on his own.
Defeating the Dream Stooges grants you access to the door they were guarding. It will take you to a recreation of the Phantom Train, drenched in a sort of olive-green hue. The enemies here are different, tending more to Lightning-based attacks, though they’re not much tougher than what you faced previously. The most aggravating element of this area will be dealing with Imp status, so hopefully you brought along White Capes or Ribbons.
Head west to find a save point, then further west to the second car. There’s a bit of a puzzle inside. Hit the switch on your left to move a box in front of a nearby chest, then quickly run south, west, north, and around the seats beside the chest before the box can move back into place. The chest contains a Genji Glove.
To the west in this car is a closed chest, jealously guarded by an open chest. You can’t get by just yet. Also here are six chests. Pull the switch on the western wall, note the chests that close as a result, and check the chest beside the exit. It contains a Lump of Metal. Use this on the moving chest to get at the normal chest in the back. It contains a Flame Shield.
- Pull the switch furthest to the west
- Move back to the eastern switch and flip it again
- Flip the middle switch that was previously blocked
- Hit the eastern switch
- Hit the western switch again
This opens a path to a clearing with six open chests. Close them in the same pattern as you saw in the previous car (noted in the picture above) to open the way through the wall blocking the exit.
The engine of the train’s ahead. Save in the final car, then enter the engine. When you try to leave you’ll be warped again.
Take some time to beat all three enemy types here (Pluto Armor, Schmidt, Io), as you’ll never see them outside this area. That done, wander through the mines until you appear at the south end of a winding, northbound pathway. Turn back and go through the door you just came through. This will take you to a bridge. Try to cross...
... aaaaand you’re dropped into Doma Castle. A cut scene follows, followed by the appearance of a save point. Use it. You can now wander Doma Castle and watch a few flashbacks regarding Cyan and his family (check the east and west sides of the courtyard, and Cyan’s room), though your ultimate destination is the throne room, next door to Cyan's room. There's a boss waiting, so make sure you're healed up and ready to fight.
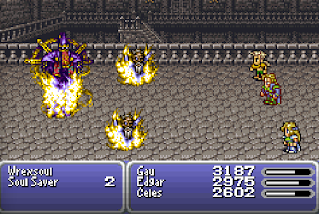
Wrexsoul
HP:
- 23,066 (Wrexsoul)
- 3,066 (Soul Saver)
Weakness: Ice (Wrexsoul, Soul Saver)
Absorbs:
- Fire, Holy (Wrexsoul)
- Holy (Soul Saver)
Drops: Guard Bracelet
The root of Cyan's troubles finally comes out to play. Wrexsoul uses the following attacks:
- Normal melee attacks
- Doom Strike, which inflicts a Doom countdown timer on one target (Wrexsoul)
- Thundaga, a Lightning spell (Wrexsoul)
- Fury, which sends Wrexsoul into one of your characters (Wrexsoul)
- Magic Drain, which saps one character's MP (Soul Savers)
- Firaga / Blizzaga / Thundaga, elemental spells (Soul Savers)
- Cure, a restorative spell (Soul Savers)
- Reflect, which bounces spells back at your party (Soul Savers)
This battle isn’t difficult, but it’s quite annoying. Aided by a pair of Soul Savers, Wrexsoul begins by using his Fury ability to possess one of your characters. He’ll then disappear. He won’t control or otherwise damage the possessed character, but as long as Wrexsoul is in hiding you can’t hurt him. In the meantime the Soul Savers will use third tier magic to do damage. Their magic stats are so low that they can’t hurt you much, but this still gets rather annoying after a while.
There are two ways to defeat Wrexsoul:
- The hard way is to KO / Petrify / Zombify your characters until Wrexsoul reappears. Once he does, launch powerful physical attacks at the thing, preferably with an emphasis on Ice-elemental attacks. You can use magic as well, but Wrexsoul has such a high defenses against magic that there’s not much point. Avoid Fire or Holy, as Wrexsoul absorbs both. You’ll have to repeat the kill-and-revive process a few times before Wrexsoul dies for good. You’ll receive a Guard Bracelet if you beat Wrexsoul this way.
- The easy way is to use the Banish spell once Wrexsoul disappears. Killing the Soul Savers normally will only result in their immediate resurrection, but if you’re a little lucky Banish destroys the Soul Savers for good. With all enemies off the field the battle ends, though you don't get the Guard Bracelet.
Wrexsoul’s defeat ends in a cut scene that earns you the Masamune. Cyan will also receive every Bushido tier he hasn’t already learned through simple leveling. Check out Doma Castle's throne room once you’re back in control and you’ll be rewarded with one final prize: The Alexander magicite.


-240214-131230.png)