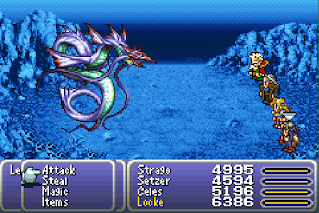
In its later incarnations (GBA onward), Final Fantasy VI included several extra bonuses. Among them were four brand-new Espers, available upon acquiring the Falcon in the World of Ruin. The four Espers - and the Magicite they yield - are all quite powerful, and worth the time to hunt down and defeat.
 |
Leviathan
HP: 32,000
The first of the extra Espers you’ll find, and possibly the easiest to obtain - though not necessarily easy. Leviathan appears to attack you if you attempt to take the ferry between Nikeah and South Figaro after obtaining the Falcon.
Leviathan uses the following attacks:
- Normal physical attacks
- Entangle, a single-target attack that inflicts Slow
- Aqua Breath / Tsunami / El Niño, Water attacks that hit your whole party
The majority of Leviathan's most devastating attacks are Water-based, and hit everyone in your party. If you have equipment that can block or absorb Water, this is the battle to use it. Otherwise, have one person heal - Curaga is a safe bet for keeping the whole party safe - while the others battle Leviathan with your strongest non-Water attacks. Nothing fancy needed, just brute force.
You'll receive the Leviathan Magicite for defeating Leviathan. If you brought Strago along he can learn Tsunami from Leviathan. This is the only battle where Mog can learn the Water Harmony Dance in the World of Ruin, so if you didn't pick that Dance up in the World of Balance you should bring Mog along.
Cactuar (Gigantuar)
HP: 30,000
Immune: Fire
To obtain Cactuar you must defeat the Gigantuar, found in the desert near Maranda after you’ve defeated enough Cactuars (tenish). This epic beast only appears in the southwestern portion of the desert, amid Slag Worms and normal Cactuars, and is quite powerful.
Gigantuar uses the following attacks:
- Normal physical attacks
- Knockdown, a much stronger physical attack
- 1000 Needles, which inflicts 1,000 HP of damage to a single target
Gigantuar emulates normal Cactuars by using 1,000 Needles, but will also ratches up the pain by using this attack multiple times. This, alongside Knockdown, can cause a lot of pain for your party.
Gigantuar can only be hit by moves that cannot miss, meaning special attacks (Throw, Tools, Blitz) and spells such as Flare and Ultima. Nothing else works. As Gigantuar dies it will use 1000 Needles ten times on your party, moving from character to character, so you need at least 10,000 health collectively - or a way to completely avoid the attack - to get through this fight. Someone should be healing your party at all times.
You'll receive the Cactuar Magicite for defeating Gigantuar.
Gilgamesh
HP: 38,000
Gilgamesh is found at the Dragon's Neck Coliseum, but you need something else before you can lure him out to play. Head to Jidoor’s Auction House and you’ll see an auction for Excalipoor. Purchase it for 500,000 gil (ouch), then bet it at the coliseum to fight an Onion Dasher for a Merit Award. Gilgamesh attacks in the aftermath.
Gilgamesh uses the following attacks:
- Normal melee attacks
- Jump, which takes Gilgamesh off of the screen, landing on a single target a round or two later
- Blade Dance, a stronger physical attack
- Throw, hurling a powerful weapon and often OHKOing his target
- 1000 Needles, a spell that always inflicts 1,000 HP of damage to a single target
- Aero, a Wind spell against your whole party
- Revenge Blast, a single-target spell that inflicts damage equal to the difference between Gilgamesh's current HP and his total HP
- Quasar, a non-elemental spell that hits your whole party
- Aqua Breath, a Water spell that hits your whole party
- Protect / Shell, protective spells that boost Gilgamesh's defenses
- Dischord, a debuff that cuts the level of its target, and all their stats
This isn’t an easy battle at low levels. Early in the fight Gilgamesh couples constant counterattacks with a variety of powerful spells, the most painful of which is easily Revenge Blast (after a handful of hits from you, anyway). Do enough damage and, after boosting his defenses, Gilgamesh swaps to a cycle of jumping, using a powerful normal attack called Blade Dance, and emulating Shadow’s Throw command to hit you with some powerful weapons. 9,999 damage is pretty common.
The first half of the battle is pretty standard. You can alleviate a great deal of pain in the second half by using the Vanish spell, as Gilgamesh’s attacks miss against Vanished characters. Hit him with your best attacks thereafter and bring him down before Vanish can wear off.
You'll receive the Gilgamesh Magicite for defeating Gilgamesh. You can Steal either a Genji Glove or, more rarely, a Genji Shield from Gilgamesh, and he will drop either a Genji Helm or Genji Armor when defeated. Gilgamesh uses a large number of Strago's Lores, listed above, so you may want to bring Strago along.
Diabolos
The final exclusive Esper, Diabolos, is by far the most difficult to obtain, as it’s found at the veeeeeery end of the Dragons’ Den, the longest and most difficult dungeon in the game. It’s a painful enough process that it has its own article, linked below.
Part 39: Dragons' Den (GBA and iOS only)
Part 39: Dragons' Den (GBA and iOS only)

-240212-205832.png)

