Krosse Cave - Enemies
- Alraune - 500 HP
- Armored Knight - 800 HP
- Landworm - 1,325 HP
- Slime - 1,500 HP
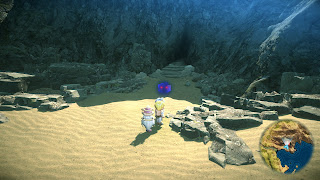
With a new character joining the party, Claude and Rena have a new objective: Explore Krosse Cave, a well-tread but dangerous cavern to the east of Krosse City. You'll find the cave by heading south of the city, crossing the first bridge you find, and then heading east on the other side. You'll wind up on a dusty path down to the front of the cave. (Don't forget to pop open the chest near the entrance, if you haven't already. It contains four Artemis Leafs.)
The enemies of Krosse Cave are not terribly dangerous, though they are a significant step up from the stuff you've faced up to now. If you're finding them too much, you should head back to Krosse and check out the Weapon Shop. Leveling on the world map is a good idea as well. As long as you keep Celine out of melee range you should be fine inside the cave. Rena can still wade into the fray if Claude needs the extra help, but you're getting to the point where she should probably stay back and heal.
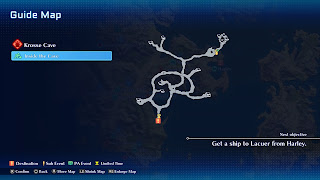
Immediately within Krosse Cave you'll find a Save Point, which you should use. North of here the path splits, though going northeast will take you to a dead end, so head northwest. The cave splits again up here, and if you take a left you'll find a small roundabout with a chest. The chest contains 1,000 FOL.
Carry on north. The next right has a chest containing Blackberries, and further north you'll find winding paths that lead east. Eventually you'll hit more crossroads. Look to the north to start and you'll find a chest containing Blueberries. Go south and you'll hit, yes, another crossroads. South of this you'll find chests containing Leather Boots and Resurrection Mist.
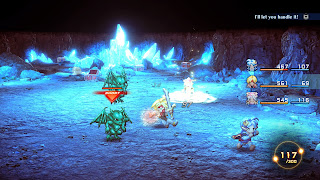
Head west. You'll find two enemies that will force you into what may be your first Chain Battle. These are forced, back-to-back (or more) battles that give you better rewards when completed. The longer the chain, the better the reward - though you don't get a break in-between. Consider avoiding Chain Battles if you're low on health, or facing a crowd of red-tinged enemies.
Beyond these two monsters is a ledge. You can leap off of it and land on a clearing you probably spotted before, if you went down the dead end path near the beginning. You can use this clearing to jump down another level and return to the entrance, assuming you're having trouble. Otherwise, head north. There are two paths you can take, and if you take the left path first you'll find a chest containing five Eggs and Dairy. (Also, many enemies. Be ready for a Chain Battle.)
Take the right path north to find another divide. If you go northwest of here you'll hit a fork in the path, both leading to purple chests. These contain Blackberries and Silver, but they will also spawn enemies at the point where the road forked. If you're up for a fight you can use these to create a potent Chain Battle and earn a lot of experience in the process.
Travel east and you'll find a red-tinged chamber with a floating rock formation. The cut scene that follows will have the characters puzzle out the way forward, revealing a path on the east side of the room. Use the Save Point, then plunge into the unknown. You'll find a room full of chests, though if you check the first chest...
Gargoyles
Yeeks, new monsters! The Gargoyles are dangerous primarily because of their high mobility. It can be tough to catch them with Claude if Rena or Celine don't use Spells to bring them down for a moment. Wait for one of the spellcasters to do their stuff, then perform as many Arts as you can on the Gargoyle that was knocked out of the sky. Keep at it until the thing is dust. Repeat the process with the second Gargoyle.
(Note that you don't have to fight the Gargoyles. Just skip the chest closest to the door.)
The rest of the chests contain the following:
- 3 Green Beryls (via the Jade Columns Unique Spot, on the right side of the room)
- A Walls of the Soul
- A Sweet Potion
- 500 FOL
- A Wood Shield+
- An Ancient Text, an AA Device, and a Laeticia Jewel
- First, Celine becomes a permanent party member. She'll stick with you until the end of the game, aside from a few short moments where the team spits up.
- Second, Celine takes up one of the eight slots in your party. This will prevent you from recruiting one of the other optional party members in Star Ocean The Second Story R... and there are a lot of them. Taking Celine now will keep someone else down the line from joining the party full-time.
- Third, this is your only chance to permanently recruit Celine. If you turn her down now you won't get another shot. (Though if you're playing as Claude she'll rejoin again for a brief time, not long from now.)


