Rosalith - Enemies
- Republican Battlehound
- Stone Commandant
- Stone Gaoler
- Stone Headsman
- Stone Scepter
- Stone Scimitar
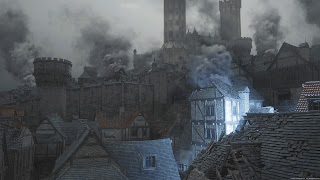
A city under siege, Rosalith has seen better days. The team chats a bit regarding the state of Clive's home, then you'll regain control. Head through the archway on your right, follow the street a little ways, then turn right. Open the gate in front of you.
Beyond here are several soldiers, and the Stone Scepter among them will cast Protect on his allies. Anyone with Protect cast - shown as a blue health bar - is protected from melee attacks. Use magic or Eikonic Abilities to wipe them out instead. Unsurprisingly, you should target any Stone Scepters first to prevent them from using Protect again.
Climb the ladder on your left. You'll find Wyrrite at the top, and the broken path ahead will force you back to street level. More soldiers will try to bar your way. On the right side of the street is a heap of rubble in the middle of the road, and you can crawl beneath it to keep going. A Stone Scepter is here with a squad of Republican Battlehounds, and when you wipe out the first wave another will arrive. Again, go after the Stone Scepter first.
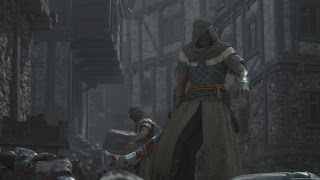
One of the streets leading out of the clearing has more rubble to pass beneath. There's a Potion on the other side, and grabbing it will put you in the sights of a Stone Headsman. The Headsman fights similarly to the Royal Tognvaldrs from Caer Norvent, with two new moves thrown in:
- Smokescreen, which creates a buff of smoke to mask a whirling melee attack from the Headsman
- Poison Mist, a stream of purple, damaging smoke
The fight is not that different from the Tognvaldrs, though the Headsman is a bit faster with his attacks. His melee strikes give you many opportunities to land Parries, specially if you activate Limit Break.
On the other side of the little square where you fight the Stone Headsman is a ladder against a building. Climb up to find stairs. Check to the left of the stairs to discover a chest containing 100 gil and ten spools of Steelsilk, then head up the steps. Snag the three Bloody Hides on the way up, and look to your left at the top for a Potion.
Push open the gate at the top of the steps. More enemies will rush you on the other side. Take them out, then check the end of the road for ten spools of Steelsilk. Backtrack to the gate and look to your right to find a path up to the castle. You'll run into a Potion and a High Potion along the way, and beside the High Potion is a chest containing The Will of Lightning (Pile Drive).
Enter the castle grounds and you'll be faced by a large number of enemies. Draw them close to the entrance and use an AOE attack to batter them. If you stick close to the gate you'll be ready for the reinforcements that show up to attack your rear, and you can immediately wipe out the Stone Scepters who start casting Protect. Be ready to fight as soon as you finish off the remaining enemies, because...
Coeurl
These guys really like their big cats. An electrical beast, the Coeurl is a more powerful variant of the Republican War Panther you fought earlier in the game. Be ready for quick, merciless attacks. The Coeurl uses the following moves:
- A quick slashing attack
- A diving charge attack
- A quick lightning blast
- An AOE spin
- Whipcrack, a dual AOE swipe of the Coeurl's whiskers that ends in a forward rush
The first phase of the battle is more or less a game of cat and mouse. The Coeurl will remain at a distance from Clive, either sending lightning blasts your way or, occasionally, sweeping in to tackle you. Whipcrack comes in if you're close enough to the Coeurl. Wait for the big cat to leap in at you, then dodge out of the way, get in a few hits, and slide back. Parrying is possible, but not recommended unless you've activated Limit Break.
Stagger the Coeurl and it will add three new attacks to its repertoire:
- Electrocharge, a long-charging attack that creates marks on the ground for small lightning strikes - if not stopped it results in an AOE charging attack that inflicts massive damage
- A trap attack where the Coeurl plants its whiskers and electrifies lines along the ground
- Wild Charge, a combo attack with lightning strikes around the field, aerial charging attacks from the Coeurl, and projectiles at the end
You'll receive a Coeurl Whisker, Sharp Fangs, and Magicked Ash for defeating the Coeurl. Alas, things don't go so well in the battle's aftermath, though thanks to Gav Clive will be freed from bondage. Clive needs to fix things, and quickly.
Rosalith Castle
Clive is alone for a little bit, here, though that won't be a problem. Leave Clive's cell and take a right. You'll find a Potion and stairs at the end of the hall. The next room at the top of the stairs contains a Potion and a High Potion. Keep climbing stairs and you'll be outside, where you fought the Coeurl, and there will be two Potions in plain sight.
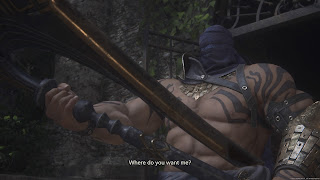
Climb the stairs to the courtyard. The cut scene that follows is... cool, and Torgal, of all things, gets a big upgrade. Jill and Gav join the party to fight off another crowd of enemies, and this time they have a Stone Gaoler along. The Stone Gaoler is similar to a number of heavy-weapon-wielding foes, though he has a new nasty attack in Execution, a combo attack that hits hard. Stay ahead of his swings as best you can. For the most part you can leave the other enemies that appear to your party, though any Stone Scepters in the crowd need to be killed immediately.
Defeat the Gaoler and his buddies and you'll receive some replacement foes: Two Stone Headsmen. Fighting a pair of 'bigger' enemies is a new one, and trying to take both Headsmen is nigh-suicidal. Keep away from them and wait for one of your party members to draw the attention of one of the Headsmen. Once they have, move in on the other Headsmen and engage. If they ever start attacking Clive simultaneously again you need to back off and wait for another distraction from your party members. A bit frustrating, but your health will vanish if you're not cautious with these guys.
You'll receive Wyrrite, Steelsilk, and Bloody Hides for defeating these waves of foes. Alas, your struggle is just beginning. Enter the castle to find a Potion and a High Potion right ahead, and another Potion and High Potion up the stairs on your right. Enter the throne room and you'll be facing down a serious opponent, so you'd best be ready.
Hugo
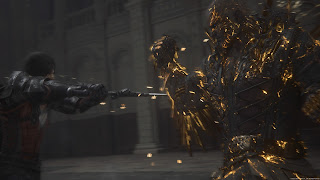
Despite his erudite tone and pretty words, Hugo Kupka is pretty much what you'd expect: A hefty, powerful brute of a man who wants to turn Clive into slurry. This fight won't be easy. Hugo uses the following attacks:
- A series of punch and kick combos
- A large-fisted, rushing uppercut
- A double-fisted rush, straight at Clive
- Sledgehammer, a rushing attack that knocks Clive into the air and smacks him about with a combo
Yep, Hugo likes to punch. The entirety of this battle's first phase consists of melee slams, and Hugo will come at you from multiple angles, trying to fake you out before dashing in to attack. Dodge out of his way - Hugo travels in straight lines, so it's easy to see him coming - and catch him from the side with Eikonic Abilities. Hugo occasionally blocks, so normal melee combos don't always work here. That said, Limit Breaks are your best friend, as they will intercept most of Hugo's attacks as Parries and give you an opening. (And you receive an extra Limit Break bar earlier in Rosalith, so this is good timing.)
Stagger Hugo and, after a bit more fighting, you'll hit a cut scene. Perform a Cinematic Evasion at the correct moment to avoid damage. After a quick change of arena Hugo will gain some new attacks:
- Two-fisted melee combos
- Landslide, a ground-shaking line attack
- Stripmine, a conical AOE attack
- Sledgehammer, a rushing attack that will see Clive pummeled by a combo if he doesn't dodge
- Tumult, a series of shockwaves that Clive will need to jump to avoid
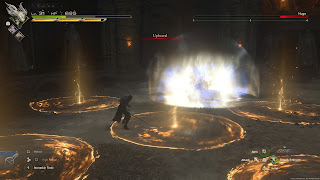
- Geocrush, a burrowing attack that will change into an AOE field strike that you'll need to avoid before Clive gets creamed
- Weight of the Land, a series of AOE fields that will erupt with boulders after a few seconds
- Torment, a combo that involes a hopping slam attack, lines of erupting rocks from the ground, Hugo's fists flying at Clive, and a huge AOE attack - this marks his strategy change
- Rushing melee attacks with crystal formations over his hand
- Force of the Land, an arena-wide AOE attack that you'll need to jump to avoid
- Earthen Fist, where Hugo conjures massive hands and tries to smack them together with Clive in the middle
- Upheaval, a shockwave attack you need to jump while avoiding land mine marks on the ground

