Part 9: Seaside Town, Sea, and Sunken Ship
Main Walkthrough
Land's End
Enemies
- Chewy - 90 HP
- Chow - 80 HP
- Fink Flower - 200 HP - Weak to normal attacks
- Geckit - 100 HP - Weak to Ice
- Kriffid - 320 HP - Weak to Ice
- Octovader - 250 HP - Weak to Fire
- Shogun - 100 HP - Weak to Ice
- Shy Away - 140 HP - Weak to Ice
- Spinthra - 230 HP - Weak to Ice
- Stinger - 65 HP
Land's End is located to the north of Seaside Town. The road there doesn't appear immediately after defeating Yaridovich, and you'll need to speak to Seaside's Elder to reveal the path.
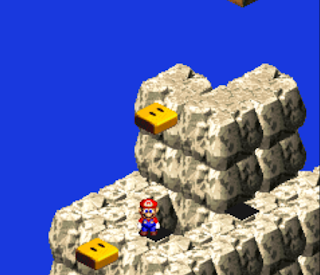
Your first obstacle in Land's End, just beyond the first save block, is a cannon. Jump inside and the cannon will rotate to several angles. To blast up to the cliff to the northeast you'll need to launch Mario out of the cannon when it is facing to the northeast. The sooner you launch Mario after the cannon changes directions, the further he'll be fired in that direction. You'll need to use this tactic in the next few areas. There's a hidden chest containing a Red Essence near the moving yellow platform, and you can collect it by jumping to the platform, waiting for it to rise to the highest point, and then jumping directly north.
The next screen will have you do the same thing with another cannon, and you'll land in a pit filled with Chows. Once you wipe out the enemies you'll notice a chest floating far above the ground. There are two hidden yellow platforms near the hole, one right in front of it and one a little ways to the southwest. Jump to reveal the platform nearest the hole, then use the cannon to launch to it. It will move beneath the chest once you're standing on top, allowing you to retrieve a Frog Coin. Jump onto the nearby cliff and check on your left to find a hidden Kerokero Cola, as well.
The third section of Land's End is a gauntlet of Geckits, getting launched into your path by cannons on the lower clearing. You can either wipe them all out and progress safely, or try to cross when they hop off of the cliffs. There are four cannons on the lower level, but you can only use the southwestern cannon. Jumping on any of the other three will knock Mario for a loop and leave him vulnerable to enemies.
Get past the cannons and you'll wind up in a grassy area with a save block. Look to the east of the save block and you'll find a row of three blue flowers. Jump between the second and third blue flowers - you'll need to perform a running jump off of the top of one of the flowers, which is a bit awkward to do - to reveal a hidden chest. It contains a Frog Coin.
There are two exits from the first grassy screen, and you'll need to use the spinning red flowers near the save block to reach the second, more important exit. At the tops of these cliffs you'll find the Sky Bridge, a minigame operated by a cloaked man. For five coins Mario can try to leap across the Sky Bridge while dodging Bullet Bills. There are three levels of difficulty:
- Normal. Mario's feet are locked onto the donut blocks, making the jumps easy, and all you have to do is avoid the Bullet Bills. You'll receive 5 coins for crossing the bridge.
- Special. Mario's feet are still locked to the donut blocks, but they will fall if you stand on one for too long. You'll receive 8 coins for crossing the bridge.
- Expert. Mario's feet are not locked to the donut blocks, and they will fall if you take too long. You'll receive a Frog Coin for crossing the bridge.
If you manage to cross the Sky Bridge you'll have an option to try it again for double the winnings, though you'll lose everything if you fall. You can speak to the cloaked man at the bottom of the bridge and hop onto his head to return to the Sky Bridge if you fall off.
Once you're done messing about with the Sky Bridge - or if you want to skip the minigame altogether - you can cross to the other side to find the exit. Before you leave the area, however, note the conspicuous hole beneath the northwest end of the Sky Bridge. If you jump down into the hole (or leap at it from the ground enough times that you luck your way in) you'll find a cave filled with enemies. There's a chest partway through, accessible via jumping from crates, that contains a Frog Coin. Check in the north and you'll see three wall indents, and if you jump around in the northern-most indent you'll find a hidden chest containing another Frog Coin.
Continue through the cave and you'll find an area with a few Beezos, a full restore treasure chest, and a springboard. If you use the springboard you'll be launched aaaaaall the way back to the Kero Sewers, to a location you could see earlier but not reach. Perform two careful, running jumps along the archways to the southwest of the pipe and you can reach a chest containing Cricket Jam. If you fall you'll be stuck in the Kero Sewers and will have to make your way back to Land's End, so take your time with this one.
Whether you check out the cave or not you'll need to hop across the Sky Bridge to continue the game. You'll wind up in a desert area with a save block, and if you speak to a nearby mouse he'll helpfully tell you to follow the ants that appear from the swirls of sand throughout the area. We'll get to navigating this area in a minute, but first...
Mokura
HP: 620
As you explore the desert you'll occasionally spot little white clouds floating around. Get too close, especially when you're jumping, and they will skitter away. If you manage to corner a cloud you'll get into a boss battle with a Mokura. Mokura have the following attacks:
- Bolt, a single-target Lightning spell
- Electroshock, a single-target Lightning spell
- Static-E!, a Lightning spell against your whole party
- Crystal, a single-target Ice spell
- Solidify, an Ice spell against your whole party
Mokuras start off as Formless, an invisible enemy that's immune to normal attacks. Use any Special Move on the Formless and it will turn into the Mokura, which you can then attack normally. The fight consists entirely of elemental spells, and given Mokura's low health you should be able to knock it out within a few turns. Physical attacks work best once you've revealed the Mokura.
Mokuras yield 30 experience points, and they will occasionally drop Royal Syrups or Kerokero Colas. If your team is healthy and you have time, it's worth the effort to corner and beat one up.
Head northeast of the save block and you'll find an area with three sandy whirlpools. One of the whirlpools has a Shogun's head popping in and out of it, and if you touch the Shogun you'll get into a battle with three of them. Clear out the enemy, then hop into the whirlpool before it slides away. You need to keep doing this in each area to proceed through the desert. Hop into the wrong whirlpool and you'll be forced to start over.
Proceed through the whirlpools until you see an exit to the north. If you check it you'll find the helpful mouse again, who will take note of the nearby cliff and then run back the way you came in. You'll need to climb this cliff eventually, but you'll have to visit a place called Montro town first. Backtrack, take on the final Shogun guarding a whirlpool, and dip into the sand to enter a new area.
Your final stop is a cave with a save block and a chest. Hit the chest and you'll active a Super Star, allowing you to plow through enemies. Rush to the northeast through the next two chambers and you'll find no shortage of monsters to demolish, up to and including a horde of Chows who are guarding a hole. Prioritize taking out the Chows, then wipe out any Geckits you may have missed once the path is clear.
The hole will drop you into a chamber full of Geckits. To the northwest is a stakc of crates, and behind it is a man who will offer to sell you another Super Star for 400 coins. The price is steep, but if you have the money... why not. Either way, the exit is in the northeast.
Belome Temple
Bet you didn't expect to hear that name again. A shrine to Belome, the monster you fought in the Kero Sewer, Belome Temple is a weird little area that can cost you some coin. By the entrance, for starters, is a cloaked man on a springboard, and he'll allow you to use it for 100 coins. The springboard will take you back to the desert if you want to leave the area. (Don't bother. You've almost made it through.)
In the next room you'll find a chest containing Coins, as well as another cloaked man. He's watching over three Belome-shaped wall sculptures, and will offer to tell your fortune for 50 coins. Agree and he'll let you smack the tongues of the three Belome sculptures. Depending on the order you strike them you'll receive a different fortune, and you can jump onto a stack of bricks to get at the next room over, which contains a pipe. The pipe will take you to different rewards depending on the order you struck the statues:
- Left, Middle, Right - Full health recovery or Yoshi Cookie
- Left, Right, Middle - Yoshi Cookie
- Middle, Left, Right - Enemies
- Middle, Right, Left - Enemies
- Right, Middle, Left - 100 Coins
- Right, Left, Middle - Frog Coin or 100 Coins
You can get a new fortune by leaving the room, returning, and paying the cloaked man another 50 coins. Each time you'll wind up in a room with a large gate, and once you open the chest you receive - or defeat all of the enemies you've conjured - the gate will open.
Regardless of the fortune you chose you'll wind up in a chamber with two chests, one containing Coins and the other a Frog Coin. If you use the bricks to the right of the first chest you can hop on top of it, where you'll find a third, hidden chest. It contains a Frog Coin. If you hop into the air a little walk southwest of the visible Frog Coin chest you'll discover a fourth chest, again containing a Frog Coin.
The next chamber contains a Belome face, a cloaked man, and an elevator. The cloaked man will explain that another fortune is needed to get through this area. Tap the statue to receive your fortune. If you hear that someone is 'Not accepting visitors past their naptime' and jump onto the elevator, you'll be shuttled down to a treasure room that you can't open without a key. If, on the other hand, your fortune involves hunger...
Belome
HP:
- 1,200 (Belome)
- 200 (Mario Clone)
- 150 (Mallow Clone)
- 250 (Geno Clone)
- 300 (Bowser Clone)
- 120 (Toadstool Clone)
Weakness:
- Fire (Geno Clone)
- Ice (Bowser Clone)
Heeeee's baaaaack. Belome is even stranger this time around, and won't be fighting alone if the battle drags on long enough. You'll want to choose your party carefully. Belome uses the following attacks:
- A melee lick
- An eating attack that spits out a clone of one of your party members
- Lulla-Bye, a single-target attack that can put a character to Sleep
- Aurora Flash, a spell against your entire party that can inflict Sleep
- Light Beam, a spell against your entire party that can inflict Sleep
Belome on his own is quite a nuisance, thanks to his many attacks that can put your party members to Sleep on a regular basis. More menacing, however, is his ability to eat your party members and create clones of them. The clones use their own sets of attacks apart from the originals, but on the whole act somewhat like you'd expect. Belome can create two clones at a time.
If you want to simplify this fight you should take two steps beforehand. First, equip at least one member with a Wake Up Ring. This will prevent Belome's Sleep attacks from working. Second, put Mallow, Toadstool, or both in your party. The clones Belome conjures have varying amounts of health, and you'll have the easiest time defeating Mallow or Toadstool clones. Wipe out the clones whenever they appear - especially Toadstool, since she'll heal Belome - then focus everything you've got on their hefty master. Belome only has 1,200 HP so this fight won't take that long.
Get Belome out of your hair and you'll find a button to open the nearby gate. Beyond is the pipe to Monstro Town, your next stop.
Part 11: Monstro Town and Jinx's Dojo
Main Walkthrough


