Stillwind
Enemies
- Goblin Mugger
- Goblin Weaver
Upon leaving Rosalith Castle you'll have exactly one location you can visit next, and that's Stillwind. An abandoned bog, Stillwind is your first legitimate challenge in Final Fantasy XVI, and there are a few things to note before you set off:
- First, Clive is now accompanied by two companions, Wade and Tyler. They're a pair of soldiers who will make things a bit easier for you. (Though you should nevertheless expect Clive to shoulder the majority of the heat in combat.)
- Second, you can teach Clive a variety of Abilities via the menu. You'll start off with 50 Ability Points (AP), and can learn more as you defeat enemies. Which direction you go with your starting abilities depends on whether you're more comfortable with melee attacks (right side of the wheel) or ranged attacks (left side of the wheel). If you change your mind about an Ability you can Refund the points and reallocate everything to something different.
- If you check your gear you'll find that you have Rings of Timely Focus, Timely Evasion, Timely Strikes, and Timely Healing. These accessories will slow down time a bit in combat and give you more of a chance to react to enemy attacks. You receive these items whether you chose Action-Oriented Mode or Story-Oriented Mode, though they start off unequipped in Action-Oriented Mode.
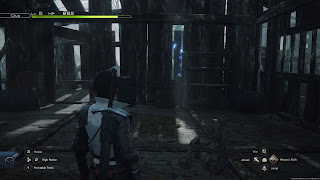
Follow the path into the swamp. Once you hit a clearing you'll find 2 gil sitting off to your right. Take a left at the clearing and you'll pass under a log, which will bring you to the first battle of the area, against three Goblin Muggers. Here you'll learn about two new moves:
- Magic Burst. Use the triangle button after unleashing a melee attack and you'll smack the enemy with a burst of fire. Handy.
- Parry. Wait until an enemy is about to strike, then tap the square button. If timed correctly you will Parry your foe, which slows time and gives you a chance to slice into them. Parries leave you open to attack if your timing is poor, so don't rely on Parrying unless you know what you're doing. (Having played Dark Souls or Elden Ring helps.)
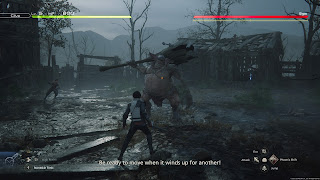
That's a big boy. The Gigas is a nasty first boss, though it doesn't have a ton of attacks to use against you:
- The Gigas will perform a side-sweeping swing with its club
- The Gigas will perform an overhead slam with its club
- Big Swing, in which the Gigas will whirl its club around in circles and move towards you, potentially striking Clive multiple times
You'll receive Hard Leather Armlets for defeating the Gigas. (I'm not 100% sure on this one, given the tutorial message received immediately after.) The leader of the Goblins will take off, and you'll need to pursue. Check the house it was standing on to find the path forward, as well as a Potion and a High Potion. Keep chasing the Goblin, and, well...
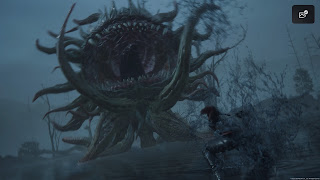
Morbol
Another boss so soon? You bet. Larger and more dangerous than the Gigas, the Morbol is a worthy opponent. It uses the following attacks:
- A sideways tentacle swipe
- A one-two sideways tentacle swipe
- A front-facing, double tentacle slam
- An underwater tentacle jab, typically when you're shooting at it from afar with magic
- An oil-spitting attack (one pool)
- An oil-spitting attack (three pools)
- An underwater dive that will allow you to perform a Cinematic Strike and a Cinematic Evasion
- A charging AOE attack
- Bad Breath, which launches a burst of foul gas in a staight line from the Morbol's mouth
- Wild Rage, a crazed charge towards Clive
For the most part this battle is about keeping the Morbol in the center of the arena and circling constantly. The Morbol's attacks are relatively slow, and it telegraphs all of them with lots of time to react. Parrying won't do you any good here, so keep on the dodge button (R1) and slip out of the way any time a tentacle gets too close. If you're fast enough to avoid the tentacles you'll have no trouble getting out of the way of the oil, the gassy charged AOE attack, or Bad Breath.
Partway through the fight you'll get a chance to perform a Cinematic Strike on the Morbol. These are fancy moments where you need to pay attention to the on-screen prompt and press the appropriate button. Do so and you'll usually Stagger your foe, giving you a chance to heap on damage. There are also Cinematic Evasion moments, and you'll be punished if you fail these, so be ready on the buttons whenever combat suddenly stops.
Do enough damage and the Morbol will start using Wild Rage. This move will carry it straight at you, then turn the Morbol around for another rush and a diving tackle. Dodging to the side tends to not work all that well, so your best bet is to dodge straight into - and under - the creature. As long as you don't dodge too early you should slip right past both of its attacks. The second dive will leave the Morbol exposed for several seconds, and you can rush in and get off several sword-strike flurries.
Defeat the Morbol and the team will leave Stillwind. Next destination: Phoenix Gate.


