Need some quality headphones to connect to your PC? Try the JBL Tune 720BT, now available on Amazon! As an Amazon Associate I earn from qualifying purchases, at no additional cost to you.
One of the strangest, bloodiest, most violent games to come out of the 1990s, Harvester is a point-and-click adventure that will test the limits of your sanity. The tale of an amnesiac young man in a town full of absolute weirdoes, Harvester was banned in several countries upon its release for its graphic content. This game is not for the faint of heart... but if you can stomach the story, you'll find a gold mine of black comedy waiting.
Harvester is best experienced without foreknowledge of what's coming, so this guide will do its best to remain spoiler-free, at least as far as the plot and the jokes are concerned.
General Gameplay and Exploration
The majority of Harvest is a point-and-click adventure. In order to progress you need to Examine your surroundings, speak to NPCs, and pick up items of value. Combine these three activities in the proper order and you'll pick your way through the story. For most of the game you can simply use your mouse to navigate, though you can also use the arrow keys to get around.
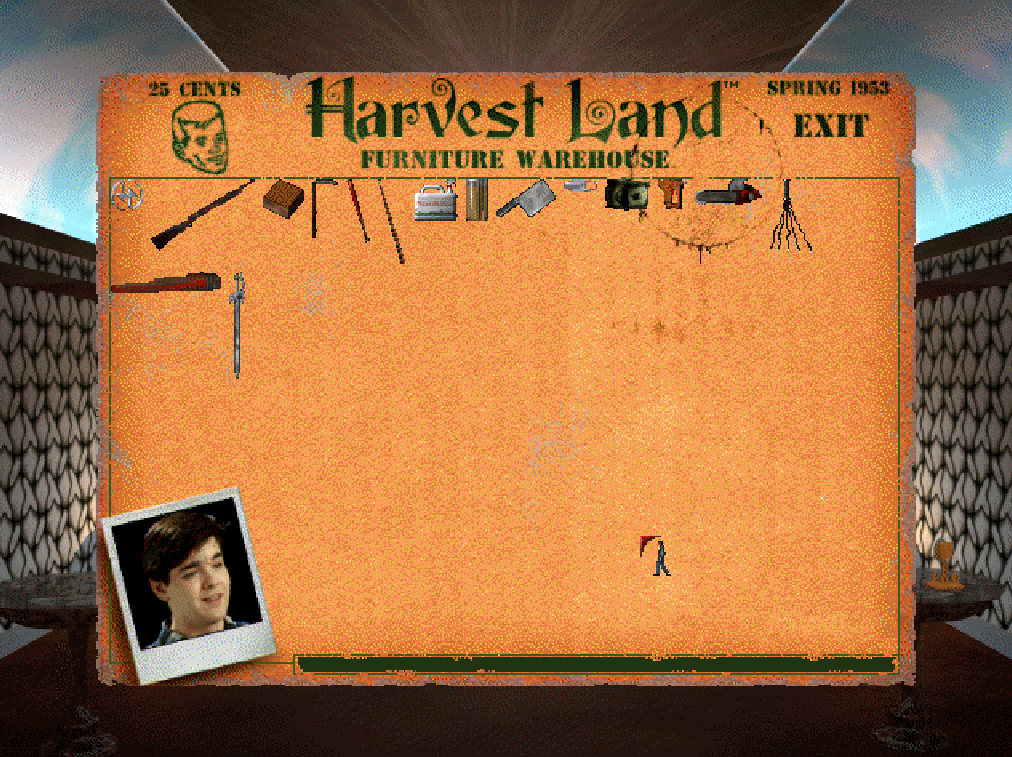
Enter an area and you can move around as Steve, the game's protagonist. You can hover the mouse cursor over elements of the background, and if you find something of note you can click it to trigger a description. In some cases this will allow you to zoom in and pick up items. You don't need to move Steve around to investigate the environment, though if you want to move from one area to another you need to walk Steve to the edges of the map, usually towards doors.
Once you leave Your House you'll see a map of Harvest, the town where the game is set. You can see each of Harvest's four quadrants by moving the mouse cursor to the edges of the map, or by using the arrow keys. Click on a building to visit it. Some buildings extend between multiple quadrants, but you'll enter the same way regardless of where you click.
NPCs
You'll receive most of your information from Harvester's many oddball NPCs. As you progress through conversations you'll be presented with new topics of discussion, some of which can unlock new interactions with other NPCs. In general it is wise to exhaust dialogue options on NPCs... though keep in mind that some dialogue branches can lead you to Game Overs. Always save before approaching an unfamiliar NPC.
In addition to preset topics of conversation, there is also a text box at the bottom of the dialogue window where you can type in your own topics. For the most part this will allow you to backtrack to dialogue options that you missed or want to discuss again, though occasionally there are hidden snippets of dialogue that you can only discuss by bringing them up yourself. These will be noted throughout the walkthrough, though in general it's wise to bring up story elements connected to an NPC that they don't seem ready to explain on their own.
Items
As you explore Harvest you'll find items that you can pick up. Most items have plot significance, though some are restoratives or weapons. You can inspect all of your items by checking your Inventory, which is accessed by clicking on Steve himself.
Occasionally you'll need to push the story forward by presenting an item to an NPC. You can do this by clicking on the item in the Inventory, then moving the cursor outside the Inventory window. This will make the window disappear. Click on the NPC to present the item to them. You can also do this to interact with the environment, such as using a key on a locked door, and on occasion to combine two items.
Combat
Unlike most point-and-click games you can attack other characters in Harvester. Hold the arrow keys in the direction that you wish to attack, then press the CTRL button. Steve will take a swing in the indicated direction with his fist, whether up, down, left, or right. If there is an NPC that can be damaged in the way of his fist - which is most NPCs, though not all - they will take damage. This will instantly kill most of the townsfolk in Harvest, though some will fight back with whatever weapon they have on hand.
Steve's fists are weak, and many enemies will take a lot of hits to defeat. You can improve Steve's hitting strength by equipping a weapon. Hover over an item in the Inventory screen and check its description at the bottom. If it says 'right click to arm / disarm', then you can equip that item as a weapon. Weapons are both close-range and ranged, though ranged weapons have limited amounts of ammo. How much ammo the weapon has is displayed at the top of the screen.
If an enemy successfully strikes Steve during a fight he will take damage. Open your Inventory screen and look at the polaroid picture of Steve in the bottom-left corner of the menu. As he takes more damage his smile will disappear and face will degrade and bloody, and once he looks like an absolute mess you'll know that Steve is on the verge of death. There are certain items - the Aspirin, Cough Medicine, and Vitamins from the Pottsdam's bathroom, for example - that can be used to restore Steve's health, though in general you just want to avoid getting hit as much as possible.
Part 1: Harvest
Monday - Your House
You'll begin Harvester in Steve's home, in his room. There are many objects to Examine in Steve's room, with a variety of colorful descriptions, though the only one that really matters is the dresser on the left side of the room. Examine it, then Operate it to look inside. You'll find a Quarter and a Pen inside. Grab both.
Exit Steve's room through the door on the left and you'll appear in the living room. Steve's brother, Hank, is sitting in front of the TV, and you can chat with him about a variety of topics if you like. Type in 'TV' for some extra dialogue. If you inspect the door to the master bedroom on the left or the clock on the right you'll hear some extra audio cues.
Enter the kitchen on the left and you'll find Steve's mom. She'll provide a great deal more information on Steve's current circumstances, though you'll probably be left with more questions than answers. Asking about Steve's 'sister' will earn you an interesting little cinematic. Type the, uh, 'F word' for some extra dialogue with mom, as well.
Return to the living room and exit the house via the door on the right. You'll now be standing on the front lawn, and you'll find a paperboy named Jimmy James nearby. Jimmy will ask for sneakers, which you don't currently have on you. Leave that 'til later. Be careful around Jimmy, as you can punch him - and if you do, he will mess you up.
If you hover the cursor at the bottom of the screen you'll find the exit to the main map of Harvest.
Monday - Harvest
The remainder of the day will have Steve bopping all over Harvest, meeting new people and picking up items for current and later use. Harvest is split into quadrants, and you can view other vuildings via the arrow keys. Not everywhere is going to be useful right away, but you can learn quite a bit by exploring the town.
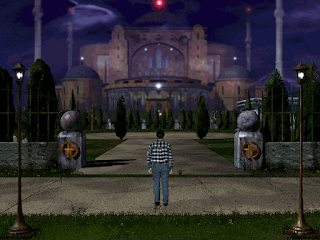
Regardless of which quadrant you inspect, you can enter the Lodge in the center of town. Here you'll meet the Sergeant at Arms, who won't allow you inside until you can present him a Lodge Application. The entirety of Harvester's first half consists of Steve's efforts to enter the Lodge, so you'll be speaking to this guy a lot.
There are also a large number of other buildings in Harvest. Given how the distribution of items works out, we're going to proceed through them in roughly counter-clockwise order. You can attack many of the NPCs in the buildings, though doing so will (unless noted below) earn you a Game Over the next time you trigger a screen transaction. Be careful whom you assault.
Below is a rundown of all the places you can visit. Skip past the bullet points if you want a quicker list of exactly where you need to go to proceed with the story, rather than window shopping.
- Pottsdam Residence - On the border between the two upper quadrants, though only a small slice of it is visible near Your House. In the living room you'll find Mr. Pottsdam, who's obsessed with meat, and in the kitchen is Mrs. Pottsdam, who is... not. Go upstairs on the left side of the living room and you'll find three doors. In the first is a bathroom, and if you check the medicine cabinet above the sink you'll find Aspirin, Cough Medicine, Vitamins, Tampons, and a Jar of Oralube. The first three items will restore your health. Inspect the painting on the left side of the room for a bit of creepiness, which you can address by saying 'peephole' to Mr. Pottsdam. Inside the bedroom on the second floor is Stephanie, and she'll share what she knows with you, but isn't of tangible aid just yet. You can say 'peephole' to her as well, and the interaction will change if you already spoke to Mr. Pottsdam.
- General Store - Upper-left quadrant. Head inside to meet Mrs. Phelps, the owner. The shelf behind her has a number of items that you can purchase, though right now all you can afford is the Adult Magazine. Give Mrs. Phelps the Quarter you picked up from Steve's room and she'll hand over the magazine.
- Post Office - Upper-left quadrant. Inside is Postmaster Boyle. Ask about getting a Lodge Application. This is where it's done, but not yet.
- Barber Shop - Upper-left quadrant. Inside you'll meet Mr. Pastorelli, Mr. Swell (Pete), and Mr. Parsons (Clem). Pete talks a lot about aluminum siding, while Clem goes on about Pastorelli's Barber Pole, which will be important later. Speak to Clem about 'aliens' for a bunch of extra... advice.
- Missile Base - Upper-left quadrant / lower-left quadrant. Speak to Colonel Buster Monroe and he'll ask you to inspect the firemen at the Fire Station. Be careful what you say to Monroe, as he's quick to give you a fiery, if amusing, Game Over. In particular you want to avoid suggesting that Steve might be communist. (Also, do not associate with llamas.) Monroe is ultimately inconsequential to progressing through Harvester, so you may want to avoid this location.

- Meat Plant - Lower-left quadrant. Inside is Pat O'Reilly, who works for Steve's father. Ask him about the meat, then ask for some free meat and he'll tell you that he'll give you some with Steve's father's permission. You'll receive a Meat Permission Slip. Ask about 'cats' for some extra dialogue. If you decide to attack O'Reilly and win the fight you can pick up a Chunk of Meat from his butcher's table, which allows you to skip a few steps later.
- Gein Memorial School - Lower-left quadrant. You'll find Principal Herrill in the hallway, and inside the classroom on the left you'll find Mrs. Whaley. Neither one of them is particularly helpful right now, though asking Mrs. Whaley about 'corporsal punishment' is, er... it triggers quite the moment.
- TV Station - Lower-left quadrant. Range Ryder, a popular actor in Harvest, is on the set. He'll give you a Ranger Ryder Autograph if asked. Left of the stage you'll find the office of Mr. McKnight, who is quick to dismiss Steve's questions. Behind McKnight is a picture, and behind the picture is a wall safe that contains the Deed to the TV Station. If you attack McKnight you can get at a Safe Manual inside his desk, then use it to open the safe. If you don't take McKnight out before going after his wall safe he will call the sheriff to arrest Steve, and you'll be escorted back to Your House. Hank will have some extra dialogue for you if you speak to him after being arrested.
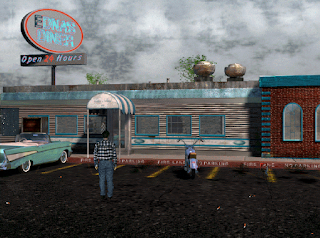
- Edna's Diner - On the border between the two lower quadrants. Inside you'll find Edna and her daughter, Karin. Edna has information on a few townsfolk, and that's about it. If you Examine and Operate the small drawer on the left side of the Diner you'll find a Straight-Slot Screwdriver inside.
- Police Station - Lower-right quadrant. Sheriff Dwayne and Deputy Loomis are inside, and the sheriff will have a bit of extra dialogue if you spoke to Mrs. Whaley at the school first. The sheriff has general information about the town, while Loomis will, if asked about 'A Man's Needs', request some smut from the General Store. Give Loomis the Adult Magazine you bought earlier - which can only be done if you visit the Police Station when the sheriff is gone, which will happen after you leave and come back - and Loomis will disappear, allowing you to check his desk. Inside the desk you'll find the Sheriff's Checkbook, the Evidence Room Key, and a Note. Use the Evidence Room Key on the right door to enter the Evidence Room, where you'll find a Camera, Bloody Sneakers, and a Gas Can on the central shelf.
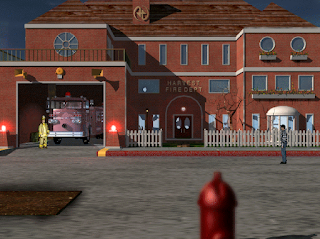
- Fire Station - Lower right quadrant. There are two unnamed Firemen in and around the Fire Station, as well as a Male Model, a dog, and Sparky, the man in charge. Sparky offers some hints, but no items.
- Newspaper Building - Lower right quadrant. A burnt-out husk of a structure with a Shovel sticking out of the ruins, around the middle of the building. Use the Shovel on the heap of ashes to reveal some debris. Examine the debris to find a Burnt Flyer and a Button.
- Wayward Hotel - Lower right quadrant. The owner, Daniel Moynahan, has info but no items for you.
- Shady Oaks Mortuary - Upper right quadrant. Also owned by Daniel Moynahan, whom you can find in the work room on the left. You can attack Moynahan here, and if you win you can steal the Astro-Glue sitting on the counter in the foreground of his worshop. You can pick up a Mortuary Ledger from the left turn in the top-left corner of the Mortuary's main hall. Enter the door straight down the middle of the Mortuary and you'll find a worship area with pews and a stage, though there's nothing of use here right now.
- Cemetery - On the border between the two eastern quadrants. Walk far enough to the right and you'll find several areas within the Cemetery, but there's nothing of use here for the moment. (Though if you visited the Hotel, the Mortuary, and the Graveyard, there's a single name that you can link to all three.)
- Johnson Residence - Upper right quadrant. Out front of the house you'll find Mr. Johnson and his prized Tucker. Mr. Johnson has some... opinions... though he isn't of use to you just yet.
- Abandoned House - Upper right quadrant. The home of Tetsua Crumb, who has a thing for wasps. Tetsua will share her philosophies with you, and you can attack and kill her without drawing attention from the law. She doesn't add much to the story besides this encounter.
Although the Deed to the TV Station and the Sheriff's Checkbook are not necessarily vital items, assuming you picked them up, they do provide a handy service. Make copies of both of them at the General Store, then show the copies to Sheriff Dwayne. Give him the original documents after showing him the copies and you'll receive two Get-Out-Of-Jail-Free Cards which entitles you to commit two crimes (ie fail at two puzzles) without the risk of getting a Game Over.
And that's all of Harvest. You've seen a lot, met many people, and picked up a lot of items. Assuming you did all the exploring above you now have everything you need to complete the first day, which requires acquiring, and submitting, a Lodge Application. Let's run through the process.

Monday - Lodge Application
In order to move on to Tuesday you need to get Steve a Lodge Application. This takes some doing, and isn't always intuitive. Here's the process, including steps that you can skip if you already picked up the necessary items:
- Pick up the Quarter and the Pen from Steve's desk in his room.
- Speak to either the Sergeant at Arms at the Lodge or Postermaster Boyle at the Post Office to learn about the Lodge Application.
- Buy the Adult Magazine from the General Store by giving the Quarter to Mrs. Phelps.
- Enter the Police Station until the sheriff leaves. Give the Adult Magazine to Deputy Loomis, then check his desk for the Sheriff's Checkbook, the Evidence Room Key, and a Note. Use the Evidence Room Key on the right door to enter the Evidence Room, where you'll find a Camera, Bloody Sneakers, and a Gas Can on the central shelf. Grab everything.
- Show the Sheriff's Checkbook to Postermaster Doyle. If you already gave away the Checkbook you can also show Boyle the Button from the Newspaper Building, found by using the Shovel (also found at the building) on the heap of ashes. Then give Boyle the Gas Can. He'll give you a Lodge Application.
- Use the Pen on the Lodge Application to turn it into the Completed Lodge Application.
- Give the Completed Lodge Application to the Sergeant at Arms in front of the Lodge. This immediately ends Monday and moves you on to Tuesday, so make sure you're done looking around Harvest before you hand in the Application.
Tuesday - Morning
Home, sweet home. Hank has a bit of new dialogue if you speak with him, but otherwise there's nothing new inside Your House. Head out front and you'll find Jimmy James waiting. If you picked up the Bloody Sneakers from the Evidence Room at the Police Station you can trade them to Jimmy for a Broom Closet Key. Make sure you grab a Newspaper from the bin in the living room and bring it out to Jimmy, or he'll get angry when you try to leave - and if you keep forgetting, he'll make you pay.
Harvest hasn't changed much overnight, and everyone is where you left them, more or less. The major exception is Gein Memorial School, where Principal Herill and Mrs. Whaley are nowhere to be found. If you use the Broom Closet Key on the left door at the end of the hall (the broom closet) you'll find the pair inside. Once they've been revealed, use the Camera from the Police Station's Evidence Room on them. This will earn you a Baseball Bat, a handy weapon that's much better than punching people.
(I found getting this item to be a bit glitchy, and when I had to reload a save and get it again I could not. You should probably save right after successfully snagging the Baseball Bat.)
Head to the Lodge once you're done looking around. The Sergeant at Arms will give you your first task that will lead to initiation into the Lodge: Scratch Mr. Johnson's prized Tucker. Check out the Johnson Residence and you'll find him outside, as always, guarding his car. Attempting to do anything to the Tucker will earn you a stern rebuke, and if you attack and kill Mr. Johnson you'll be arrested, whether or not you have a Get-Out-Of-Jail-Free Card.
Head to the Post Office. Down and to the left of the entrance is a manhole, and there's a Manhole Key sticking out of the manhole. Use the Jar of Oralube from the Pottsdam's bathroom on the Manhole Key to retrieve it. When you try to leave this area again the game will immediately transition to night time.
Tuesday - Night
Before you begin your daring heist, you should poke around Harvest a bit. For the most part places are closed, but there are two things of note:
- Unlike most places, you can enter the Fire Station at night. Check the sheet inside for a weird conversation.
- Enter the Cemetery and travel to the third screen. Where you'd normally just find a lonely picnic table you'll discover Mr. Pottsdam, who is digging a hole. Not at all suspicious. Grab the Match Book that's sitting on the ground near the picnic table before you leave.
Head to the Johnson Residence. Use the Manhole Key on the manhole in front of the house and you'll open up the sewers. Get out your Shovel, from the remains of the Newspaper Building, and use it on the corroded wall next to the water valve on the right. This will bust open a hole in the wall, and if you crawl through you'll find a path into Mr. Johnson's basement. Go up the stairs on the right to find the garage.
Check the left side of the garage for a Pitchfork that can serve as a weapon, as well as a Furniture Dolly. Then check the toolbench on the right. There's a Phillips Screwdriver here, barely visible beside the flashlight, that you can grab. You can use it or the Straight-Slot Screwdriver from Edna's Diner to scratch up the car. Once that's done, head back the way you came via the stairs beneath the car. Return to the Sergeant at Arms, out front of the Lodge, to receive your next task and end the day.
Wednesday - Morning
Back to Your House. If you speak to Hank and Mom you'll learn of some overnight developments. Head out once you're done talking - and be sure to grab a Newspaper for Jimmy before you leave the premises. You know how he gets.
Your next goal is to steal some cloth from Harvest's Firemen, but you should deal with the morning's big news first. Most of the NPCs in Harvest will have something to say about what happened the night before. The Pottsdam residence will prove the most illuminating, and you can get some extra scenes with Stephanie if you speak to her.
Travel to the Cemetery. If you head to the screen with the picnic table you may notice a patch of dirt beneath it. Use the Shovel on the dirt after moving the picnic table you'll find one of two things:
- If you do this before changing the time of day you'll uncover the missing person, and they will be alive. Head to Edna's Diner to resolve the case and receive Reward Money.
- If you do this after the third day you'll find a corpse instead, as well as a Purse. Take the Purse to Edna's Diner to receive the Reward Money.
Which path you take does not drastically alter the course of the game, though it will change the dialogue of most of the NPCs around Harvest, as well as change a cut scene later on. Either way, you can use the Reward Money at the General Store to Purchase the Wrench and the Electrical Tape. (You can also confront the clear culprit behind the crime, if you like, and though it won't get you anywhere you will get to witness one of the game's best line deliveries.)

With all that out of the way, you now need to get into the Fire Station while it is vacant. This means finding a way to get the Firemen out of the Fire Station, as well as distracting their dog, who is always inside. We'll start with distracting the dog, which requires getting a Chunk of Meat from Pat O'Reilly in the Meat Plant. You can either attack and kill Pat, in which case you'll find the Meat on his table, or you can do the following:
- Speak to Pat and ask for some meat. He'll give you a Meat Permission Slip.
- Head to Your House and use the Furniture Dolly from Mr. Johnson's garage to move the cabinet by the front door.
- Inspect and disable the security panel that was behind the cabinet.
- Leave the house and use the Phillips Screwdriver that you picked up in Mr. Johnson's garage on the barred windows to your left. (If you do this before disabling the alarm you'll be arrested.)
- Enter the unbarred window and speak to the figure in the bed. You'll receive a Signed Meat Permission Slip.
- Take the Signed Meat Permission Slip to Pat to receive the Chunk of Meat.
You can continue to come and go from the unbarred window in your house, though if you do so at night you'll receive a Game Over. Worth doing once, but... save your game first.
Now for the Firemen. Head to Gein Memorial School. There's a fire alarm at the end of the hall, and if you trip it you'll send the town's fire truck over to investigate. Head to the Fire Station and, now that the truck is gone, you'll see a Fire Axe and a Ladder inside the station's garage. Grab both, then leave the area to transition from day to night.
Wednesday - Night
Enter the Fire Station. The dog will bark incessantly at you, and if you take too long acting it will summon the police to arrest you. Get into your Inventory and use the Chunk of Meat on the dog to shut it up. That done, reveal the Male Model - he's under the sheet in the middle of the room - and he'll give you a clue as to what needs to be done next.
If you activate the light on the right side of the room you'll spot the cloth you need upon a light on the left side of the room. Use the Ladder you picked up earlier in the day on the wall light to retrieve the Mauve Cloth. Leave the Fire Station to end the day.
Thursday - Morning
Speak to Hank and Mom, per usual, then get Jimmy his Newspaper and head into Harvest. The town is abuzz with the news of the theft from the Fire Station, though the Fire Station itself is locked up tight. Check the Fire Station at night, when it is open, and you'll discover that someone was punished for your deeds. Eesh.
If you don't already have it, visit Edna's Diner and check the drawer on the left side of the Diner for the Straight-Slot Screwdriver. You need to get this before moving on with the game. Then speak to the Sergeant at Arms, outside the Lodge, and he'll give you your next task: Steal Mr. Pastorelli's prized barber pole. Once you receive your task the game will transition to night.
Thursday - Night
This night is a quick one. Head to the Barber Shop and, predictably, you'll find it closed. Use the Electrical Tape you bought at the General Store on the front door, then use one of your weapons (as an item, not by swinging it) to smash through the glass. You can now head inside.
Enter the Barber Shop and you'll find the Classic Barber Pole beside the door. You need the Straight-Slot Screwdriver from Edna's Diner to get it off of the wall, though if you do this right away you'll trigger an alarm and alert the sheriff. Use the light switches to the right of the sheep to turn off the power to the Classic Barber Pole before you try and remove it. Leaving the Barber Shop will end the night.
(If you're playing the Steam version, which is likely, you'll need to 'change the disc' at this point by pressing Ctrl and F4, and left clicking the mouse. If this doesn't work, try Ctrl + F4 + Fn + a left mouse click instead.)
Friday - Morning
You know the drill by now. Get up, talk to Hank and Mom, give Jimmy his Newspaper, and leave the house. The town is busy discussing the theft of the Classic Barber Pole, and, er... if you check out the Barber Shop you'll discover that Pastorelli didn't fare all that well in the aftermath. Alas.
Check in with the Sergeant at Arms by the Lodge's front door to turn in the Classic Barber Pole and receive your final task: Burning down Edna's Diner. Slight bit of escalation there. Time doesn't move on, as it did the previous two days, so you'll need to accomplish something else before you can move on to torching the Diner.
For this next section you'll need Daniel Moynahan's Astro-Glue, in the Mortuary's dissection room. You can either attack Daniel and take the Astro-Glue once he's dead, or you can head into the Chapel and inspect the casket on the stage. Use the Camera on the casket to receive a Photo of Slashed Corpse, then present the Photo to Daniel to receive the Astro-Glue. Once you leave the Mortuary the time will transition to night.
Friday - Night
The night of the infamous Bake Sale. If you travel to Gein Memorial School and check the right door at the end of the hall you'll enter the gym, where you'll find a lineup of PTA Moms. This meeting doesn't seem terribly important, though when you attempt to leave you'll see a cut scene pointing you to the TV Station across the street. Check out the TV Station, and... yeah.
Head to Edna's Diner. As with the Barber Shop, you can use a combination of Electrical Tape and one of your weapons to get in the front door. Once inside you'll need to prevent the fire alarm from alerting the authorities to your attempted arson. Here's the process:
- Check the rear of the Diner for a Cake Cover. Pick it up.
- Use the Astro-Glue on the Cake Cover. You'll receive a Cake Cover With Glue On The Rim.
- Use the Cake Cover with Glue on the Rim on the smoke alarm on the ceiling. It's the red dot to the left of the Exit sign.
- Inspect and activate the grease fryer at the rear of the Dinner. It's to the left of the central pillar.
- Use the Match Book from the Cemetery to ignite the fumes coming off the grease fryer.
- Leave. If you linger in the Diner while it burns Steve will, eventually, get fried.
Once you walk away from the burning Diner you'll automatically be sent home to sleep.
Saturday
Ready for your last day in Harvest? It starts off the same as usual. Speak to Mom and Hank - Mom has a particularly gruesome cut scene waiting for you - then give Jimmy his final Newspaper and head into the town. If you check in on Edna's Diner you'll catch another grisly scene, one that's a bit different depending on how you handled things earlier in Harvester. You'll also get a pretty funny Game Over if you admit to Mrs. Pottsdam that you burned down the Diner.
Speak to the Sergeant at Arms to learn that there's still one thing you need to do to get into the Lodge, though he won't say what. Visit the Pottsdam Residence to get a bit of a jumpscare, then go upstairs and speak to Mr. Pottsdam to trigger a cut scene. Pick up the Lodge Invitation on Stephanie's bed once you regain control. It's difficult to see, but it's a little black rectangle beside the sheriff.
Visit the Sergeant at Arms to discover that your job in Harvest is still not done. To wrap things up you'll need to pay a visit to the Cemetery, and check out the Pottsdam Family Crypt at the far end. Use the Ladder on the Crypt to climb to the skylight, then use one of your weapons to smash open a hole in the skylight. Be sure to equip a weapon, as a weird dog thing will attack as soon as you enter the Crypt via the hole you've made. Smash it to pieces by pressing down and the CTRL button, and use a restorative item in the aftermath if you took damage. You can grab three of them out of the medicine cabinet in the bathroom of the Pottsdam Residence.
Inspect and Operate the sarcophagus inside this room to open it up, then grab the Skull and Spinal Cord inside the sarcophagus. Use the ladder on your left to take your leave, then use the barely-visible ladder near the skylight to climb back down into the Cemetery.
And... that's it! You're more or less done with Harvest. You now have two options, though, to be fair, it boils down to one in the end:
- Go home. If you try to enter the house with the Skull and Spinal Cord in your inventory Steve will wake up on Sunday, and you'll get a Game Over. Try it out once, for funsies.
- Go to the Lodge. Present the Skull and Spinal Cord to the Sergeant at Arms and he'll allow you to enter the Lodge, at long last. You can't leave once you've entered the Lodge, so make sure you tie up any loose ends in Harvest first.
Ready? Then take the plunge.
Part 2: The Lodge
First Floor
The first thing to note here is that the Lodge is difficult. Not complicated, necessarily, but it's very easy to die here, and you won't always be at fault when it happens. You should save on a regular basis, especially when entering a new room. The trip to Harvester's ending will be filled with Game Overs. (And if you're really struggling, just jump to the cheats at the bottom of this guide. No one will judge you.)
You'll start off in a circular room, and your Inventory will be empty, save for a Harvest Blade. You can - and should - equip the Harvest Blade. Speak to the Valet in this room and he'll tell you about a 'pest' problem. You can get at said pests by trying to exit the room to the south, which will dump you into a fleshy tunnel.
Head south of your landing point and you'll find a pulsating sphincter. Go through and you'll be barred from backtracking. From this point on you'll start running into enemies, and they're all low to the floor. Hold the down key and swing your Harvest Blade like made to get rid of them before they can inflict too much damage.
You can head left or right from the exit of the sphincter and reach the same point. (Don't bother traveling the whole route around, you'll get into extra battles for no good reason.) Walk until you find a room with another sphincter. Go through and you'll appear in an area filled with eyeballs. Kill the little eyeball that runs up to you, then stroll up to the giant eyeball at the right end of the room and swing your Harvest Blade. It will pop, revealing an altogether nicer room on the other side.
When you enter the next area you'll be alerted to an acidic goo that will kill Steve if left on his clothes for too long. (I don't believe this is the case if you can somehow avoid getting hit by monsters in the previous area, but, good luck with that.) You need to solve the acid problem before you die. Quickly follow these steps:
- Go through the door on your left
- Speak to the Cloak Room Attendant (this part isn't mandatory, but checking once will at least let you know where he is)
- Return to the previous room and go through the northern door
- Kill the dog that appears on your left in the next room - I found swinging normally once, then switching to swinging downward, gives the best results
- Take a right to find a bar
- Check the shelves behind the bar for a Strong Beer, on the top shelf, which Steve will immediately drink
- Kill the figure who appears after the the drink to receive a Bar Key, which you can use to open the cash register on the left side of the bar - inside are Two Hundred Dollars and Five Dollars
- Run back to the Cloak Room Attendant, to the left of the entry point, and give him the Five Dollars
Phew. This won't restore Steve to health, but at least you're no longer on a timer. You can now explore the area a little more thoroughly. The cloak room itself is worthy of note, as the Cloak Room Attendant will blow your head off if you try to touch the Toga on the back wall too many times. You can kill him to not only acquire the Toga, but his Shotgun. Place the Toga on the clothing peg that's second from the left on the back wall and you'll open a secret passage, within which you'll find Shotgun Shells and a Scythe. The Shotgun and the Scythe will make killing things much easier, and should not be missed.
Head back to the room where you started. If you go through the door on the right you'll find a room with a blazing fireplace, but no items inside. There are two paths to the second floor of the Lodge, and one of them is in here, behind the fire. You'll need to find a way to extinguish the flames. We'll come back to this shortly.
Return to the room where you fought the dog and check the door on your left. It leads to the Lodge's kitchen, where you'll find the Lodge Chef, who isn't particularly helpful. There are two Chunks of Meat on the ground, a Sandwich on the table in the foreground that you can use to partially restore Steve's health, and an Empty Glass on the countertop next to the Lodge Chef. The Chef drops a Cleaver if you decide to kill him, though it isn't much better than punching enemies, given its poor range.
If you try to go through the batwing doors on the right side of the bar you'll find a garden with a dangerous plant that will give you an instant Game Over, so don't bother going this way just yet. Head back to the cloak room instead and check the right side of the room for what appears to be a light switch. Triggering it will instead unlock the door on the left side of the room.
Equip a weapon and go through the cloak room door ready to fight, as a gangly monster will attack. This thing is a decent candidate for the Shotgun if you find that the Scythe isn't doing the job. You're now in a games room, and with the monster gone you can look around. There's a Pool Cue you can grab off of the pool table and use as a weapon, and you'll find a Baseball Bat leaning against the left wall. There's also a gum machine in this room, in the top-right corner, and you can use it to gradually restore Steve to full health. Keep popping gumballs until Steve's picture on the Inventory screen is smiling. There isn't an unlimited number of gumballs, so don't overdo it.

Through the door on the left side of the games room you'll find a bridge over some sludge. If you try to walk through here Steve will be eaten by a monster from the sludge, earning you a Game Over. Use one of the Chunks of Meat you collected from the kitchen on the bubbles in the sludge to receive temporary passage through here. You'll need to do this again on the way back, so if you forgot to get both Chunks of Meat from the kitchen then make sure you do not save in the next room. You'll be trapped.
Beyond the bridge is a foul bathroom. This room will provide you with two methods for leaving the first floor, assuming you brought the Empty Glass from the kitchen along. Use it on the sink on the left side of the bathroom and you'll receive a Full Glass of Water. Check the lockers on the right side of the room and you'll find Weed Killer on top of them. Head back the way you came in, and don't forget to toss the second Chunk of Meat into the water before you cross the bridge.
From this point on you have two options, both dangerous. We'll cover both.
Fireplace Route
(For the record, I don't recommend this route. There are more enemies and more opportunities to take damage than the other route.)
Return to the room with the fireplace, on the right side of the circular entrance room. You can use the Full Glass of Water to extinguish the flames, allowing you to get at both a Grate and Firewood. Be ready to fight once you remove the Grate, as a giant spider will crawl out of the fireplace and attack. Return to the game room and munch on any remaining gumballs if the spider manages to ding Steve.
Inside the fireplace you'll find a surprisingly large room with more fireplaces. A giant wasp will attack you from the right, so have your weapon ready. Once you clear it out you can look around. There's a small doorway on the left, but if you try to go through you'll get a Game Over, thanks to a surprise blade. If you inspect the floor in front of the door you'll notice a floor plate, and you can put the Firewood on the plate to set off the trap. This will allow Steve to go through the door intact...
... though as soon as he does, he'll be attacked by a hulking fellow with a chip on his shoulder. Given how much damage he can take, as well as how hard he hits, this guy is a great candidate for using the Shotgun. He just takes too many hits to kill otherwise. You'll receive Cain's Book once you defeat the fellow, and when you go through the door on your right, voila, you'll be on the second floor of the Lodge. Well done.
Plant Route
If you didn't bring along the Empty Glass during your trip to the bathroom you'll need to take this secondary route instead. Head to the bar, on the right side of the room where you fought the dog, then exit to the garden with the fountain. There is still a man-eating plant here, and if you use the Weed Killer that you picked up in the bathroom you can instantly kill it.
Open the gate in front of the fountain and inspect the fountain to see Steve's image in the water. If you hover the cursor around his right shoulder (your left) you'll find a barely-visible Fountain Key. Exit back to the main room and look on the right side of the room. There's a bulge in the wall, and about parallel with Steve's waist is a hole in the wall. Use the key on the wall to open a door out of the garden.
You'll come under attack from your left by a humanoid thing when you enter the next room. It's not as tough as the big dude from the fireplace route, so you can probably finish it off with a melee weapon and save your ammo. Inspect the rope it was guarding, on the left side of the room, to find a route out of here.
You'll emerge in an art allery. An Art Curator will offer some commentary, then let you loose. As you walk around this area, to the left or the right, you'll run into living art pieces that will attack you. Ignore the right side of the gallery from the Art Curator - the gallery eventually loops around - and go left. The first enemy you run into will drop an Art Gallery Key. You can use this to open the door further to the left, guarded by another enemy. Beyond you'll find the second floor of the Lodge.
Second Floor
Huzzah! That's one floor down. This section of the Lodge consists of a long, curving hallway with a blue carpet, and the nondescript doors you'll find make navigation a bit tricky. Let's go through them one-at-a-time to start, beginning at the art gallery door on the far west end and heading east:
- The double door next to the art gallery is the library. Inside is a Librarian who wants you to get a book back from a Mr. Cain, who happens to be the hulking fellow that you killed if you came up through the fireplace. Bring her Cain's Book and she'll provide a hint for besting another NPC.
- To the right of the art gallery and the library you'll hit an intersection, and if you head north you'll find two doors. The right door leads to the office of the Membership Director, who will provide additional information if you bring him a Kewpie Doll.
- If you check the left door, beside the office of the Membership Director, you'll find a wide, decorative room with a piano in the middle. You can closely inspect the four pillars surrounding the piano, and if you Operate the right-most pillar you'll find a Hooked Flail. It's hidden in the vines on the right side of the pillar.
- Head back to the intersection near the art gallery / library and go south. You'll find two colored doors. You can't open either of them.
- To the right of the secured doors you'll hit another intersection. Go north from here and you'll find a door flanked by two rook-shaped ashtrays. Check the ashtrays for Shotgun Shells. This room belongs to the Chessmaster, whom we'll discuss below.
- Continue left of the Chassmaster's room and you'll find the room belonging to Mr. Cain, where you'd emerge if you took the fireplace path to the second floor. If you didn't get Cain's Book earlier you'll have to kill the brute to get it now. Once again, this is a great place to use the Shotgun. (I don't recommend going here, however, unless you came up via the fireplace. You don't need Cain's Book to advance. Save your ammo.)
- The final door, east of the eastern intersection, is a lovely ballroom. Head south from the entrance and you'll find a Maintenance Man mopping the floor, and he'll demand you keep your grubby shoes off his hard work. We'll come back to him.

Now that you've explored everything - or at least read all the descriptions provided above - you'll need to find your way through the second floor, via those two oddly-colored doors. Start by visiting the Chessmaster. He'll ask if you know how to play Chess, and your answer will determine what happens next:
- If you say 'Yes' you'll be challenged to complete a Chess game, with you playing as white. Move the Knight to the space in front of your King, then move the King one space to the left, then move the Knight north and to the right.
- If you say 'No' you'll have to battle an enormous Chess piece. Hack it down (which is quite easy) to advance. You'll need to fight the Chess piece if you fail to win the Chess game, as well.
Either way, the Chessmaster will... uh... expire. Check his body to find the Chessmaster's Key.
Next head to the ballroom and face down the Maintenance Man. You'll need to kill him to progress, and he has a Nail Gun that, despite doing low damage, will knock you away from him. Unless you have the Shotgun handy, which makes him an easy kill, you'll need to charge him with a melee weapon, swinging wildly, and hope you connect. (This is a good place to use cheat codes. Fighting this man is
awful.) You'll get the
Nailgun, another ranged weapon, for beating the Maintenance Man.
To the right of the Maintenance Man you'll find a door that you can unlock with the Chessmaster's Key. Inside the next room you'll run into a bouncy clown who will rush at you with a Chainsaw. He's pretty easy to beat with a melee weapon, mercifully. Take out the clown to receive the Chainsaw, a Kewpie Doll, and a Kewpie Key.
Take the Kewpie Doll to the Membership Director, if you like - this is not an obligatory step, but you get more dialogue - then head to the colored doors and use the Kewpie Key on the left door. You'll find an auditorium inside, and on the stage, to the south, you'll find two
Flags. Pick up both of them, then exit through the tear in the curtain behind you.
This will bring you backstage. There are two Wood Planks here, one on the floor and one leaning against the wall on the left, that you need to grab. Chech the lunchbox in the foreground and you'll find a Sandwich that you can use to restore Steve's health. You won't get many ore opportunities to heal Steve, so grabbing the Sandwich is highly recommended.
Walk off the screen to your right and you'll find the other half of the backstage, where another Wood Plank waits for you, on the floor. If you check the door on the right side of this area you'll find a green room, and a corpse-like fellow inside will attack you from the right. Take him out and you can explore the room, though all you'll find of use is Lighter Fluid, beside the chairs to the right. The Lighter Fluid can be used to refill the Chainsaw.
Return to the right side of the backstage and look next to the curtain, on the left side of the screen. There are two masks that you can manipulate. Click the white mask on the left four times (it should be upside-down) and the black mask on the right seven times. This will open a door to a laundry room. Head south to the other half of the room and you'll find some familiar clothes, as well as a door. Going through the door locks you in to a potential Game Over, so make sure you save first.
You're now sealed inside a boiler room. This is a timed puzzle that will burn Steve to death if you take too long. You can tell how much time you have left by checking the green-yellow-red pressure gauge on the first boiler, in the central area of the boiler room. Let's get it over with quickly:
- Walk to the left and you'll find a Pipe and a Wrench on the floor of the room's middle section. Continue left to find two more pieces of Pipe, on the floor near the exit door.
- Combine the three pieces of Pipe to create an S-Pipe.
- Return to the middle section of the room and Operate the valve that's above and to the left of the pressure gauge on the first boiler. This will prevent the steam from flowing.
- Use the Wrench on the broken pipe running from the valve on the first boiler to the second boiler.
- Use the S-Pipe on the valve.
- Operate the valve again to turn it back on.
This will stop the awful alarm screeching, as well as open a panel on the first boiler. Inside the boiler you'll find a Boiler Room Key. You can use this to open the door back to the laundry room, as well as the door on the left, leading deeper into the Lodge.
In the next room you'll find a generator that looks way too sci-fi for this setting, and an electrician will attack you. A few melee swipes should take him out. The next two rooms beyond here are timed, so make sure you move quickly:
- In the first you'll need to cross... lava? Put down two of the Wooden Planks you picked up from the backstage in order to leave the room to the left.
- In the second you'll be locked into a rocky chamber with a ceiling that is slowly descending towards Steve's head. Use the flags that you picked up from the auditorum on the two cement bases near the center of the room to stop the ceiling's descent. This will open the room's two doors.
The final room on this floor, to the right of the Flag puzzle room, is watched over by a rather mundane security guard. Take him out with one of your weapons, then climb the rope up to the third floor. At last!
Third Floor
You're almost at the end. Just... a dozen or so more rooms to go. Eesh. There's a Pack of Nails behind and to your left when you reach the top of the rope, but otherwise all you can do is head through the door on your left.
The first room is the Temple of the Mystery of Abstinence. You can either grab at the burgers to irritate the big guy who is eating, attack the big guy before he can get up, or wait until the big guy finishes all the burgers and then fight him. Unless you wait until the big guy is done, however, you'll be attacked by the Man in Suit as well, and his handgun can put you down quickly. You'll do well to wait.
Go through the central door and you'll enter the Mystery of Motherly Love, which is... quite something. After conversing for a bit you'll be attacked by three little creeps, and you'll need to kill them off. Swipes from a melee weapon will do.
The next central door will take you to the Temple of the Mystery of Religion. A priest will ask you a series of questions, and if you answer any incorrectly you'll be attacked by the two fellows with bags on the sides of the room. They come at you one-at-a-time, so this fight is pretty easy. Still, you should avoid damage if you can, soooo:
- Yes
- In Heaven
- Frolic with the Wombats
- I'll take the Staff
- Trip to Brazil
The central door in this room will take you back to the beginning of the third floor, but that won't get you anywhere, so head through the door on the left instead.
This next room is... well, it isn't pretty. Still, there's no challenge here, and if you inspect the boxes on the right you can find a full complement of Shotgun Shells. Examine the cans on the left and Steve's health will be fully restored. Head south and you'll discover that this is the Temple of the Mystery of Morality, and a man with a machete will attack you. Take him out.
On the right side of the Temple of the Mystery of Morality you'll come across a familiar face, inside the Temple of the Mystery of Flesh. They will rant for a while before attacking you. This fight can take quite a toll on your health, and is a great candidate for one of your ranged weapons. (You know, like the Shotgun you just reloaded.)
The next room is the Mystery of Lust. Here you'll be propositioned by a Madam, and you can trade in the Two Hundred Dollars that you picked up earlier in the Lodge to watch an extra cut scene. This will have the effect of badly sickening Steve, however, and you'll be put on a timer to find a Syringe a few rooms over before you run out of health. If you decline the offer you'll need to fight one of the room's ladies instead. (I don't recommend taking up the offer, or if you do, make sure you save first.) Grab the barely-visible Mirror off of the ground on the left side of the room before you exit.
To the left is the Mystery of Beauty. A woman will ask you if you think she's beautiful. If at any point you say she isn't she will attack. Continue to compliment her and you'll eventually run out of compliments... unless you have the Mirror in your inventory. Choose 'Here's a mirror. See for yourself!' when it comes up to watch a grisly cut scene, as well as avoid a battle. (Though if you're suffering from the wasting disease, you should skip to the battle and get it over with. This woman is easy to defeat.)
Left of the Mystery of Beauty is the Mystery of Pain. The Inquisitor in here will invite you to torture the man strapped to the rack in the middle of the room. You can either beat the man with one of your weapons - any of them seems to work fine - or you can attack the Inquisitor and kill him. Either way, you'll open the door to the north. Sitting on the floor on the left side of the table is a Syringe, and in addition to restoring a bit of Steve's health it will cure the disease that you may have picked up in the Mystery of Lust. Go for this immediately after the Inquisitor stops talking if you're taking damage.
To the north is the Temple of the Mystery of Charity. You'll have a quick chat with the fellow, but ultimately it comes down to a fight. This guy's cane has a long reach, so you may want to use a ranged weapon so you can avoid damage. Exit on the left.
The next room is the Mystery of Mercy. You have a choice: Either attack the old people on your left or attack the Gladiator on your right. If you refuse to attack the elderly couple the Gladiator will immediately come at you, and he'll likely do a great deal of damage before going down. Unless you're determined to get his Sword, which... isn't much different from other melee weapons... you should go after the couple. (If you really want the Sword, take out the couple, then use the Chainsaw on the Gladiator before he can react.)
Exit the colosseum to the right to enter the... well, who knows what this place is, exactly. Mystery of Violence on Television? As you walk towards the guy in the middle of the room he'll summon a gunslinger near your position. If you pull out your Chainsaw you can quickly buzz through this guy before he gets off a shot. A robot will then be summoned to the right, and a ranged weapon can take it out before it gets too close. (Though it isn't especially dangerous close up either.)
Go through the door behind the TV in the middle of this room and you'll wind up in the penultimate chamber of the Lodge, where another familiar face is waiting. You'll need to take out two targets here, and since you won't need your ammo anywhere else this is the place to pull out your remaining ranged weapons and unleash them on your two foes. A few blasts from your Shotgun can wipe them out in a hurry. Attack fast, as the nearest guy can blast Steve pretty badly if given a few seconds.
Defeat the final two enemies and you'll meet up with the Sergeant at Arms, who will explain the backstory of Harvester, and why, exactly, Harvest is such a weird place to live. You'll then be forced to make a choice which will determine the ending of the game. There are two potential endings:
- Remain in Harvest. Select the Sergeant at Arm's empty hand.
- Leave Harvest. Select the Sergeant at Arm's Harvest Blade. You'll have to perform one last kill if you choose this ending.
You can still save your game at the decision screen, so feel free to watch both endings. Regardless of your choice, congratulations! You've completed Harvester! Wasn't that fun?
Cheats
Finding Harvester too challenging? Luckily, there's an easy way around the unrelenting challenge of the second half of the game, and that's using cheat codes. There are several cheats that will make Harvester substantially easier. Type the code in while you can explore as Steve, including any spaces. If you did it successfully you'll hear a shotgun blast, and the cheat's effects will be implenented.
- murderer - Receive all weapons in your inventory. This will also refill any expended ammo. You can only receive weapons that you are normally found in your given area, so you can't, for example, get all of the ranged weapons from the Lodge back in Harvest.
- son of sam - Receive all non-combat items in your inventory. As with the weapons, items found in Harvest won't be placed in your inventory when you're inside the Lodge, and vice versa.
- nick - Fully restores Steve's health.
- bruce - Make Steve invincible. This will only protect you from damage doled out by enemies, not traps or story events.
- dustin - Jump to the first floor of the Lodge. Only works if you're in Harvest, not if you're already in the Lodge.
- boston strangler - Jump to the second floor of the Lodge, below the art gallery.
- helter skelter - Jump to the third floor of the Lodge, just before you enter the first Mystery.
- charles manson - Jump to the final battle in the Lodge, just before the ending.