Main Walkthrough
Recommended Level: 39
The fourth chapter of Hikari's story takes place in the distant town of Stormhail, one of the more difficult towns to reach in Octopath Traveler II. To get to Stormhail you'll need to travel to Montwise, which is almost on the other side of the world from Wellgrove, Hikari's last destination. Fortunately, Montwise was the setting for Hikari's second chapter, so you can zip right there.
Travel to the north end of the Western Montwise Pass and you'll find a Guard in front of the entrance to the Northern Montwise Pass. Have one of your characters beat him up with their Path Action - Hikari himself is good at this - and he'll let you by. Beyond the Western Montwise Pass is the Southern Stormhail Snows, and Stormhail itself is down the northwestern path.
Upon arrival with Hikari in the party you'll be prompted, as ever, to begin the chapter. If you decline you can visit the Tavern, speak to the Tavern Keeper, and choose Hear a Tale. The Tavern is on the west side of town, right beside the central path.
Hikari travels to Stormhail in search of Rai Mei, one of his old friends, whom he hopes will help battle against King Mugen. She dwells in Castle Mei, to the north of the entrance of Stormhail, in the Bridge area. Cross the bridge on the right side of the route to trigger a cut scene... and a battle.
Kunzo
Shields: 5 (Kunzo) / 3 (Clan Mei Spearman)
Weakness:
- Dagger, Axe, Lightning (Kunzo)
- Sword, Bow, Fire, Dark (Clan Mei Spearman)
Drop: Nourishing Nut (L), Olive of Life (M)
Steal: Olive of Life (M) (Clan Mei Spearman)
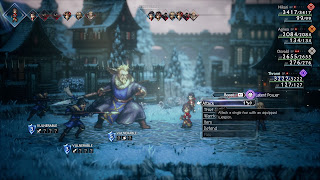
Despite Kunzo's big sprite, this is a basic fight. (Rightly so, considering this is the beginning of the chapter.) Kunzo and his two Spearmen will use a series of melee attacks on your party. Wipe out the Spearmen and Kunzo will buff his physical attributes, making him a more potent foe for a few turns. His counterattacks can be vicious, so if you're not sure that you can Break him in a single attack either use magic or Defend and build up some BP. Anything that buffs your defenses will make Kunzo an easier opponent.
Rai Mei will call off her men after the battle, but her reaction to Hikari's presence is... unpleasant, to say the least. Hikari will have a little flashback battle, and you'll need to Challenge his opponent and fight a quick duel. Nothing too serious. Once that's done there will be several more cut scenes, and when they're done Hikari will wake up in a dungeon. A surprise ally will set the team free, granting you access to the next dungeon.
Castle Mei: East Tower
Enemies
- Albino Bat - Weak to Spear, Bow, Staff, Dark - Drop / Steal Forget-Me-Do
- Clan Mei Spearman - Weak to Sword, Bow, Fire, Dark - Drop / Steal Olive of Life (M)
- Thunder Curator Mk. II - Weak to Polearm, Bow, Wind - Drop / Steal Thunder Soulstone (M)
- Thunder Guardian Mk. II - Weak to Sword, Dagger, Bow, Wind - Drop / Steal Thunder Soulstone (M)
- Thunder Sentinel Mk. II - Weak to Sword, Polerm, Axe, Staff, Wind - Drop / Steal Thunder Soulstone (M)
- War Dog - Weak to Axe, Bow, Fire, Lightning - Drop / Steal Herb of Revival
Rai Mei has quite a nice castle. Head upstairs from the dungeon and you'll be inside the entry hall. If you head west through the hall you'll emerge at the bridge that Rai Mei destroyed earlier, and you can use it to return to Stormhail and stock up.
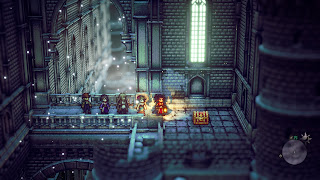
Check the north side of the entry hall for a chest containing a Thunder Soulstone (M) in a side room, then head east. There's a save point ahead, and if you check northwest of the save point, along the railing, is a chest containing 16,000 leaves. Save, then head up the stairs in the east to properly enter the combat zone of Castle Mei.
There are stairs to the east of the entry point. Skip them and go all the way east. You'll find an exit to the castle's ramparts, where you'll find a chest containing an Herb of Serenity. Climb to the second floor landing, then go down the partially-hidden side steps on the left side of the northbound stairs. The hidden stairs will take you to the chest on your right, which contains a Thunder Soulstone (L).
Climb to the top floor. Check the side room on the left for a chest containing a Healing Grape (M), then trek east. You'll climb a bridge and enter another section of the tower. There's a ladder to the southeast, and if you climb down you can cross another, smaller bridge and enter a barren room containing a chest. Inside is a Nightmare Glaive. It's a great weapon for Hikari if he's behind on attack power.
In the north of the second tower you'll find a save point. If you check out the west side of this tower you'll find another bridge. This leads to a smaller, lonely tower with a chest containing a Thunderstorm Amulet. Consider equipping this on someone with poor defenses to magic. East of the save point you'll find stairs, leading up to the Gallows, and there...
Rai Mei
Shields: 7, 9 (Rai Mei) / 4 (Clan Mei Swordsman)
Weaknesses:
- Sword, Staff, Fire, Light (Rai Mei)
- Dagger, Axe, Wind, Dark (Rai Mei - Thunderclap Stance)
- Polearm, Bow, Fire, Lightning, Dark (Clan Mei Swordsman)
Drop: Refreshing Jam
Steal: Refreshing Jam
Hikari's friends really need to stop forcing him into boss battles.
- Normal melee attacks
- Levin Stance, which boosts Rai Mei's attacks to twice per round
- Spearhead, a heavy melee attack against one target
- Twin Levinspear, which inflicts melee damage on two characters
- Sweep, a melee attack against your whole party
- Serenity, a buff to Rai Mei's accuracy and critical hit rate
- Thunderclap, a Lightning attack against a single character
- Thunderclap Stance, which gives Rai Mei a new set of weaknesses and gives her attacks an extra Thunderclap
- Cross Spear, a strong melee attack that can knock a character Unconscious
- True Levin Stance, which gives Rai Mei another set of weaknesses and increases her attacks per round to three
- Thousand Spears, a random flurry of strikes against your whole party
- Bolt Brandish, a powerful melee / Lightning attack against the whole party
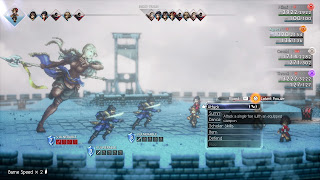
Rai Mei begins the fiht by granting herself two attacks per round and locking away all of her weaknesses. Accompanied by two Clan Mei Swordsmen, she'll spendtime battering your party with melee attacks, as well as the occasional Thunderclap. The Swordsmen are no slouches, and can provide Rai Mei with plenty of backup. Rai Mei's weaknesses are only exposed once you defeat the two Swordsmen.
Break Rai Mei and she'll use Thunderclap Stance. This will swap most of her weaknesses around, as well as add an extra Thunderclap onto the end of each of her attacks. While this doesn't quite double Rai Mei's damage output - she loses her extra turn per round - it does make her individual attacks much more problematic. She'll also start using Cross Spear, which can inflict Unconsciousness on a single target. Continue to damage Rai Mei and she'll swap to True Levin Stance, which boosts her shields to nine, changes her back to her original weaknesses, and grants her three attacks per turn.
Once you get Rai Mei into the red she will use a charge attack, and if it isn't interrupted it will turn out to be Bolt Brandish, which hurts the whole party quite a bit. If this goes off Rai Mei will change to the Thunderclap Stance again, adding Lightning to her attacks but reducing her attack count to one per round. The rest of the battle swaps back and forth between her two final forms.
This battle is long and painful, but straightforward. In the first phase you'll need to concentrate your attacks on the Swordsmen while healing away the damage from Rai Mei's attacks. Anything that boosts your team's defenses will help, and Sidestep is always handy when facing melee blows. Once Rai Mei is alone it's not that difficult to Break her, so long as you conserved BP. Keep someone on healing duty - a Cleric is best, given the number of AOE attacks Rai Mei uses - while everyone targets her weak points. Over time you'll whittle Rai Mei down and defeat her.
(If you're having trouble keeping up with Rai Mei's damage output once she has three attacks you may want to let Bolt Brandish go off. Rai Mei will change forms and go back down to a single move per round, which, while still painful, is much easier to handle.)
The battle will end without further bloodshed, though Rai Mei cannot commit herself to Hikari's side. At the very least she's done trying to execute him, and that's... something. Chapter complete.
Main Walkthrough


