Recommended Level: 36
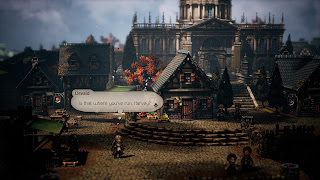
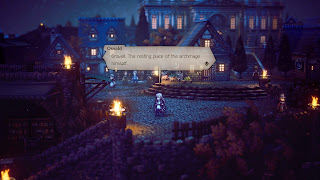
The fourth chapter of Osvald's tale takes place in Montwise, a town on the far east end of the Crestlands. To get there from Conning Creek, the setting of Osvald's third chapter, you should jump back to Cape Cold and travel east, to the Eastern Cape Cold Snows. Head south of here to the eastern Flamechurch Pass, then go east again. You'll wind up at Montwise soon enough.
Upon arrival Osvald can begin his chapter immediately, assuming he's in the party, or wait until later. If you opt to wait you can begin the chapter by visiting the Tavern and choosing Hear a Tale when speaking to the Tavern Keeper. The Tavern is north of the entrance.
Thinking back on his friendship with Harvey as he arrives in Montwise, Osvald decides to look for his former colleague in the town's enormous library. It's the largest building in town, and difficult to miss. Head inside during the day and have a look around for three people to Scrutinize:
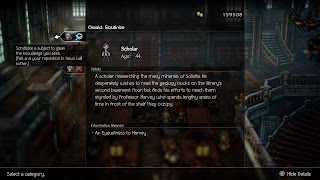
- A Scholar on the west side of the ground floor is An Eyewitness to Harvey
- A Scholar on the west side of the first basement floor, down the stairs, knows Harvey's Whereabouts
- A Scholar on the east side of the first basement floor heard a Lubrary Rumor
The three tidbits of info will point towards a hidden passage somewhere inside the library, in the second basement, that is known to Harvey. Climb down to the lowest level of the library and check to the left of the western ladder to trigger a cut scene, culminating in Osvald's discovery of the passage.
Underground Laboratory
Enemies
- Dark Curator - Weak to Polearm, Bow, Staff, Light - Drop / Steal Shadow Soulstone
- Dark Guardian Mk. II - Weak to Dagger, Bow, Light - Drop / Steal Shadow Soulstone (M)
- Dread Viper - Weak to Polearm, Axe, Staff, Light - Drop / Steal Energizing Pomegranate
- Ettin Asp - Weak to Polearm, Axe, Staff, Wind - Drop / Steal Energizing Pomegranate (M)
- Furious Fungoid - Weak to Polearm, Staff, Wind, Light - Drop / Steal Healing Grape (M)
- Sentinel Mk. II - Weak to Sword, Polearm, Axe, Bow, Staff - Drop / Steal Ancient Sentinel Core
How devilish. Head east from the entrance and you'll see two small side rooms. The room further to the right has a chest containing 14,000 leaves. Begin your trek west along the main path and you'll find a third side room, and inside are chests containing two Bottled Nightmares.
Continue west. The next two doorways lead to a connected room, within which is a chest containing a Fire Soulstone (L). Further down the corridor you'll find... a save point? Oh, that was fast. Heal your characters up, save, and head into the room beside the save point.
Creatures
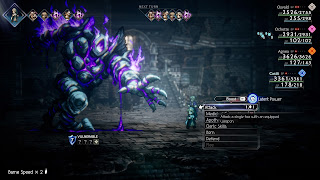
Shields: 3 (Deformed Creature, Synthesized Creature) / 2 (Cobbled Creature)
Weaknesses:
- Polearm, Ice, Light (Deformed Creature)
- Polearm, Staff, Lightning (Cobbled Creature)
- Dagger, Axe, Staff, Ice (Synthesized Creature)
- Polearm, Staff, Wind, Light (first phase)
- Sword, Bow, Ice, Dark (second phase)
- Sword, Polearm, Dagger, Axe, Bow, Staff (crumbling)
- A normal melee strike
- Pound, a heavy melee attack against one character
- Pulverize, a heavy melee attack against one character that also does BP damage
- Shake Off, a melee attack against your whole party
- Wail, an attack against the whole party that debuffs elemental attack
- Dissolving Darkness, a Dark attack against a single target with an ongoing HP, SP, or BP drain effect whenever that character takes an action
- Dark Torrent, a Dark attack against the whole party that has the same drain effect as Dissolving Darkness
- Rampage, a charged attack that inflicts heavy melee damage twice
- Stampede, which raises the Golem's shields to 14 and gives it an additional attack per round


