Recommended Level: 16
Assuming you decide to follow Father, the second chapter of Throné's story takes place in Winterbloom, a town deep within the Winterlands. To reach this community from Throné's starting location of New Delsta you'll need to travel north, to the Southern Cape Cold Snows. Head east to the Eastern Cape Cold Snows, then north, to the Western Winterbloom Snows. Winterbloom is to the east of this route.
Upon arrival Throné will be prompted to begin her chapter, if she's in party. If not, you can trigger it by visiting the Inn and choosing Hear a Tale when speaking to the Tavern Keeper. The Tavern is right beside the entrance to Winterbloom, so it's nigh impossible to miss.
Throné arrives in Winterbloom on the trail of Father, one half of the Blacksnakes' leadership. She suspects that the Blacksnakes have a stronghold on the outskirts of town, though she'll need more information before she can properly track them down.
Head north through Winterbloom to the Thieves' Quarter. There's a second, less-cozy Tavern in the northwest of this area, and it appears to be deserted when Throné arrives. This changes quickly when three men corner her. Switch to night and Ambush all three of them. Father will stroll in, happy with Throné's performance, and give her a new job.
Head to the east side of the Thieves' Quarter. Father will explain the job: Eliminate the leader of the Snowhares, a rival organization to the Blacksnakes. Stroll up to the front of their HQ and Ambush the Lookout standing guard. Throné will reminisce about her past, then head inside. Check the back room on the ground floor to find your next destination.
Snowhares' Den
Enemies
- Curator - Weak to Polearm, Dagger, Bow, Staff - Drop / Steal Ancient Sentinel Core
- Dire Ash Raven - Weak to Polearm, Dagger, Bow, Light - Drop / Steal Lily of the Light
- Ice Curator - Weak to Bow, Staff, Fire - Drop / Steal Ice Soulstone
- Ice Guardian - Weak to Sword, Dagger, Bow, Fire - Drop / Steal Ice Soulstone
- Ivory Eel (water only) - Weak to Polearm, Axe, Fire, Dark - Drop / Steal Cleansing Leaf
- Majestic Snow Marmot - Weak to Dagger, Bow, Staff, Fire - Drop / Steal Lily of the Light
- Shrew Fossilized Fish (water only) - Weak to Polearm, Bow, Lightning, Dark - Drop / Steal Herb of Clarity
- Snowhare - Weak to Sword, Bow, Lightning, Light - Drop / Steal Herb of Clarity
- Snow Yak - Weak to Polearm, Axe, Lightning, Dark - Drop / Steal Whimsical Leaf
- White Howler (water only) - Weak to Polearm, Bow, Wind, Dark - Drop / Steal Fool's Leaf
There are two paths through this next section, and they both connect near the end. If you just want to get through the dungeon and leave, head south and follow the path to the east. If you'd like treasure, however, you should walk east of the Exhausted Woman. Down a ladder you'll find a dock which you can use to climb in a canoe and sail around. There are a number of treasures to collect.
- Sail south of the first dock and through the first archway on your right. It will take you to a chest containing a Shadow Soulstone (M).
- Just north of the eastern dock that takes you back to the main path is a hidden tunnel. Sail through it to find a ladder up to a chest. The chest contains an Empowering Bracelet.
- Up the ladder from the eastern dock and a little ways north is a chest containing an Inspiriting Plum (M).
- Sail to the far southeast corner of the area and you'll find a chest containing a Quartz Dagger.
On the east end of the Snowhares' Den you'll find a save point, just south of a dining area. Heal, save up, and approach the leader of the Snowhares. Unsurprisingly, he's not interested in talk.
Bergomi
- Sword, Bow, Fire (Bergomi, first phase) / Sword, Dagger, Bow, Fire, Light (Bergomi, second phase)
- Dagger, Staff, Lightning, Light (Bergomi's Lackey)
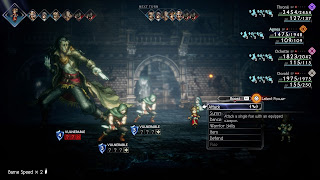
Ouch, painful. The leader of the Snowhares, Bergomi is quite a fighter. He'll pester your team throughout the fight, and has a special love for status ailments that gets annoying rather quickly. Bergomi uses the following attacks:
- Wild Needle, a melee attack against your whole party
- Triple Strike, a three-hit melee strike against one character
- Augmenting Needle, which randomly buffs one of Bergomi's Lackeys
- Debilitating Sting, which randomly debuffs one of your characters
- Poison Sting, which Poisons one of your characters
- Befuddling Sting which Confuses one of your characters
- Forbidden Pressure Point, which buffs all of Bergomi's stats
- Pincushion, a two-strike melee attack against your whole party
- Enfeebling Pressure Point, a charged attack that debuffs all of one character's stats
This fight is pretty nasty. Bergomi enters with two Bergomi's Lackeys, and during the first phase of the battle he'll either buff their stats or help them batter your party with melee attacks. Bergomi has a massive fondness for needles, and he'll use them to inflict status ailments and debuffs on your party. While his Lackeys are alive Bergomi's weaknesses can't be exploited.
Defeat Bergomi's Lackeys and Break Bergomi and he'll raise his shield count to eight and his move count to twice per round. He'll then use Forbidden Pressure Point to amplify his stats and start using more powerful moves. If Bergomi is allowed to charge up and unleash a move he'll use Enfeebling Pressure Pont to massively debuff one of your characters for a few turns.
Assuming you've recruited her, you'll want to bring Castti along for this fight. She can use her Conconctions to swiftly cure one or all of your party members of status ailments using Cleansing Leaves. Bergomi's attacks are all physical, so Hired Help - Mercenary also helps by buffing your resistance to damage. That done, pick one of the Lackeys, take him out, then do the same to the other.
On his own Bergomi isn't as bad, despite his improved shields. He gains a few additional weak points in the latter half of the battle, and you can use these to swiftly knock away his shields and Break him. Status ailments continue to be a concern, but so long as you save up BP Bergomi should remain Broken for most of the fight. The only ailment you need to dispel is Confusion, so if you have to prioritize between knocking away shields or healing a status ailment, you can go for Bergomi's shields most of the time.
Bergomi begs for his life once the battle is over, though he - and Throné - are ambushed by Father, who was never fooled by Throné's ruse. He tells his 'daughter' to meet him in Montwise, a town in the Crestlands, if she wants to escape the Blacksnakes. Sounds like a plan. Chapter complete.


