Main Walkthrough
Recommended Level: 34
The fourth chapter of Agnea's journey takes place in Sai, a small, poor town in the deserts of Hinoeuma. If you're headed straight to Sai from Tropu'hopu, the location of her previous chapter, you'll need to hop on a boat from Toto'haha to Canalbrine. Travel east to the Canalbrine Bridge, south to the Western Conning Creek Coast, and west to the Southern Sai Sands. Sai is in the north of this last route.
Upon arrival, assuming Agnea is in the party, you'll have a chance to begin the chapter right away. If you decide to hold off until later you can visit the Tavern, speak to the Tavern Keeper, and choose Hear a Tale. Sai's Tavern is a short walk northeast of the town's entrance. The town of Sai has plenty of stuff worth collecting, if you want to have a look around first.
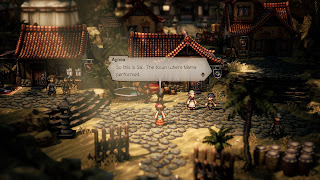
Despite learning of a grand gala of entertainers elsewhere in the world, Agnea nevertheless decides to make a stop in Sai, where she's been told her mother once danced. One of the townsfolk suggests Agnea look in the town's East District, and lo and behold, Agnea finds a statue that looks a lot like her mom. It is then promptly defaced by a young woman named Laila. Agnea tries to brighten the situation with some dancing, but... nope.
An old couple stop by and appreciate Agnea's dancing more than Laila, and they invite her to their home. You'll find it to the north of the statue, on the west side of the East District. A lot will happen while you're inside the house, and by the end Agnea will need to track down Laila, who has run off again. She's back by the statue.
Agnea decides that Laila needs some new shoes. Head back to the main area of Sai, in the west, and check out the Armorer, near the entrance. There's an Elderly Man out front whom you can Entreat at night. He's carrying a pair of Cute Shoes. Take them to Laila, still by the statue, and the two girls will practice and bond for a while. The good times don't last, however, and one of the townsfolk signals trouble.
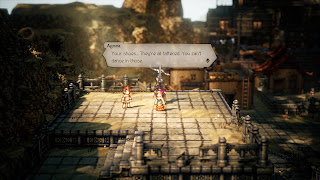
Head to the square out front of the elderly couple's home. None other than Dolcinaea has arrived, and it appears that she has plans for Sai. She'll leave the town for Dragonridge, to the east, and Agnea will charge after her.
Dragonridge
Enemies
- Assassin Bug - Weak to Spear, Dagger, Fire, Ice - Drop / Steal Inspiriting Plum
- Dark Roller (day only) - Weak to Dagger, Ice, Lighting - Drop / Steal Dual Flower
- Desert Worm - Weak to Sword, Axe, Wind, Light - Drop / Steal Inspiriting Plum
- Giant Scorpion - Weak to Polearm, Dagger, Axe, Wind - Drop / Steal Cleansing Leaf
- Killer Bug - Weak to Sword, Dagger, Fire, Ice - Drop / Steal Herb of Revival
- Withered Wanderweed (day only) - Weak to Sword, Axe, Fire, Wind - Drop / Steal Herb of Awakening
The initial path through Dragonridge will take you east. Walk until you're heading up some steps. Between the first two lanterns on these steps is a well-hidden slope. Walk along it to find your way to a chest containing a Wind Whisperer. This is a great weapon for Agnea, especially if you have her using magic.
Continue east until the path veers south. Check on your right as you walk and you'll find a hidden path up to a chest. Inside the chest you'll find an Empowering Lychee. Continue south along the main path until it turns west, then check on your right for a chest containing an Inspiriting Plum Basket.
The remaining path will bring you to a save point before long. Check to the right of the save point and you'll find a hidden Tempest Amulet. Equipping on this someone will make the next battle more tolerable. To the west of the save point you'll see a clearing, and given who's occupying said clearing, you shouldn't be too surprised by the coming boss battle.
Veronica
Shields: 6 / 8 / 9 / 10
Weakness: Dagger, Axe, Fire, Ice, Dark
Drop: Inspiriting Plum Basket
Steal: Inspiriting Plum Basket
Dolcinaea's bodyguard, Veronica more than lives up to her station. Fighting only with her fists, she's quite capable of not only holding off your entire party, but beating them to a bloody pulp. Veronica uses the following attacks:
- A normal melee strike
- Straight, a stronger-than-average melee blow
- One-Two, a two-hit melee strike on a single character
- Razor Wind, a Wind attack against the entire party
- Stunning Uppercut, which strikes one character can may knock them Unconscious
- Body Blow, a heavy strike against a single character that debuffs physical defense
- Counter Position, which will counter any physical attacks on Veronica with a stronger return hit
- Featherweight, which boosts Veronica's evasion
- Switch Gears, which grants Veronica an extra turn per round
- Azure Right, a charged melee attack that hits the whole party and can temporarily kick characters out of the battle
This battle is much more dangerous than it seems at first. Veronica specializes almost exclusively in physical attacks, and she'll dole out decent amounts of pain with each hit. Despite this she's relatively easy to Break, and isn't that problematic... at least until you do enough damage. Veronica will later boost her shield count to eight, and use Switch Gears to add another attack per round. She'll do this again later, giving herself three attacks per round, and her shield count will rise to nine. Eventually Veronica will rise to four moves per round, with ten shields. Add in her charged attack and you can quickly find yourself in trouble.
For the first half of the fight you want to preserve BP, keep the party healed, and steadily Break Veronica until she gains more turns per round. Once this happens start leeching off of your BP to keep Veronica Broken whenever possible. When Veronica moves to three, four, and five moves per round you must have BP available to Break her, as not only will she begin charging up, she'll just use a ridiculous number of physical attacks. Your characters will fall left and right if you don't Break her. There are no special tricks to Breaking Veronica, though a fully-charged Scholar who knows Elemental Barrage will have the easiest time getting through Veronica's shields. Any move that hits Veronica's weakness multiple times without using up BP is also handy.
Late in the fight you'll likely have trouble keeping up with Veronica's damage output. Buffing everyone's defenses will help offset the pain a bit, and Hired Help - Mercenary is a good way to do that. One particularly simple method is to use Bottles of Blinding Dust to Blind Veronica, which will cause many of her hits to simply miss. Castti can also use Dual Flowers in her Concoctions to Blind Veronica, though only at night.
Dolcinaea will agree to leave Sai alone once you've won the fight. She makes it clear that she's the star here, however, and challenges Agnea to a dance-off showdown at her next destination. It's a date, you pompous so-and-so.
Main Walkthrough


