Location
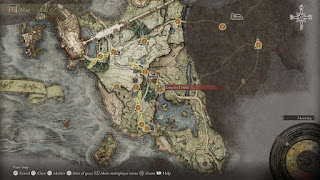
Limgrave Tunnels is located on Lake Agheel, as close to the Gatefront Ruins as any part of the lake gets. Follow the road east out of the Gatefront Ruins until you reach a telescope, then head south and down to the lake. Follow the lakeshore west until it becomes cliffs. Keep following the cliffs and they will take you to the entrance to Limgrave Tunnels.You can come at this place from plenty of angles, though be warned: A boss fight with Flying Dragon Agheel waits on an island just south of the entrance. It's pretty easy to get around Agheel once you know it's there, but early in Elden Ring you probably aren't ready to fight this thing.
Limgrave Tunnels
Hop on the elevator at the top to be escorted down into the mines. On your way down you'll probably notice a small mine shaft about halfway up the elevator shaft; hop off on your way back up the elevator and you'll find a Golden Rune [4]. There are lit ledges below this little passage that you can use to reach the bottom.
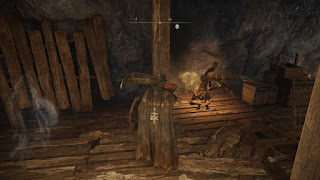
Activate the summoning pool ahead, then proceed into the first mining tunnel. You'll come across your first miner soon enough, and he's busy working on a yellow Smithing Stone [1]. He'll ignore you unless you attack him or take the Smithing Stone on the wall. The miners have thick skin, and can be a bit difficult to whittle down if you're not using magic or a striking weapon. Still, they're worth backstabbing in case one drops a surprise Smithing Stone [1]. Be sure to two-hand your weapon if you're fighting these things via melee, or your attacks will bounce a bit every time you hit one.
A little further down the wooden walkway are two more miners, one with a bag on his back. Any miner not actively working will attack you. Take this guy out, then go for the one working on the Smithing Stone [1] on the wall. Look to your right and you'll see yet another miner working away in a small side tunnel. Kill him for his Smithing Stone [1].
The path splits here to your left and right. To the southwest is a small, dark chamber with three rats inside it, guarding a Smithing Stone [1]. Kill the rats and take the item. Watch out behind you for a miner who will show up and assault you.
To the northeast is another elevator. Ride it all the way down and follow the passage ahead. It will lead you to a shack with a hound inside, feasting on five Large Glintstone Scraps. Killing the hound will bring a miner and another hound over to attack you. Get outside the shack so you're not cornered and lead the hound away, then take on the miner once the hound is gone. Another miner on the right is working away at a Smithing Stone [1], and there's yet another Smithing Stone [1] behind the shack.
Return to the elevator and ride it back up. Halfway up the shaft you'll see a tunnel set into the wall. Jump down to it. The tunnel leads to an intersection with more miners, two of whom carry lanterns that can project flame. Watch their patrol routes and split them up so you're not fighting too many enemies at once, and try not to accidentally strike the miners who are busy working. There's a Smithing Stone [1] at the intersection, and down the right path you'll find three Glintstone Scraps.
Follow the tunnel to the left and you'll find a miner and a Smithing Stone [1], right beside an elevator. There are some barrels beside the elevator, and if you smash through them you can find ledges below that lead down to a Golden Rune [1], as well as the bottom of the elevator shaft. The boss fog door is down here. Check the passage to the right of the fog for one last Smithing Stone [1], then step inside.
Stonedigger Troll
A familiar face if you've been exploring the highlands of Limgrave, the Stonedigger Troll is not a huge deal as far as bosses go. It has a substantial reach and its area of effect slams can be a pain, but this thing is a slow, easy target, and shouldn't give you too much trouble. Some tips:
A familiar face if you've been exploring the highlands of Limgrave, the Stonedigger Troll is not a huge deal as far as bosses go. It has a substantial reach and its area of effect slams can be a pain, but this thing is a slow, easy target, and shouldn't give you too much trouble. Some tips:
- If you're using a melee build, stick to the Troll's legs and hack away at them whenever it isn't attacking. Pretty quickly you will wear it down into a stagger, and once it's on the ground you can either stab it in the face for critical damage or keep hitting its body. Both will do plenty of damage. If you're using a ranged build you can hit whatever part of its body you like.
- Watch the Troll's body language, in particular its feet if you're standing under the beast. As soon as it raises a leg you need to be ready to roll out of the way.
- Watch its reach. The Troll's weapon is sizable, and it can hit you from further away than you might think. Always be ready to roll.
- Summon in some help. Any Spirit Ash will be useful in this fight, and they don't need to be upgraded to wreak havoc on the Troll. If you bring in a mob of summons it won't be long before their tiny smacks stagger the Troll and bring it to the ground.


