(Quick note: Since Super Training on Pokémon Omega Ruby and Alpha Sapphire is pretty much lifted wholesale from X and Y, this walkthrough can serve as a guide for Super Training in those games as well.)
For a long time, the programmers of Nintendo kept the existence of Hidden Values - long since dubbed EVs by Pokémon fans - out of the bulk of the games themselves. These values never saw the light of day unless you did the math, and it took some rather dedicated gamers to make them public knowledge. Now EV training is a standard in competitive Pokémon play.
Previously you needed to either fight specific species of Pokémon or feed your Pokémon Vitamins to increase EVs. Super Training does away with the need to do either of these.
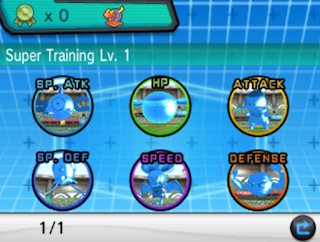
Unlocked early in the game, Super Training constitutes a method of boosting the stats of your Pokémon. By focusing your efforts on a particular stat - HP Attack, Defense, Special Attack, Special Defense, or Speed - you can potentially boost the stat gain they receive upon level up. With proper training, you can turn those zeroes, ones, twos and threes so common upon level-up into fours and fives instead, making your Pokémon much more potent overall.
There are two different forms of Super Training. Both ultimately achieve the same end.
Super Training Regimens
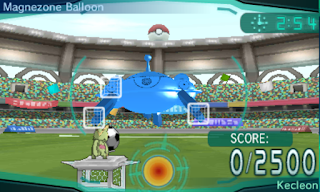
Training regimens are the more dominant of the two Super Training minigames. Your Pokémon enters a 3D arena and must trade shots with a giant, moving balloon. Your goal is to attack the hit boxes on the balloon, striking them with balls while avoiding the shots the balloon sends back your way. Hold down the stylus on the screen and you can charge up your shot, or press L to create a defensive barrier which will ward off incoming attacks. That, along with moving around, are really the only things you need to know about Super Training Regimens.
Super Training consists of five difficulty levels. Complete one and the next will appear. The first three are dedicated solely to gaining EV points for your Pokémon.
Level One
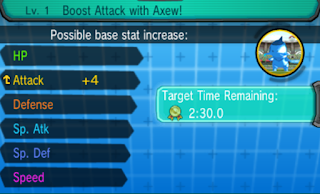
The easy level. Completing these regimens will gain you four EVs per session.
The easy level. Completing these regimens will gain you four EVs per session.
- Sp. Atk - Magnemite, 300 HP. This is a simple battle. Magnemite will fire one ball at a time that will home in on you. Dodge or block these and aim for the weak points.
- Sp. Def - Tentacool, 200 HP. You can easily go an entire battle against Tentacool without being attacked. It likes to wave its tentacles around; shoot slightly ahead of the movement of the tentacle you're aiming for.
- HP - Wailmer, 500 HP. All bulk, no brawn. Wailmer occasionally throws one poorly-aimed ball. Take time to charge your shots and aim properly.
- Speed - Noibat, 200 HP. Though weak, Noibat is a bit difficult to hit. Go for charged shots on the head and normal shots on the wings.
- Attack - Axew, 300 HP. Easy to hit, easy to avoid. Dodge the single ball and stay still when it fires a spread.
- Defense - Geodude, 400 HP. Very easy to hit, as it has a ton of weak points and barely moves. When it flexes, it's about the fire.
Level Two
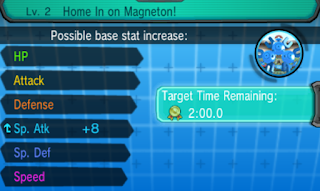
The medium level. Completing these regimens will gain you eight EVs per session.
The medium level. Completing these regimens will gain you eight EVs per session.
- Sp. Atk - Magneton, 1,500 HP. Like Magnemite, Magneton fires balls that go right for you. Move constantly.
- Sp. Def - Tentacruel, 1,000 HP. Enemy balloons! Though you can deflate Tentacruel's buddies, you're better off ignoring them to get a good time. Watch out for Tentacruel's occasional homing attack.
- HP - Relicanth, 2,500 HP. Larger balls, and... that's about it. Relicanth's greatest strength is its massive HP score.
- Speed - Aerodactyl, 1,000 HP. The attacks aren't the problem. The wings are. Reserve charged shots for the head and launch volleys at the wings, in advance of their sweeps.
- Attack - Fraxure, 1,500 HP. Very similar to Axew, though with more HP and slightly heavier attacks. Stay on the move.
- Defense - Graveler, 1,500 HP. Though it has the same number of weak points as Geodude, Graveler is a fair bit harder thanks to a shield and the fact that it occasionally jumps. Fire at the weak point to get rid of the shield; otherwise, just carry on as normal.
Level Three
The toughest standard level. Completing these regimens will gain you twelve EVs per session.
The toughest standard level. Completing these regimens will gain you twelve EVs per session.
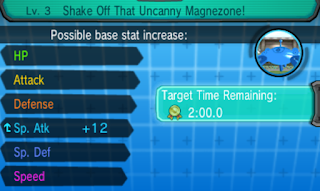
- Sp. Atk - Magnezone, 2,500 HP. As immobile as its predecessors, though much more dangerous. Magnezone loves homing shots, and will warp many of them to make avoiding the balls especially difficult. If it's firing, you should be moving.
- Sp. Def - Dragalge, 2,000 HP. More of those stupid balloons. Combine these with Dragalge's homing shots and this is a rather dangerous battle. Wipe out the balloons, then go for Dragalge.
- HP - Wailord, 4,000 HP. Ack, those stupid balloons. It's much easier to dodge Wailord's shots, so ignore the balloons this time and aim for the whale. It takes a while to whittle away its HP.
- Speed - Noivern, 2,000 HP. Noivern's largely difficult because it flaps quickly and only has one hit box at a time. Use a barrage of balls to ensure a hit.
- Attack - Haxorus, 2,500 HP. Hitting Haxorus is easy, though not without taking hits of your own. Be ready to block.
- Defense - Golem, 2,500 HP. Don't charge up from the get-go, as Golem begins with a barrier. Past that? Fire away. Lots of hit boxes, many chances to wipe it out. Occasionally Golem will unleash a huge wall of balls, but they're very easy to dodge by blocking.
Super Secret Training
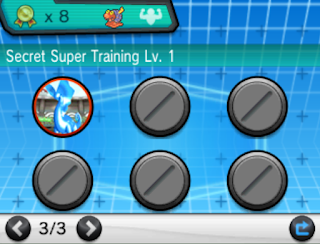
Upon completing the normal training levels, as well as raising at least one of your Pokémon to max EV, you'll gain access to Super Secret Training. These levels are unlocked one-at-a-time, are only available to maxed-out Pokémon, and can earn you valuable items if you manage to beat pre-set records. In some cases these items are specified in the description; if not, or if you're unlucky, you're more likely to get Soda Pops, Hard Stones, Lemonades, or Stardusts.
Upon completing the normal training levels, as well as raising at least one of your Pokémon to max EV, you'll gain access to Super Secret Training. These levels are unlocked one-at-a-time, are only available to maxed-out Pokémon, and can earn you valuable items if you manage to beat pre-set records. In some cases these items are specified in the description; if not, or if you're unlucky, you're more likely to get Soda Pops, Hard Stones, Lemonades, or Stardusts.
Level One
- Aurorus/Tyrantrum, 1,800 HP each. Aurorus is a piece of cake, as its hit boxes are all very close together. Charge up and let fly. Tyrantrum is not as easy, but its homing moves are few and far between. You'll win Wing items for beating this challenge.
- Venusaur, 4,000 HP. Venusaur is all about rapid-fire shots. Move from side to side and this is actually really easy. You can win a Leaf Stone for beating this challenge with a good time.
- Charizard, 4,000 HP. Charizard switches between rapid fire, homing, and grouped shots, though it doesn't throw too many curve balls. Be ready to defend on the homing shots, and prep charged shots for most of your attacks. You can win a Fire Stone for beating this challenge with a good time.
- Blastoise, 4,000 HP. Blastoise gets more challenging as you go, though it's never too difficult. You'll find it most destructive when it unleashes concentrated volleys of balls; defend to get through them with ease. Try to beat it before it puts up a barrier for the best time. You can win a Water Stone for beating this challenge with a good time.
- Stunfisk, 4,800 HP. What a pain. Stunfisk launches absolutely enormous balls to start off. Focus more on dodging these, only launching balls after one passes by. Once Stunfisk rears up and gains a more permanent hit box, unleash the strongest barrage of uncharged balls you can. You can catch it in a stun lock and whittle it down quickly. You can win a Thunder Stone for beating this challenge with a good time.
- Aegislash, 4,800 HP. Not a difficult battle overall, though you want to do as much damage to Aegislash before its second phase as possible. Its movements become very jerky when it changes colors, and it's easy to miss when this happens. Aim carefully at the beginning and you'll have a good chance of hitting two hit boxes with one shot. You can win a Dusk Stone for beating this challenge with a good time.
- Roserade, 4,800 HP. Avoiding Roserade's shots is not the problem. The problem here is hitting the stupid thing. Roserade's attacks are sweeping and abrupt, and it likes to pull its limbs out of shooting range. You're best off using a Pokémon that can hit really, really hard with each shot. Time carefully. You can win a Shiny Stone for beating this challenge with a good time.
- Gallade, 5,600 HP. Gallade's attacks look a lot deadlier than they are. It uses huge, sweeping strikes that are really, really slow. Be prepared to defend constantly and keep moving. Gallade's greatest strength is really its high HP; take advantage of its many hit boxes. You can win a Dawn Stone for beating this challenge with a good time.
- Scatterbug, Spewpa, Vivillon, 1,200 HP, 2,400 HP, 3,600 HP. Scatterbug is a pushover, Spewpa isn't much better. Vivillon, by contrast, can be quite a pain. Its single hit boxes don't last long, it moves around a fair bit, and it fires some rather potent volleys. Move up and down to avoid the volleys and get the best shots at Vivillon. You can win Wings for beating this challenge with a good time.
- Nosepass, 7,200 HP. Another battle that looks tougher than it is. If you travel in a circle around the area constantly you'll have no trouble dodging Nosepass's attacks. It can be a little annoying to attack the hit boxes before they disappear, but you have just enough time to charge up and shoot before most of them vanish. You can win Wings for beating this challenge with a good time.
- Deino, Zweilous, Hydreigon, 1,200 HP, 2,400 HP, 4,800 HP. Yep, if you get hit, you'll lose all of your points. Immediately. Fortunately, none of these forms have attack patterns that are difficult to avoid. Be ready to defend or move whenever the balloon rears back; otherwise, attack constantly. As long as you don't freak out this is a fairly easy battle. You can win a Sun Stone or a Moon Stone for beating this challenge with a good time.
- Larvitar, Pupitar, Tyranitar, Mega Tyranitar (X), Aron, Lairon, Aggron, Mega Aggron (Y), 1,600 HP, 2,400 HP, 3,200 HP, 5,600 HP. Quite a mouthful, but they're not that different from one another, as far as I can tell. Straightforward battles overall, and if you can beat the Pokémon leading up to this fight, you can beat this one. Largely an endurance trial where faster Pokémon have an advantage. You can win any of the evolutionary stones for beating this challenge with a good time.
Core Training
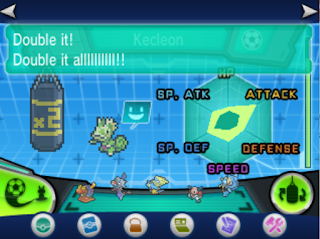
The more passive form of Super Training, Core Training pits your Pokémon against a Training Bag. Training Bags come in three different sizes - Small, Medium, and Large - dictating how many points you'll gain in the associated stat. Small Training Bags will raise a stat by one EV, Medium Training Bags will raise a stat by four EVs, and Large Training Bags will raise a stat by 12 EVs. You can tap on a Training Bag to make your Pokémon work on it, or simply let it attack automatically. If left to train on their own, a Pokémon will hit a Training Bag roughly once per minute.
There are a variety of different Training Bags.
- HP - Raises your HP EV stat.
- Attack - Raises your Attack EV stat.
- Defense - Raises your Defense EV stat.
- Sp. Attack - Raises your Special Attack EV stat.
- Sp. Def - Raises your Special Defense EV stat.
- Speed - Raises your Speed EV stat.
- Big Shot - Increases damage inflicted to balloons in the next Super Training session.
- Double-Up - Doubles the EV increase of successfully completing a Super Training session.
- Reset - Resets the base stats of your Pokémon, wiping out all EV training you've undergone up to that point.
- Soothing - Raises your Pokémon's Friendliness level.
- Swiftness - Raises your Pokémon's movement speed during your next Super Training session.
- Team Flare Bag - Decreases the number of hits needed to get through your next Core Training session.
- Toughen-Up Bag - Decreases damage taken when you take a hit in your next Super Training session.
It's worth noting that Super Training, while relatively fun - and rewarding - is not necessarily the best way to train Pokémon EVs. We'll get into more effective, alternate methods of doing so in another article.

