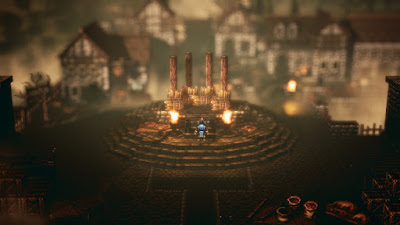
The final leg of Olberic's rather tortured story brings him to Riverford, a fortified town in the Riverlands. Unlike most final destinations you'll get here by walking through a different region, specifically the Cliftlands, until you reach the South Orewell Pass. Head south and then east through the North Riverford Traverse to reach Riverford.
It's quite unlikely that you're coming through this area for any reason other than to complete Olberic's story, so first we'll have a look around town and see what we can acquire:
- Outside the Tavern is a Servant who is part of a Side Story. She has a Refreshing Jam to Steal / Purchase. Inside the Tavern are two Guards. The one on the left has a Gargantuan Shield, while the one on the right has an Unseen Saber. The one on the right also has the Thieving Tips & Tricks info to Inquire / Scrutinize, and the one on the left will reveal a Silver-filled Pouch inside a blocked house in Lower Riverford, to the east.
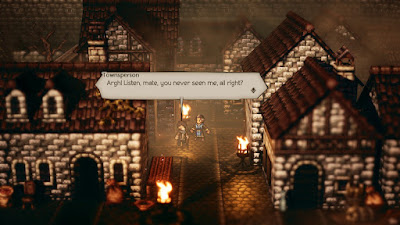
- There's a Merchant outside the General Store. He has the Discount at the Inn info to Inquire / Scrutinize. Across from him is an Old Man with a Tough Nut (L) to Purchase / Steal.
- East of the Inn is a Townsperson blocking a home. He has a Nourishing, Tough, and Critical Nut (L) to Purchase / Steal. If you Challenge / Provoke him and win you'll find a Revitalizing Jam inside the house.
- The Elderly Woman right by the entrance to this section of town has a Giant's Club to Purchase / Steal. You'll can learn the Challenge with Ease info by Scrutinizing / Inquiring her, as well.
- Down the street from the Elderly Woman is a Soldier blocking a home. He has a Fire Amulet to Purchase / Steal. Defeating him via Challenge / Provoke will open up the house, where you'll find a hidden item from a Soldier in the Tavern.
- There are steps leading down to the water along the main street. Check the west side of the steps for a chest containing an Herb of Valor.
- Beside the save point here is a Townsperson blocking a house. Challenge / Provoke him successfully to get inside. You'll find a chest containing an Adamantine Shield, as well as a Girl. Inquire / Scrutinize her for the More Plentiful Provisions info.
- North of the save point is a dead end. If you check between the houses on the left side of the street you'll find a scaredy-cat Merchant hiding nearby. He has a Carnage Blade, a Calamity Spear, a Befuddling Dagger, and a War Hammer to Purchase / Steal. Not too shabby.
- Horned Fly - Weak to Polearm, Bow, Ice, and Wind. Annoying enemy that can confuse your characters. Easy to stun, fortunately.
- Lord of the Flies - Weak to Polearm, Bow, Ice, and Wind. Can confuse your characters, and is generally just a pain in the butt. A higher-priority enemy.
- Mad Ratkin - Weak to Polearm, Lightning, and Light. Can put your party members to sleep, and is a solid melee fighter. Try to get them stunned quickly.
- Gooey Slug - Weak to Dagger and Light. Strong melee enemy that can inflict terror. A fair irritant given its few weaknesses.
- Vampire Bat - Weak to Sword, Polearm, Bow, and Ice. Can sap health and put your party to sleep. Worth demolishing early, especially since they're the easiest enemies to kill in this area.
- Giant Gator - Weak to Polearm, Axe, and Lightning. Powerful melee enemy that can wreak havoc, and has lots of health to boot. Get it stunned fast.
Ahh, this is nicer. You'll run into the following new foes as you make your way to Werner:
- Werner's Man I - Weak to Sword, Dagger, and Fire. Can debuff your party, but generally enjoys melee attacks.
- Werner's Man II - Weak to Sword, Dagger, and Fire.
- Werner's Man III - Weak to Sword, Dagger, and Fire.
- Fire Guardian Mk.II - Weak to Sword, Dagger, Bow, and Ice. Strong Fire-oriented melee enemy. Takes a fair bit to break.
- Flame Curator Mk.II - Weak to Polearm, Bow, and Ice. More Skill-oriented Fire enemy. No big curveballs.
- Dark Guardian Mk.II - Weak to Sword, Dagger, Bow, and Light. Dark version of the Fire Guardian.
- Dark Curator Mk.II - Weak to Polearm, Bow, and Light. Dark version of the Flame Curator.
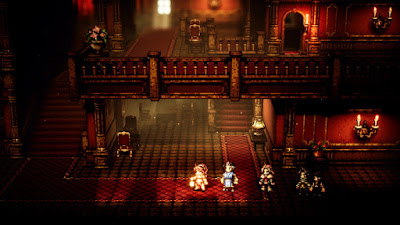
There's a save point on your right as you come up the entry stairs. Continue east and you'll find a chest containing a Healing Grape (M). In the drawing room at the end of the eastern path you'll find an Energizing Pomegranate (L).
Head back to the save point and go up the stairs. Follow the upper path east and you'll come to a dining room. Inside is a chest containing a Silver-filled Pouch. Continuing to follow the main path will take you back to the ground floor, and the carpeting will lead you to this area's exit. Continue east and up the stairs before leaving and you'll find a room containing a Blizzard Amulet.
Continue to follow the carpeting in the next area to the south. To the west you'll come to the manse's front door, which leads to the Manse Gardens and back to Riverford. Dip out if you need to resupply. If you go up the stairs from this small foyer you'll find a Clarity Stone among the tables on your left. Go right from the stairs and you'll find a chest containing an Inspiriting Plum (M) at the far end of the balcony pathway. In the room along the way you'll find a hidden passage in the top-left corner, beyond which is a purple chest containing a Rune Hatchet.
Return to the foyer and head west. Up some stairs and along the main path you'll find a chest containing a Healing Grape Bunch. Keep following the path until it takes you back to the ground floor. Follow the carpeting to the next set of stairs, and veer just off the path before going up the stairs to find a chest containing a Refreshing Jam.
Beyond the door to the north of the stairs you'll wind up in the rear area of the manse again, near a save point. Look to the left of the save point for a chest containing an Inspiriting Plum Basket. The save point - and the door beside it - are the end of the line, so get your party ready, save up, and head into the next room. Werner is waiting, and he's in no mood to negotiate.
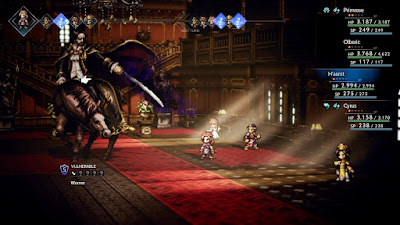
Werner
Weakness: Dagger, Axe, Lightning, Wind, Light
Where the heck did he get that horse? Well, whatever. Werner is a physical opponent, slicing at your party with his sword, though he's also capable of throwing a few curveballs. His Oppression skill debuffs everyone physically for a few turns, making you more susceptible to his attacks, and Boot to the Head can inflict unconsciousness on one target. On top of these moves Werner can inflict terror status on your characters with all of his attacks, locking away Boosting, and if he uses Rule by Fear any terrorized characters will be instantly knocked out. Halfway through the fight Werner will increase his number of attacks per round to three, which is always a pain. Later in the fight Werner will start going into Boost mode, and if he's not broken he'll use Terror of a Tyrant to inflict a hearty dose of damage on the whole party. On top of his attacking, Werner will rotate through his weaknesses on a regular basis, locking new ones away each time he's broken and limiting your combat options.
One of the best things you can do to prepare for this fight is to equip all of the Calming Stones in your inventory on your characters, as they will prevent terror from taking hold on your party. This will stop Werner from party wiping everyone when he uses Rule by Fear. Equip the Resist Ailments Skill on everyone else to lower the chances of terror taking hold, and use Herbs of Valor when that doesn't work. Otherwise, this battle is pretty straightforward: Target weaknesses and keep Werner broken for as much of the fight as you can manage. Hired Help - Mercenary and Shackle Foe will keep Werner's attacks from stinging too much, though expect to heal whenever he comes out of break.
One side note: Unlike the vast majority of story bosses, Werner does not have a weakness Olberic can exploit with his base job and skills. If you've come here on an Olberic solo run you must give him a job with some better weapon / elemental coverage, or he'll never survive the fight.
You'll receive Werner's Sword for defeating the tyrant of Riverford, and Werner will... well, suffice it to say he's no longer a problem once the battle is over. Olberic will make peace with his cause in life - to protect anyone who needs it - and his story will come to a close.
... though there are still a few things to see, now that Olberic is all done:
- Gaston, the antagonist from Olberic's first chapter, will be in Cobbleston, right by the Village Headman's house. You can Purchase / Steal an Unseen Saber and a Crystal Armor from him.
- Head back to Riverford and you'll find Reggie to the west of the town square. He has a Protective Necklace to Purchase / Steal. Reggie also has a Side Story involving Harald...
- ... and if you go through with the Side Story you'll make Harald spawn in the resistance HQ in Lower Riverford. He has an Imperial Lance to Purchase / Steal. (You'll also get Harald's Sword for completing the quest, which is much better than the lance.)
- If you go back to Wellspring you'll find Erhardt in the barracks on the west side of town. He has a Battle-tested Blade that you can Purchase. It's an incredible weapon, and worth the steep 84,000 leaves price tag. You can also Purchase a Dragonscale Armor from Bale, the commander of the local guard.
- Head to Marsalim and Grieg the Unbreakable, one of the contestants from the second chapter, will be standing in the square. He (possibly she?) has a Battle-tested Shield for you to Purchase, and it's worth every penny if you don't care about a character's evasion score.

