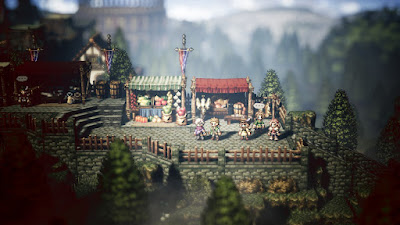
Tressa's third chapter takes her to Victors Hollow, a town of warrior-lovers in the east of Orsterra. You can reach Victors Hollow most quickly from S'warkii, heading west to the West S'warkii Trail and then north along the East Victors Hollow Trail. Victors Hollow is on the west side of the trail.
Olberic's second chapter also takes place in Victors Hollow, so there's a good chance you've already swept through the populace and seen everything there is to see. If not, though, it's worth checking out the town before proceeding with the story:
- The Townsperson at the entrance of Victors Hollow has a Nourishing Nut (M), an Invigorating Nut (M), and a Magic Nut (M) to Purchase / Steal, and you can Scrutinize / Inquire him for New Weapons for Sale at the Armory. Great start to the town.
- Out front of the Tavern in the south of town is a Listless Gladiator who will give you a Side Story to do. He has a Knight's Sword and a Silver Helm to Steal / Purchase. Be careful fighting him, as he's incredibly strong.
- Down the street from the Tavern is a Doting Aunt who has the Father and Fighter info if Inquired / Scrutinized. This is part of a Side Story, unsurprisingly.
- On the west side of town is an orphanage, and the Orphanage Matron out front has the Marta's Gang info as part of a Side Story. If you Challenge / Provoke her and win, which seems very uncharitable, you can enter the orphanage and find a chest containing a Heavy Coin Pouch. You monster.
- To the right of the Inn is a Merchant. He's carrying a Robe of the Flame and an Inferno Amulet that you can Purchase / Steal. Both are tricky to Steal, particularly the Robe of the Flame, though both are great items.
- To the left of the entrance to this area is a side path leading to the Forest of No Return, a Danger Level 48 area. Pay attention to the name if you're trying to enter early and maybe think twice. Across from the Forest of No Return is a man named Mont d'Or who is carrying an Imperial Lance that you can Purchase / Steal.
- On the left side of the street to the north is a house guarded by a man named Barker. He has a Tomahawk Bow and a Charm Bow to Steal / Purchase. If you Challenge / Provoke him and win - no mean feat, as Barker is pretty powerful - you'll find a Silver-filled Pouch inside the house. (Also a Townsperson who tries to insist that he's injured. Pretty funny if you beat him up anyway.)
- There are plenty of decent items to be Stolen / Purchased out on the streets, and you can also Scrutinize / Inquire the young Spectator near the stairs for the Discount at the Inn info.
- There are many NPCs with good stuff outside the Armorer, to the south of the arena. You can get a Golden Hairpiece, a Magus Knife, a Shadow Bow, a Fur Cap, a Victor's Spear, a Divine Blade, and a Bear Cleaver from the assorted NPCs here. The Spectator on the right has the Challenge with Ease info to Scrutinize / Inquire about, and the young man named Estadas has the Estadas's Condition info (part of a Side Story).
- If you head towards the arena and check the fencing to the right of the entrance you'll find a path into the tree-filled garden. Walk through it and you'll find an Old Man looking over a fence. Scrutinize / Inquire him and a Lightning Amulet will appear on the ground nearby.
Victors Hollow: The Arena
Might as well have a look around inside, as there are a few more things to find before we move on. The Arena Attendant immediately inside the arena has a Light Nut (M) and a Slippery Nut (M) for you to Purchase / Steal. Look in the small room on his left for an Inspiriting Plum, and in the small room on the right for a purple chest containing a Dark Amulet.
And that's the whole town. Time to see what Tressa's peddling. If you turned down the trigger for it upon entering Victors Hollow you can get the ball rolling again by going to the Tavern, speaking to the Tavern Keeper, and choosing Hear a Tale.
Tressa's Chapter
Still on the trail of the notebook she received from a former pirate, Tressa comes to Victors Hollow in search of a treasure that she can display at the Merchants' Fair in Grandport. She immediately finds something of interest in a vendor's stall when she happens upon an old map... though Tressa is bad at keeping her mouth shut, and loses her chance to claim the map for a pittance. Oh well.
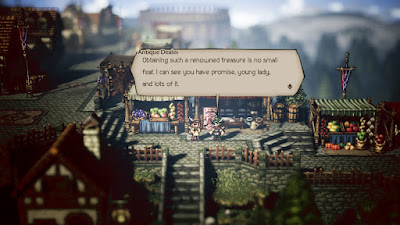
Walk over to the front of the Tavern, just to the right of the front door, to trigger a cut scene. Leon will make a surprise appearance, along with former scamps Mikk and Makk, and it turns out Leon knew the pirate captain who drew the map from earlier. Leon isn't interested in claiming the map, however, leaving Tressa room to meet the Antique Dealer's demands: He'll trade the map for Edbart's Shield, a fabled piece of equipment.
Travel north to the Arena Gate. Just outside the Armorer is a Merchant with several shields you can Purchase, though the only one you need is Edbart's Shield, which goes for 8,000 leaves. (The Spiked Shield and Elemental Shield might not be terrible purchases at this point either.) Take Edbart's Shield back to the Antique Dealer and he'll hand over the map.
Head to the Tavern. Leon will share a tale of his days with Baltazar, the map's former owner, and why he didn't want the map. Tressa gets it back, and she now has her eyes set on a prize to take to Grandport... assuming she can find the Eldrite Leon speaks of. Time to head to the Forgotten Grotto, where Baltazar's ship crashed.
(Before you leave town, check out the Tavern. Leon, Mikk, and Makk are all still here. You can Steal / Purchase an Imperial Lance and an Elemental Glaive from Leon, and some minor items from the other two pirates.)
Path to the Forgotten Grotto
Before you can reach the Forgotten Grotto you have to trek down the Path to the Forgotten Grotto. There are enemies aplenty populating this forested area:
- Mutant Mushroom - Weak to Dagger and Fire. Can use Soporific Sting to put party members to sleep. A nuisance that's worth stunning quickly, if you can target its weaknesses.
- Rampant Weed - Weak to Sword, Axe, and Fire. Can use Silencing Sting to silence a single party member. Not a massive threat, but still annoying.
- Green Scissors - Weak to Dagger, Axe, and Lightning. Little crab with some painful Toxic Breath. Easy to stun, and worth doing promptly.
- Kingfisher - Weak to Polearm, Bow, and Wind. Fairly powerful enemy that won't show up too often. Worth stunning before it can get off Meteor Storm.
- Gargantuan Boar - Weak to Sword, Bow, and Dark. Towering enemy that does a lot of physical damage, especially when it uses Boar Rush. Not a lot to say, really - just get them stunned pronto.
- Buccaneer Bones - Weak to Dagger, Staff, Lightning, and Light. Can confuse and terrorize your party members. Annoying, but also very easy to stun, so... not a big deal.
- Davy Bones - Weak to Axe, Staff, Wind, and Light. More or less the same enemy as Buccaneer Bones, just with different weaknesses and more shields.
- Sea Scorpion - Weak to Polearm, Ice, and Wind. Can poison one or more members of your party. Annoying, but not horrible.
- Vampire Bat - Weak to Sword, Polearm, Bow, and Ice. Does the usual battish stuff, including Mass Slumberwave. Kill these first before they put your party to sleep.
- Lightning Element - Weak to Fire and Wind. Deals in Lightning Skills, and has few weaknesses. Hopefully you have someone other than Tressa (Therion and Cyrus jump to mind) to break these things.
- Ettin Serpent - Weak to Dagger, Axe, and Fire.


