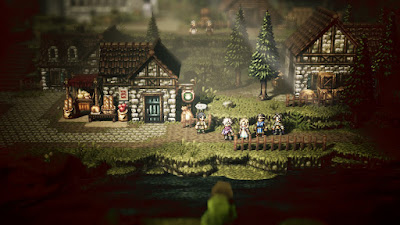
The second step in Ophilia's journey takes her to Saintsbridge, an appropriately-named home of the pious in Orsterra. There's a good chance this is your first visit to Saintsbridge, so before we let Ophilia continue the path of the Kindling we'll have a look around the town a bit:
- Right at the entrance of Saintsbright is the Provisioner. Check the house next to the Provisioner to find a chest containing an Inspiriting Plum (M).
- If you head to the docks in the south of town you'll find a wooden bridge leading across the river to an area you can't currently access. We'll get to it. The Old Man near the west end of the bridge has a Bridge Lance and a Tower Shield to Steal / Purchase, and if you Inquire / Scrutinize him you'll learn the Challenge with Ease info. He's also a powerful opponent if you Provoke / Challenge him, though he doesn't drop anything special when defeated. (Which, of course, means he's probably good to Guide with Ophilia, if you can match his level.)
- There's a log cabin in the north of Saintsbridge, before you reach the bridge itself. Outside and on the right of the cabin is a chest containing an Energizing Pomegranate (M).
- As you begin to cross the bridge into the nicer sections of Saintsbridge you'll see a Townsperson. You can Inquire / Scrutinize him for the Discount at the Inn info.
- As you cross the bridge you'll come to a Townsperson. If you Inquire / Scrutinize him he'll give you the New Weapons for Sale info.
- Across the bridge you'll find three children together. All three have decent accessories (Ice Amulet, Enlightening Bracelet, Stimulating Bracelet) for you to Steal / Purchase. To the left of the kids are two Grandmas who also have a bunch of decent equipment for you to Purchase / Steal.
- Down the road from the kids and the two Grandmas is a Townsperson with an Elusive Shield and a Heavy Lance to Purchase / Steal. Keep going west and you'll hit another path that you can't explore just yet.
- North of the square with the kids is the Tavern. Just the large house just north of the Tavern to find a chest containing a Heavy Coin Pouch.
- Just outside the cathedral is a Knight Ardante. Scrutinize / Inquire him and you'll reveal a hidden 3,000 leaves sitting outside the Tavern.
- There are two Clerics flanking the pews as you enter the cathedral. The one on the left has the Guide with Ease info to Scrutinize / Inquire, while the one on the right has a Forbidden Staff to Purchase.
- Look between the columns on the right side of the cathedral and you'll find a chest containing an Herb of Valor. The columns on the left side hide a chest containing an Olive of Life. Also on the left is a Townsperson with a Holy Longbow and an Unerring Necklace that you can Purchase / Steal. The Holy Longbow in particular is quite powerful.
That's all for Saintsbridge. On with Ophilia's storyline. If you ignored the prompt earlier, you can set things in motion by visiting the Tavern and choosing Hear a Tale from the Tavern Keeper.
Chapter 2
When Ophilia arrives in Saintsbridge she'll be greeted by Bishop Bartolo. He seems quite welcoming, and takes her up to see the Sacred Flame of Saintsbridge. Ophilia will renew the flame's vigor, and her job will be... done? That was easy. Bartolo offers Ophilia shelter for the evening, but she wants to look around Saintsbridge first.
(Side note: You can Steal a Staff of Wonders from Bartolo, and if you successfully Challenge / Provoke him you have a chance to earn a Mental Belt. He disappears from the Cathedral later, so get these things out of the way now if you're interested.)
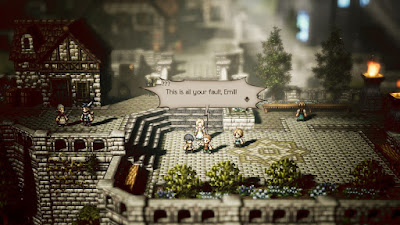
Trek to the town square where you saw the kids earlier and they'll now be squabbling. Apparently little Emil lost little Derryl's brooch, and little Nate is just along for the ride. Ophilia will offer to help Emil find the brooch, though their initial investigation is unsuccessful.
Head to the house north of the Tavern. Derryl is inside. Speak to him and he'll prove to be a bit of a sad, sulky brat. Guide Derryl and you'll see another cut scene, then take him back to the square. Flashbacks will relate Derryl's story to Ophilia's, and she'll reconcile the two friends... or maybe not, as Emil apparently ran off after a dog. Derryl will take off in pursuit, and you'll need to follow both kids into the Murkwood.
Murkwood Trail
You're not quite in the Murkwood yet, though the trail to the Murkwood is dangerous enough on its own. You'll run into the following enemies here:
- River Fly - Weak to Polearm, Bow, Ice, and Wind. Swift, but fairly weak, enemies. Befuddling Claw can confuse a party member, so wiping them out quickly with area attacks is advisable.
- River Bug - Weak to Sword, Axe, Staff, and Dark. Likes melee attacks, can buff its party, and can put people to sleep with Soporific Claw. Annoying if you let them live for too long.
- Reptalion - Weak to Axe.
- Salamander - Weak to Dagger, Ice, and Light. Beefy creature that can steal HP from your characters with Swallow Whole while inflicting quite a bit of damage. Stun early to avoid excessive damage.
- Howler - Weak to Polearm, Bow, and Lightning. Debuffs your team members with Lower Offense, then attacks or uses Wind Slash. More annoying than deadly.
- Wanderweed - Weak to Sword and Fire. Uses melee attacks. Not much to say.
- Shambling Weed - Weak to Sword, Axe, and Fire. Uses basic melee Skills to do damage. Usually come in packs, so pick a Skill that will hit them all and stun them quickly. If given time they can use Proliferate to create all-new Shambling Weeds, which can stretch battles out quite a bit.
- Creeping Treant - Weak to Axe and Fire. Can use Silencing Sting to prevent Skill usage, Blinding Sting to reduce accuracy, and is generally a pain in the butt thanks to its few weaknesses.
- In the southwest you'll find a chest containing an Inspiriting Plum, beside the river that runs through the area.
- If you southeast you'll find a chest containing an Olive of Life (M).
- In the northwest you'll find a chest containing an Energizing Pomegranate (M).


