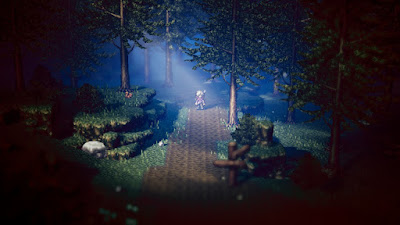
The northbound continuation of the S'warkii Trail, the East Victors Hollow Trail is the road adventurers must take to reach Victors Hollow. Both Olberic and Tressa will need to head this way to continue their stories, and even if you don't pursue their tales it's worth going this way anyway, as Victors Hollow is a great place to pick up new weapons.
First you need to get through the East Victors Hollow Trail, however, and there are plenty of monsters ready to get in your way:
- Forest Ratkin IV - Weak to Sword, Axe, Wind, and Light. Can use Poison Flurry to hit your whole party, and potentially poison everyone. Very annoying, but still a lesser enemy in the long run.
- Forest Ratkin V - Weak to Sword, Axe, Wind, and Light. More or less the same as the Forest Ratkin IV, just with a few more Skills and greater strength.
- Forest Ratkin VI - Weak to Polearm, Axe, and Fire. Tougher version of the other Ratkins that can now blind you, as well as hit everyone at once. Eliminate early.
- Forest Ratking I - Weak to Dagger, Staff, Ice, and Wind. Powerful, evasive enemy that can do a lot of damage to your party while buffing its own. Use Skills to break its defenses as often as you can while defeating surrounding enemies.
- Mutant Mushroom - Weak to Dagger and Fire. Can use Soporific Sting to put party members to sleep. A nuisance that's worth stunning quickly, if you can target its weaknesses.
- Rampant Weed - Weak to Sword, Axe, and Fire. Can use Silencing Sting to silence a single party member. Not a massive threat, but still annoying.
- Creeping Treant - Weak to Axe and Fire. Can use Silencing Sting to silence a party member, which is quite annoying given its few weaknesses. Try to break defenses before your Skills are locked off.
- Horned Howler - Weak to Polearm, Bow, and Lightning. Deals in Wind Skills as well as Soporific Claw to put party members to sleep. Painful, but a secondary threat a lot of the time.
- Gargantuan Boar - Weak to Sword, Bow, and Dark. Towering enemy that does a lot of physical damage, especially when it uses Boar Rush. Not a lot to say, really - just get them stunned pronto.
Just north of the exit back to the S'warkii Trail is a save point, and the road branches in two directions. If you head east here you'll soon see chillier weather ahead; check on the border between green and white for a chest containing an Inspiriting Plum. This path will take you to the Western Stillsnow Wilds, which eventually lead to the village of Stillsnow.
Follow the northern path and you'll hit a small branching point, though you may not immediately realize that you can go through the rocks on your right. If you do you'll find the Shrine of the Huntress, and inside the Hunter job will be bestowed upon your party as a secondary job. Also in here is a chest containing an Olive of Live (L).
Go west from the Shrine of the Huntress and you'll find another split in the path. If you follow it south you'll soon come to Victors Hollow. If you go off the path from the intersection and up the hill to the west you'll find a Healing Grape (M) a short walk south, and if you go behind the big rock on your left you'll find a hidden path over to a waterfall. Beside the waterfall is a chest containing 5,000 leaves. If you head north along the intersection you'll come to East Duskbarrow Trail, an altogether more dangerous area that leads to Duskbarrow.


