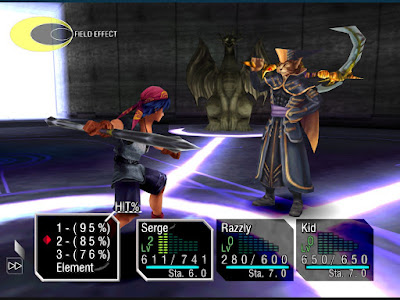
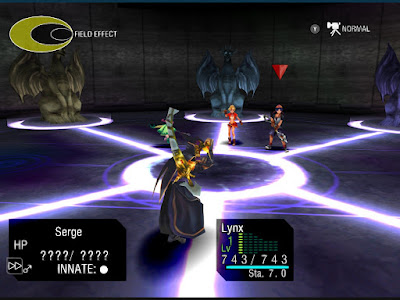
Part Thirteen: Mount Pyre (Another World)
Hoo boy. After a substantial amount of trekking you've finally reached Fort Dragonia, the place Chrono Cross sorta began. Once you complete Fort Dragonia you'll hit a point of no return of sorts, so it's highly recommended you go tie up any loose knots before making serious inroads into this dungeon.
Unsurprisingly, Fort Dragonia is teeming with bad guys. You'll run into the following monsters as you explore Fort Dragonia's twisting corridors:
- Cybot - Yellow Innate. Hulking robots that you probably fought in Viper Manor. They have a lot of health, and their Beaten Earth attacks do a lot of damage. Avoid them if your team is already struggling; otherwise use Green Innate Elements to bring them down. Might take a while.
- Paper Boy - Yellow Innate. Rather weak at first blush, though they can use their Paper Moon Tech to inflict an unhealthy amount of damage to one character. If you steal their item (or even just try and fail) they can use Paper Moon twice in a row, making them much more dangerous. Take Paper Boys out with Green Innate moves before this happens. They don't have much HP.
- Alphabat - Black Innate. Basic little critters that can use Plasma Beam to quickly turn the Field Effect Black, making their attacks - and those of their accompanying Combats - more powerful. Elements will knock them out of the sky quickly.
- Combat - Black Innate. Uses Anti-White and Gravity Blow to be annoying to Serge specifically. Otherwise performs the occasional weak attack. Shouldn't be a problem even if it manages to lock Serge out of his best Techs for a few turns.
- Googhoul - Yellow Innate. Typically uses normal attacks, though can hit a character with Gnash to inflict Sprain status. Annoying, but easy. Green Elements will wipe them out. (What's with all the bats in Fort Dragonia? Should they change the name?)
- Acacia Private - Red Innate. Basic enemy that you've fought before. They haven't changed much.
- Acacian Sergeant - Red Innate. Basic enemy that you've also fought before. They use more Elements than the Privates but are otherwise not that different.
- Dragoon - Red Innate. Can use Acacai Breath to burn a single character. Otherwise not a big deal.
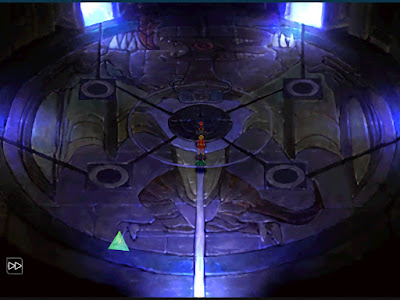
Upon entering Fort Dragonia you'll find yourself in a large, circular room with four doors. Each door leads to a crystal you must deactivate, protected by a puzzle room that you must complete before you can reach the upper, more familiar section of the fort. You can complete these puzzle rooms in any order you like, so we'll go clockwise, starting from the top-right. Make sure you use the save point in this room after completing each puzzle, just in case.
Top-Right Room
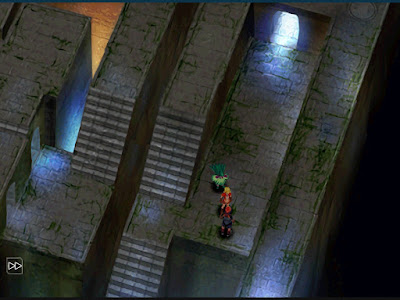
This first area is more of a straightforward maze than a puzzle, though the Cybots make it pretty dangerous. Go straight north from the entrance to start and you'll come to several sets of stairs, patrolled by a Cybot. Go north, down the stairs on your left, then under the bridge you were just on. Through the archway on the left you'll find chests containing a Heal All Element and a Bushbasher Element. Head back east through the archway and follow the path north. It will eventually lead you to an Antidote Element.
Backtrack to the entrance of the area and take a left at the first Cybot. Head east to the next room over and the path will loop around on itself, eventually leading you to a north-south intersection. The southern path will take you to a Tornado Trap Element after a bit of trekking, while the northern path takes you to another screen.
You'll see a Cybot patrolling on the path beside you, and if you start to move south it will leap down and pursue. Go south down the stairs to find an Aero Blaster Element, as well as another Cybot that will leap over to attack you once you grab the chest. You only have a moment to run away. Return to the previous screen and use the stairs straight ahead to leave the screen.
The path beyond will take you to a blue switch. Activate it to drop down stairs that will lead back to the beginning of the maze. You might want to leave and save, as the remainder of the path takes you to the crystal you need to deactivate - and a boss.
Taurusoid
A Green Innate bruiser, the Taurusoid is pretty straightforward as far as enemies go. Seemingly a wrestler in its previous life, the Taurusoid uses a combination of normal attacks and single-target Techs to inflict a bunch of Green Innate damage. It has three different unique moves - Body Press, Chokehold, and Backdrop - all of which do around the same amount of damage, and just look different from one another. Taurusoid will occasionally chain these moves together in succession, rapidly switching the Field Effect to Green and giving itself a damage boost. Once the Taurusoid takes enough damage it can use Heal All, though this won't benefit its HP count too much.
Taurusoid has a lot of health and doesn't take much damage from physical attacks, so you'll need to rely on your Elements for this fight. Equip a bunch of Yellow Innate Elements and pound Taurusoid every chance you get. This will both maximize the damage you're doing and reverse the Field Effect so it doesn't give Taurusoid too much of a boost. Heal if anybody starts to go below 200 HP, and keep chipping away at the beast until it goes down. Yellow Innate characters will take a lot of damage form Taurusoid's attacks, so you may want to consider leaving them out of the party for this fight.
You'll earn a Star Level, 1,200 g, and a Carapace for defeating the Taurusoid. Deactivate the crystal it was guarding before you leave.
Bottom-Right Room
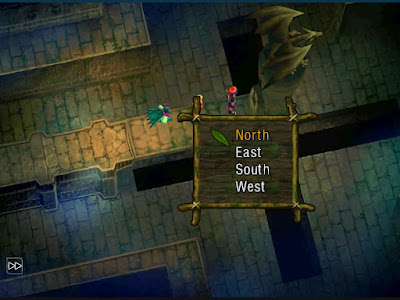
When you first enter this area, after crossing a bridge, you'll find yourself on a thin stone walkway and standing face-to-face with a statue of a dragon. Checking the statue will trigger a prompt that says 'the watchkeeper faces north', after which you'll need to choose a cardinal direction. Depending on which direction you choose the platform will spin around and drop the party into one of four holes, each of which leads to a different path.
The trick to this puzzle is to pay attention to the orientation of the dragon statue. When you first enter the room the statue will be facing towards you, and since the 'watchkeeper' faces north choosing north will always drop you into the hole overlooked by the statue, while every other direction would be relative to the dragon's position. If you chose south, for example, the platform would spin around behind the statue and drop you into that hole. The dragon's facing changes to the last direction you chose, so north, south, east, and west change accordingly as well. You may need to perform some trial and error before this odd mechanic makes sense.
Each hole leads to an independent path back to the entrance. You'll want to check out all four:
- The hole on the left leads to a red crystal that will restore your health. Nice, but hardly necessary.
- The upper hole leads to several Cybots, and... nothing else. Avoid this path unless you want to fight Cybots.
- The hole on the right leads to the crystal you need to deactivate to proceed through Fort Dragonia.
- The lower hole leads to four chests containing a Volcano Trap Element, a Flame Charm, a Magma Burst Element, and a Fire Pillar Element.
Each path leads you back to the first room with the bridge. Climb up the handholds on your left to try a different hole.
Bottom-Left Room
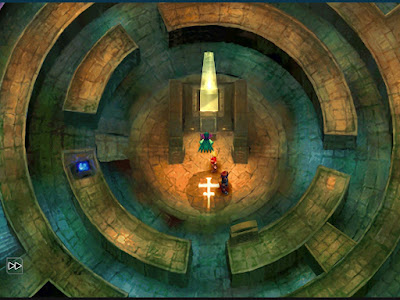
After crossing a bridge you'll find yourself in a circular room with a small maze, and there will be a number of items of interest on higher paths that you can't reach. Make your way through the maze and up to the exit in the west of the room. Inside the next small room is a stone tablet with three sets of footprints in front of it. Check the stone tablet and it will tell you that Dragonians consist of a head, body, and tail, and that you must change the order of the body to unveil a new path.
The 'head, body, and tail' in this puzzle is your party. Whenever you step in front of the tablet the maze in the previous room will change based on the order of your party. If you entered this area with Serge in front, Kid in second, and, say, Glenn in third, Serge would be the head, Kid would be the body, and Glenn would be the tail. Rearrange the party to a different configuration (use the Select button if you're using a controller; it will change based on the system you're using) and head, body, tail will become body, tail, head, or body, tail, head.
Does that mean there are only three potential combinations? Not quite. If you look just outside the room with the stone tablet you'll see a conspicuous floor panel. Step on it and it will rearrange your party again, giving you access to three more combinations. This means the maze can take on six different configurations. The stone tablet will tell you the party arrangement you've chosen, so you shouldn't get too confused. (If you aren't confused already.)
Tired of the puzzle? Same here. You'll be able to do the following things, and reach the following items, with these maze configurations:
- Head, Body, Tail - The first combination you should perform, as it creates a path to a blue switch that will lower some stairs near the maze's entrance.
- Body, Tail, Head - Creates a path just south of the stone tablet room, allowing you to get to a chest containing an Earth Charm.
- Tail, Head, Body - With the stairs near the entrance lowered this grants you access to a chest containing an Electro-Jolt Element.
- Tail, Body, Head - With the stairs near the entrance lowered this grants you access to a switch that will lower the platform in the middle of the maze. Here you can deactivate the crystal and complete the maze.
Body, Head, Tail and Head, Tail, Body don't create any meaningful paths through the maze.
Top-Left Room
This puzzle consists of a number of moving pathways, controlled by chests at both ends of the room. Run west from the entrance to find the first pair of chests. Open the chest on the right to create a path for yourself across the center of the room. Run along it to the east and you'll be guided to another set of chests. Ignore it and run back west along the top of the room to find a third pair of chests.
Open the chest on the right, then run back to the second pair of chests. You'll have created a path to the doorway on the right side of the room. Inside you'll find a mounted Dragoon waiting to attack you. Defeat it or quickly run back out to avoid it, then run back out and return to the second set of chests in the northeast corner of the room. Open the both. Run to the third set of chests again and close the left chest to create a path to the doorway on the left side of the room, within which you'll find a Sea Charm. The enemy and chest alternate sides, so you'll always run into the enemy first.
(This is a fiddly puzzle that you can complete in any order you like just by messing with the chests. This path will get you to the end in the quickest time, is all.)
Return to the second set of chests and close the chest on the left. This will move the platform on the right so it's facing towards the entrance. Run back through the room and across the central path one last time and you'll find the doorway leading to the crystal. Hit the blue switch beside the door to create a path back to the hub area with the save point, run out and save, then approach the crystal. Boss time!
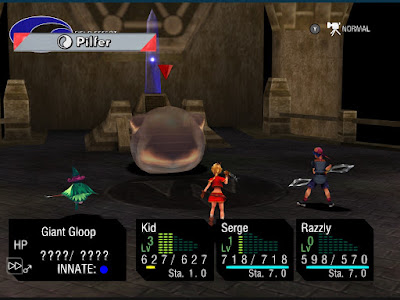
Giant Gloop
Huh. Well, that name sure does describe the boss pretty well. A big ol' glob of goo, the Blue Innate Giant Gloop isn't too tough. Aside from physical attacks it can use its Gooey Goo attack to hit everyone at once, lowering evasion on anybody who takes damage. It can then use its Take In attack to grab afflicted characters, doing damage and freezing them. It can also use Blue Field to alter the Field Effect, after which it will begin using Ice Blast to pummel your characters.
Giant Gloop is Blue Innate, so Red Innate Elements are the weapon of choice. Unfreeze anybody who gets frozen and blast the thing with your best fiery Elements. Despite the potential damage from Ice Blast Kid makes a good party member here, as her attacks will get a nice boost, and she can help everyone else get the Field Effect away from Blue and into Red. Overall not that bad a boss.
You'll earn a Star Level, 800 g, and an Aqua Ball Element for defeating the Giant Gloop. Deactivate its crystal and leave.
Once you've completed all four puzzle rooms a massive elevator will rise out of the floor in the hub area. Save up, heal your team if necessary, and head inside. You'll immediately be facing off against the most disturbing enemy in Chrono Cross, bar none.
Sun of a Gun
What... is... that...? Good lord, Square Enix. A terrifying sun thing, the White Innate Sun of a Gun is characterized by its changeable face and changeable modes. Every few turns it will use Mode Change, shifting which moves it will use as it does:
- Happy. In this mode Sun of a Gun uses Kissy-Wissy, which can put a character to sleep if they're hit.
- Sad. In this mode Sun of a Gun uses Weak-Minded on one of your characters, then Strong-Minded on itself to boost its Elemental attacks.
- Angry. In this mode Sun of a Gun uses Photon Beam, then Meteor Shower shortly thereafter. Bad news if you have any Black Innates (ie Luccia) in your party.
- Neutral. (Really mode of another sad, just... less sad.) In this mode Sun of a Gun will use Anti-Black on a character, then cast Holy Light to hit everyone for quite a bit of damage. Throw down a Holy Light Trap to snag the Element or just be ready to heal once it's over.
The mode changes are random, so you could wind up facing the same few attacks three or four times in a row if you're lucky (or unlucky). Sun of a Gun will throw the occasional physical attack into any of these modes.
This is a tricky fight that might take a while. You can bring Luccia in to deal out extra damage to Sun of a Gun, but Black Innates are under great threat throughout the battle thanks to the constant White Innate Element slinging. You're better off getting a few White Innates (Serge, Pip, Doc) and maybe one neutral character, then loading them down with Black Innate Elements. Attack Sun of a Gun whenever it's happy or sad, then shift more to the defensive when it changes to angry or neutral. Heal as necessary, tending towards restorative Elements that will keep the Field Effect White. Sun of a Gun doesn't have a ton of health, but you don't want to get too overzealous about your damage-dealing and leave yourself vulnerable.
You'll earn a Star Level, 840 g, and an Iron for defeating Sun of a Gun. With that monstrosity out of the way you can deactivate the white crystal behind it. This will bring an elevator down that you can use to rise to the upper levels of Fort Dragonia...
... though it can also go down. On the lowest level of Fort Dragonia you'll find a small room with several deactivated devices, four of which appear to contain broken eggs. You can't do anything with this version of the room, but remember it for later, when you can access Home World's version of Fort Dragonia. (Hint hint, you can recruit someone here, and they're a pretty good party member.)
Upper Fort Dragonia
Once you go up the lift you'll find yourself in a very familiar place, because, yes, you started the game here. To the left from the top of the lift you'll see the last of the elemental crystals, though you can't reach this one from here. Take a right from the lift instead.
Unlike your first visit to Fort Dragonia there are items to find up here this time. Go south from the entrance and check near the base of the elevator in the middle of the room to find a Capsule Element. Go up the stairs on the left and follow the walkway south until you reach an outer room. It will loop you around to the upper level of the room with the elevator.
On your immediate right are stairs leading back out of the room. You'll wind up at an intersection. Follow the path to the left to find a Meteor Shower Element - a great weapon against all the stupid bats in Fort Dragonia - then follow the path to the right. Through the next doorway you'll come to an Angel Charm and a dead end.
Backtrack to the central room and head north. Go up the second set of stairs on your right to find a chest containing a Daemon Charm. Return to the northbound path and follow it out of the room. You'll be staring at the final elemental crystal, and this one is guarded by a rather strange boss.
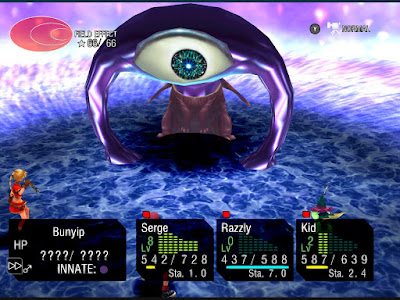
Bunyip
Hoo boy. Fort Dragonia is full of weirdos. Starting the fight out as an unassuming little Red Innate that uses Red Elements, Bunyip gets very odd after it takes too many hits. Changing colors to Black Innate and barfing up an enormous eyeball monster when you do enough damage, Bunyip also changes up its tactics, introducing more physical attacks and a change to Black Innate Elements. Included is its unique attack, Devil Thunda, which will do 150+ HP damage to everyone in the party, and more to Serge in particular.
Hold off on Serge's Techs at first and pummel the Bunyip until it changes forms. Once it reveals its true self, swap from Blue Elements to White Elements (such as the Meteor Shower you received not that long ago) and hit it as hard as you can, healing often. Serge's Techs are much more effective once Bunyip changes forms, and they'll counteract the Black changes on the Field Effect. Serge can hit the Bunyip very hard compared to everyone else, so hopefully you can get through the second half of the fight quickly, before Devil Thunda takes anyone out of commission.
You'll receive a Star Level, 1,300 g, and a Gravitonne Element for defeating the Bunyip. You can also deactivate the black crystal in the room...
... which will activate the elevator in the central room. Backtrack and hop on via the second staircase on the right as you head south. You'll notice that there are now stairs leading down from the elevator, and you can use these to return to the lift back to the first level of Fort Dragonia. You may want to go save, as what awaits you at the top of the central elevator is going to be very nasty indeed.
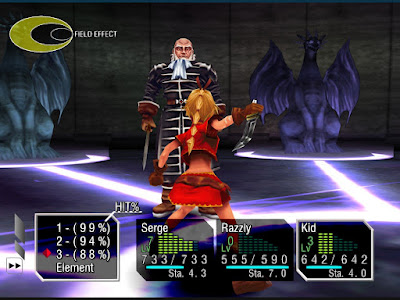
Gen. Viper
General Viper, fortunately, is not the 'nasty' thing you're going to encounter at the top of Fort Dragonia, though the general can still hold his own. A Yellow Innate swordsman, Viper can do some respectable Yellow Innate damage, using his two Techs, G-Force and Air Force, to hit one target and all targets, respectively.
Alas, Viper just can't compare to your team at this point. His attacks aren't strong enough to knock anyone out easily, not even Green Innates, and you can easily heal away his normal strikes. Target Viper with strong Elements and Techs, with an emphasis on Green Innate attacks, and he'll go down pretty easily.
You'll earn a Star Level and a Mythril Mail for defeating Gen. Viper. Hopefully you had some Element Grid levels or healing items left over once he went down, as the next opponent is up right after you beat Viper.
Lynx
Ahh, Lynx, you jerk. Fighting similarly to last time, Lynx has become more powerful in general, and will hit a lot harder than he did at Viper Manor. On top of his random assortment of powerful Elements from other colors - Ice Blast, Aero Blaster, Magma Bomb, Fire Pillar, Electro-Bolt, Meteorite, Inferno - Lynx can now use his personal Tech, Glide Hook, in battle. Glide Hook is a single-strike move that can do upwards of 200 HP of damage, more so if it's used on a White Innate character. This move is very dangerous to Serge.
There is, nevertheless, no great secret for beating Lynx, and you should play to his weakness by bombarding him with White Innate Elements and Serge's Techs. Lynx uses enough other Elements that the Field Effect should almost never be all Black, which will prevent him from reaching his full potential. Heal regularly to keep everyone above 200 HP, and keep an eye on Serge in particular. He's your greatest weapon against Lynx, but he's also the most vulnerable. Any Elements you have to strengthen Serge's defenses will help him limp through the fight.
(If the battle drags on long enough Lynx may use Ultranova, a White Innate Element of great power. Throwing down a trap can net you this mighty Element, though you'll need to wait a while before it comes up.)
You'll receive a Star Level, 666 g, and the Greater Pendragon Sigil for defeating Lynx. Congratulations on your victory...
... now... fight your own party...?
Your Party
Yeeks. Yes, you've been kicked out of your own party, and you need to fight as Lynx alone. A Black Innate, Lynx will have access to all of Serge's former Elements, as well as Black Innate versions of Serge's Techs. If you're fighting the party on a New Game you will almost certainly lose this fight, though if you're playing on New Game+ you might stand a chance. Keep your health relatively high until you've beaten at least one party member, then go more on the offensive. Taking Serge out first will probably be easiest, and he can also do the most damage to Lynx, making him a prime target.
Defeating your party has the same outcome as losing to them, though you'll receive a little extra animation before the battle ends. Congratulations? Things go badly afterward either way, and when you regain control of the, uh, 'party', Serge will be gone. He's not coming back under your control for a long, long time, either.

