
 |
| Final Fantasy VI copyright Square Enix. Images used for educational purposes only. All images on this page taken from the Final Fantasy Wiki. |
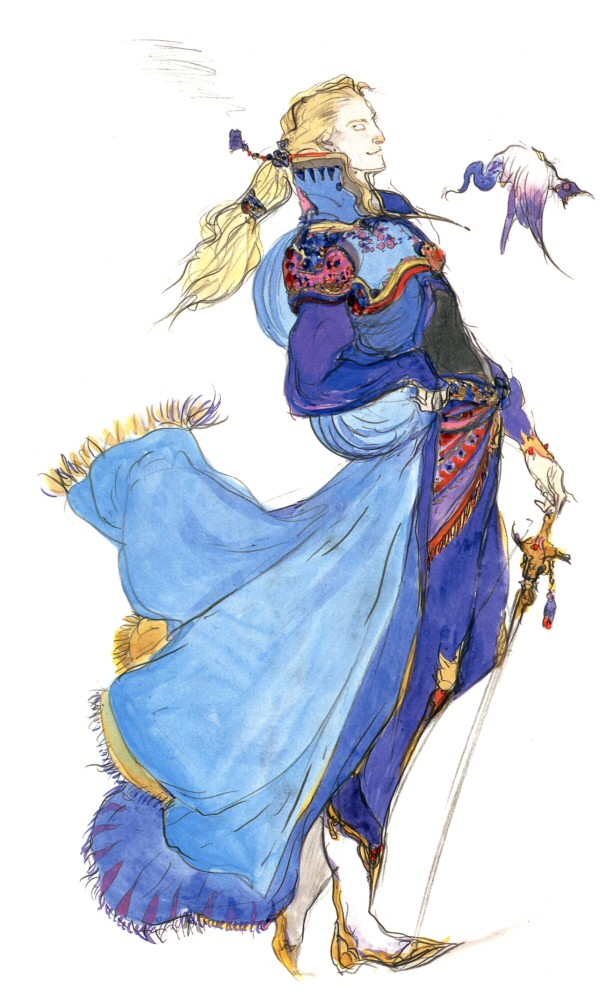
Terra
A human weapon, and a confused young woman. The majority of the first half of the game deals with Terra coming to terms with her seemingly-inhuman nature, and many of the major events somehow involve her, typically in a strong role. Without Terra, there is no Final Fantasy VI.
Terra is one of the best party members in the game. She sports a strong balance of physical and magical skills, and from the first moments of the game can ably fill either role rather well, though ultimately Terra is a bit better as a magician. She has one of the highest magic stats in the game, and given that she’s one of only two characters to learn magic as she levels Terra makes good use of this advantage. Terra can also equipment some of the most powerful equipment late in the game, contributing to her long-term damage output and survivability in most battles.
After several major events Terra gains the Trance command. While active, Trance increases her attack stats significantly, allowing Terra to inflict a great deal more damage with physical strikes and spells. Trance lasts for a limited time, the timer dependent on how often she uses Trance. If Terra just used Trance in a previous battle, for example, it will only last for a few seconds before Terra returns to normal.
Terra learns the following spells through natural levelling:
- Cure
- Fire
- Poisona (level 6)
- Drain (level 12)
- Raise (level 18)
- Fira (level 22)
- Teleport (level 26)
- Cura (level 33)
- Dispel (level 37)
- Firaga (level 43)
- Arise (level 49)
- Holy (level 57)
- Break (level 68)
- Graviga (level 75)
- Meltdown (level 86)
- Ultima (level 99)

Locke
A 'treasure hunter'. Locke plays the role of primary male protagonist for the first half of Final Fantasy VI. He is forced into your party more often than any other character, so you’d, uh, best get used to him?
Locke is primarily a physical fighter, with a high speed and otherwise decent combat stats. He’s not quite as durable as your other characters, especially given his so-so HP gains, but he can keep up adequately in most battles. Locke suffers in the magic department, however, and more than most characters he’ll inflict a minimum of damage with his spells. Locke’s equipment isn’t great, as he’s largely limited to lighter fare, though he can equip some of the stronger swords in the game as well.
Locke’s special command is Steal, allowing him to pilfer items from enemies. Giving Locke the Brigand’s Glove turns Steal to Mug, allowing him to attack while he Steals. Many enemies sport exceptionally powerful equipment, so it’s wise to keep Locke in your party for boss fights.
Edgar
The king of Figaro. Edgar is a secret ally of the Returners and a staunch ally against the Empire, and will join your party early in the game. A lady’s man without peer, Edgar spends much of his time making mildly chauvinistic comments.
Edgar is a heavy-duty fighter. Though a little slow, he sports some of the best physical stats you’ll get on your team. In particular he’s quite durable, and can take hits like few others. To balance this out Edgar is a relatively poor magic user, though if nothing else he’s a bit better than Locke. Overall, Edgar makes an excellent party member - a good thing, too, as he joins early and is one of only three characters who must join your party by the end of the game.
Edgar’s special command is Tools. Typically purchased in stores associated with Figaro, Tools bestow Edgar with an assortment of combat abilities. Tools can be used in perpetuity once purchased. Though they lose their lustre to a degree later in the game, Edgar’s Tools make him a fantastic character for the majority of the game. His Tools include:
- Auto Crossbow: Hits all enemies with physical damage. Auto Crossbow will almost single-handedly get you through most early-game mobs. Already possessed by Edgar when he joins the party.
- Noiseblaster: Inflicts confuse on all opponents. Not bad if you’re in a jam. Purchased in Figaro Castle and South Figaro.
- Bioblaster: Hits all enemies with poison-elemental damage, often inflicting poison status in the process. A great weapon against humanoids. Purchased in Figaro Castle and South Figaro.
- Drill: Hits one enemy with substantial amounts of physical damage, ignoring defence. A fantastic weapon that can easily substitute for Edgar’s Attack command if you aren’t wearing a Genji Glove. Purchased in Figaro Castle after stopping Kefka in Narshe.
- Flash: Deals non-elemental damage and can inflict blind on all opponents. Decent if you’re up against enemies that rely on physical attacks; otherwise not that great. Purchased in Figaro Castle after stopping Kefka in Narshe.
- Chainsaw: Hits one enemy with substantial amounts of physical damage, ignoring defence. Has a one in four chance of inflicting auto-death rather than HP damage. The Chainsaw is good against normal enemies, but its insistence on the occasional auto-death makes it a risky venture against most bosses. Though stronger than the Drill, I recommend using the Drill when your life is on the line. Found in Zozo’s ‘Inn’ by entering 6:10:50 on the clock.
- Debilitator: Assigns a random elemental weakness to a single opponent. Debilitator is another risky Tool, as you may wind up with something you can’t hit and just waste a turn, but because this can be used on bosses Debilitator ultimately winds up as a favourable option. Purchased in Figaro Castle once you enter the World of Ruin.
- Air Anchor: Inflicts heat status on a single enemy, which will kill them the next time they attack. Possibly Edgar’s most useless Tool, as it doesn’t work on bosses or anything immune to auto kills. Found in the secret room in the Cultists’ Tower.

Sabin
Prince of Figaro, and twin brother of Edgar. Sabin is a martial artist with a troubled mind, not sure if he should intervene in matters of state or just stay away from the world’s problems altogether. He ultimately joins your party, providing a great deal of heft when he does.
Sabin’s a powerful physical character. One of the strongest attackers in the game, he can use his normal Attack command to great effect right from the get-go. He’s also fairly bulky, and though his armour typically doesn’t support high defences Sabin usually has enough health to survive strong attacks. Predictably enough, his magic is of low- to middling- strength, and he won’t be a great mage without a lot of work.
Sabin’s special command is Blitz. By inputting fighting game-style combos players can order Sabin to use a variety of attacks on opponents. If a Blitz is entered incorrectly Sabin will waste his turn. Blitzes are handy once you memorize their inputs, though the occasional reliance on magical power (an area where Sabin sucks) sometimes stunts their effectiveness. Sabin’s Blitzes include:
- Raging Fist: Inflicts physical damage on a single enemy. A good entry-level Blitz, one Sabin knows when he joins the party.
- Aura Cannon: Inflicts holy-elemental spell damage to one enemy. You won’t get another holy-elemental attack for a long time, making this a great weapon against the undead. Sabin knows Aura Cannon when he joins the party.
- Meteor Strike: Inflicts physical damage to a single enemy. Doesn’t work on flying enemies, or anything that’s too large (typically bosses). A good weapon when there’s only a single monster on the screen; otherwise its damage is reduced. Sabin learns Meteor Strike and level 10.
- Rising Phoenix: Inflicts fire-elemental spell damage to all enemies. Great for crowd control, and good early in the game when you have no other means of dealing fire damage. Sabin learns Rising Phoenix at level 15.
- Chakra: Heals all other party members for an amount of HP equal to Sabin’s current HP and cures blindness, silence, and poison. A great Blitz if you’re low on health, though it’s rather useless if Sabin’s the one who’s suffering. Sabin learns Chakra at level 23.
- Razor Gale: Inflicts wind-elemental magic damage to all enemies. Basically the wind version of Rising Phoenix. Good, but you’ll probably use it less often than Rising Phoenix. Sabin learns Razor Gale at level 30.
- Soul Spiral: Restores everyone’s health to full and cures all status ailments besides fainted. Sabin is reduced to zero HP and MP, and he’s ejected from the battle. This is a last-ditch Blitz at best, and since Sabin is completely knocked out of the fight… not so hot. Sabin learns Soul Spiral at level 42.
- Phantom Rush: Inflicts non-elemental magic damage to a single opponent. Quite powerful, but by the time you have it Sabin can reliably inflict the same damage through other means, whereas Phantom Rush’s input is… complex. Sabin learns Phantom Rush at level 70; alternatively, he can learn it by speaking to Duncan in the World of Ruin, found in a cabin on an island a little ways east of Narshe. Look for trees shaped in a cross pattern.
Because the inputs for Blitzes range wildly from platform to platform, I suggest looking at this page on the Final Fantasy Wiki for a list of inputs. It’s just easier.
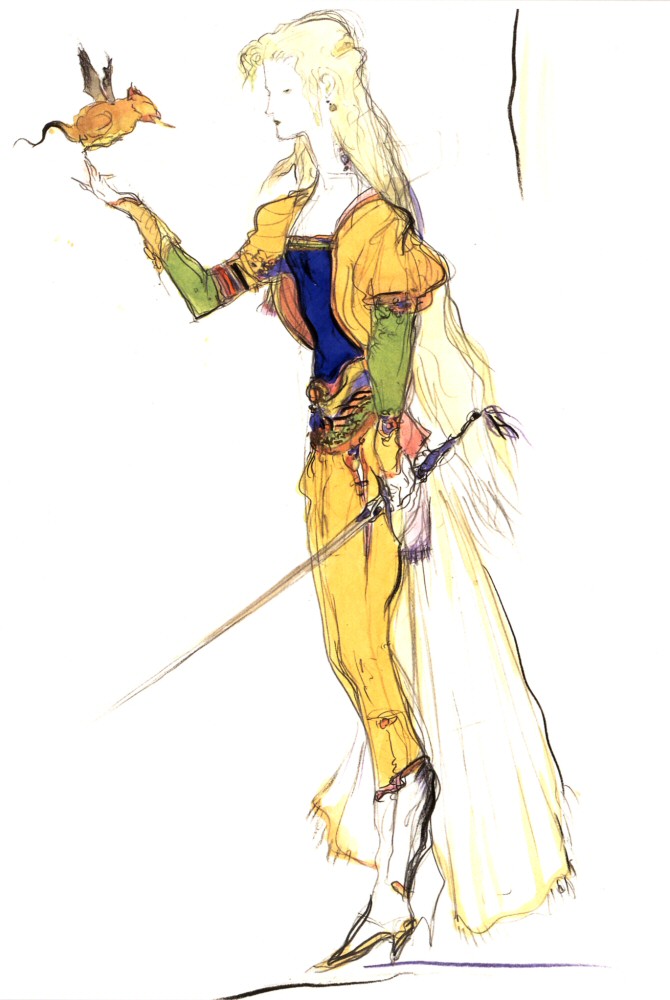
Celes
An Imperial general. Originally an enemy, Celes joins the Returners early in the game, bringing with her some icy expertise and a few loyalty issues. Celes figures into many of the game’s major events, and though she leaves for a while partway through the first half of Final Fantasy VI she’s nevertheless very important to the game’s plot. She is the only character you control when you arrive in the World of Ruin, and, consequently, is one of only three compulsory characters you must recruit to complete the game.
Celes is basically a blonde Terra. She is a good mix of physical and magical combat, with an edge towards the magic. There are few magic users better than her in Final Fantasy VI, which makes sense given that she’s one of only two people to learn spells naturally. Celes is blessed with the ability to equip most of the game’s best equipment, as well, including some of the strongest weapons you’ll ever see.
Celes’s special command is Runic. When used, Runic will allow Celes to draw in a spell cast between her turns and convert the normal effects of the spell into MP for herself. It’s a handy ability in theory, and a good way to collect MP if you know what enemies will use, but you’ll probably not use Runic for most of the game, as it interrupts your own spells as well. Runic requires Celes to be holding a sword to use.
Celes learns the following spells from levelling naturally:
- Blizzard
- Cure
- Poisona (level 8)
- Imp (level 13)
- Libra (level 18)
- Protect (level 22)
- Blizzara (level 26)
- Haste (level 32)
- Confuse (level 32)
- Berserk (level 40)
- Blizzaga (level 42)
- Vanish (level 48)
- Hastega (level 52)
- Holy (level 72)
- Flare (level 81)
- Meteor (Level 98)
Shadow
A mercenary of renown - and few scruples. Shadow comes and goes during the game, providing some oft-optional support but not touching the plot a whole lot until his hand is forced. Shadow has a veiled past, one that may line up with the childhood of another party member…
Shadow is a ninja, and his stats are those of a ninja. A strong physical hitter with so-so defences, his greatest attribute by far is his speed, which allows Shadow to attack more often than most other party members. To make up for his meh survivability Shadow has some of the best normal and magical evasion stats in the game, so he gets hit a lot less often than many other characters. Unlike most other male members on this list Shadow is a pretty solid magic user, making him a great candidate for early magicite learning, though his constant absences from the party limit his usefulness.
Shadow’s special command is Throw. Throw allows Shadow to fling weapons, typically variations of Shurikens, in the player’s inventory at the enemy. A Thrown item is a lost item. Throw is an exceedingly-powerful command for much of the game, and maintaining a stock of cheap Shurikens will allow Shadow to out-perform most of your other party members.
Shadow is also blessed with the presence of Interceptor, his dog. Occasionally Interceptor will block physical attacks from hitting Shadow, following up with one of two powerful counterattacks that can inflict as much, if not more, damage than Throw. Interceptor cannot hit flying enemies, though he can still block their attacks.

Cyan
Retainer and most powerful knight of the kingdom of Doma. Cyan is a tragic figure, losing his family and friends moments after his introduction. Nevertheless his strong manners and sense of honour lend a comic side to the knight, and Cyan is a loyal companion for most of Final Fantasy VI.
Cyan is almost strictly a physical character, relying on his hitting power and solid defence to keep him afloat. Unfortunately his good physical stats come at a cost, as he has an exceedingly-poor speed and is possibly the worst character in the game at casting spells. Overall… not the greatest guy on your party.
Cyan’s special command is Bushido. Selecting Bushido opens a gauge that charges over time. The number you stop at is the Bushido level Cyan will use when his next turn comes up. Bushido can take a long time to charge, and despite the usefulness of some of the attacks it’s really not that good a special command. Cyan’s Bushidos include:
- 1 - Fang: Inflicts physical damage on a single enemy, ignoring defence. A good alternative to Cyan’s Attack, as you can open Bushido and Fang will be automatically ready to go. Cyan knows Fang when he joins the party.
- 2 - Sky: Inflicts a powerful spell-based counterattack if Cyan is ever hit between the time the move is triggered and his next action. Sky is great for some early battles, but it quickly loses pace after Sabin’s Scenario. Cyan knows Sky when he joins the party.
- 3 - Tiger: Halves an opponent’s health and inflicts sap status. Not very good, as it fails against anything immune to auto-death. Cyan learns Tiger at level 12.
- 4 - Flurry: Performs a series of four random physical attacks against a group of enemies. Good against bosses where you don’t have to spread out the attacks, though by now the charging time is a teensy bit intolerable. Cyan learns Flurry at level 15.
- 5 - Dragon: Absorbs HP and MP from a single enemy. Doesn’t do enough to warrant using. Cyan learns Dragon at level 24.
- 6 - Eclipse: Deals non-elemental magic damage to a group of enemies and may inflict stop status. Good in theory, but Eclipse takes sooooo loooong to charge. Cyan learns Eclipse at level 24.
- 7 - Tempest - Performs a series of four random physical attacks against a group of enemies. Identical to Flurry save that it ignores defence. It would be a solid move if this replaced Flurry, but… nope. Cyan learns Tempest at level 44.
- 8 - Oblivion - Inflicts auto-death on a group of enemies. Has a good chance of landing, but by the time you learn Oblivion you’ll have other, better ways of killing groups of enemies in a single hit, and you won’t have to wait nearly as long. Largely useless. Cyan learns Oblivion at level 70.
Note that you can bypass the level limits for learning Cyan’s Bushidos by completing his side quest at Doma Castle in the World of Ruin. That doesn’t make this stupid command much better, but…

Gau
A wild child who lives on the Veldt. Gau was raised by animals, and his combat skills neatly reflect his upbringing. He joins Sabin and Cyan when they first arrive on the grasslands, and though he does almost nothing to affect the plot, Gau is nevertheless a staunch and loyal comrade during the fight against the Empire.
Gau is a weird one when it comes to stats, as almost across the board he’s pretty strong. His complete inability to equip weapons is compensated for by a fantastically-high raw strength stat, and nothing else - save perhaps his defence, which is mildly lacklustre - really lags either. Of particular note for the early game is his solid magic stats, which make him a good caster - and, unlike almost everyone else you gain pre-magicite, he can use magic, despite lacking the Magic command.
Gau’s special command is Rage. Rage allows Gau to emulate the attack style of the game’s enemies. By going to the Veldt and using the Leap command to follow enemy formations, Gau can accurately replicate a particular foe’s battle script, allowing him to utilize attacks that no other member of your team will ever learn. The downside, unfortunately, is that you cannot control Gau while he is under Rage status, and his berserker mode will only lift when he faints or the battle ends. It is vital to learn what a Rage does before using it in combat, as Gau may heal your enemy rather than hurt.
(There are so many Rages in Final Fantasy VI that putting them on this page is silly. Check out this listing from the Final Fantasy Wiki for Gau’s many, many Rages.)
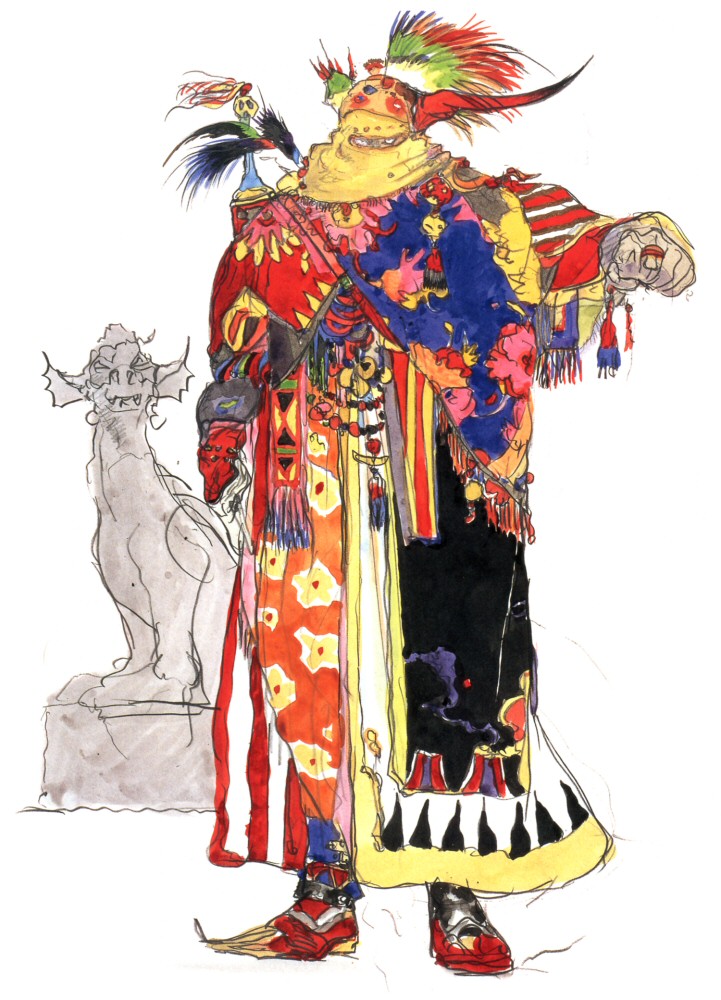
Setzer
A gambler who lives in the skies. The romantic man of fortune that opera singers dread, Setzer flits over the world in his airship, the Blackjack. He is not a man to do anything when money is not involved - though the pain of his past, wielded properly, may motivate him to eventually do the right thing.
Setzer is a fairly average character. He doesn’t hit terribly hard in most cases, but he also doesn’t take a hell of a lot of damage, especially not physical damage. His magic stat is rather low, so don’t expect him to be a stellar mage without some magicite customization. Setzer somewhat makes up for his so-so attributes with his odd equipment, including ranged cards that allow him to attack from the back row without sacrificing his attack power.
Setzer’s special command is Slots. A chancy command, Slots consists of three spinning wheels covered in pictures. Line up these pictures in the proper combinations and Setzer will carry out a variety of attacks. Slots is a bit too luck-based, and ultimately doesn’t work out that well if you like predictable battles. Setzer’s Slots abilities include:
- Mysidian Rabbit: A losing combination. The whole party regains a small amount of HP and is cured of some minor status ailments. Mysidian Rabbit basically means you screwed up and have to try again.
- Chocobo Stampede: Three chocobos. Inflicts non-elemental magic damage on all enemies. Doesn’t work on flying enemies. Not bad for basic crowd control.
- Prismatic Flush: Three diamonds. Inflicts non-elemental magic damage on all enemies. Certainly better than Chocobo Stampede, and generally okay for most of the game.
- Dive Bomb: Three airships. Inflicts non-elemental magic damage on all enemies. A step up from Prismatic Flush, and great for crowd control.
- Mega Flare: Three birds. Inflicts non-elemental magic damage on all enemies by summoning Bahamut. Not bad, but it’s rarer than Dive Bomb and often not as good.
- Summon: Three BARs. Summons a random Esper. Could be useful; could be useless.
- Joker’s Death: Two sevens and a BAR. Kills the whole party, ignoring any immunity to auto-death. Ouch. Don’t get this one.
- Joker’s Death: Three sevens. Kills every enemy, even working on bosses. Fantastic, as… well… you win. That said, it’s very rare.
If you equip Heiji’s Jitte on Setzer - this relic is found in the Cave to the Sealed Gate - Slots will turn into Gil Toss. Gil Toss allows you to expend gil to damage enemies. It’s an expensive attack, but in a pinch will allow you to dish out a ton of damage very quickly.

Mog
A Moogle. Mog acts as the narrator for the three post-Lethe River scenarios, and joins your party as an optional character partway through the World of Balance. A spunky Moogle with little overall relevance to the plot, Mog nevertheless makes a solid - if somewhat unpredictable - party member.
Mog is a little weird. He’s not a great fighter, as he’s kinda slow and he can’t hit that hard, but he’s got the best defences in the game. He also has the equipment of a fighter, so even though he’s not very strong you can make Mog into a solid frontline fighter with a high level of survivability. Mog also has some good magic stats, so it’s wise to start teaching him spells as soon as you acquire him.
Mog’s special command is Dance. When Mog uses Dance he’ll enter a berserk state wherein he’ll choose a random move each turn, either harming your enemies or healing your allies. Dance has a chance of failing, though once Mog is successful he’ll continue Dancing until he’s knocked out or the battle ends. Not a bad ability, but there are many boss battles where you simply won’t want Mog to be uncontrollable. Mog learns new Dances by fighting, and winning, in different geographic areas. Mog’s Dances include:
- Wind Rhapsody: Learned on grassy areas on the world map. Wind Rhapsody specializes in wind-based attacks, and its Sunbath ability is pretty great at healing your whole party.
- Desert Lullaby: Learned in deserts on the world map. Desert Lullaby is largely an attack-based Dance with an emphasis on auto-death, and nothing special.
- Forest Nocturne: Learned in forests on the world map. Forest Nocturne is good primarily because of Will o’ the Wisp, which can dish out a lot of damage to a single enemy.
- Earth Blues: Learned on mountains, such as the outdoor sections of Mt. Kolts. A good attack-based Dance with a slight chance of healing.
- Love Serenade: Learned in indoor urban areas, such as beneath South Figaro or in the Imperial Palace. Love Serenade is again great for Will o’ the Wisp, having a higher chance of using it than Forest Nocturne, and is one of the better Dances.
- Twilight Requiem: Learned in caves and mines, such as where you first meet Mog. A fairly meh Dance that will often waste turns trying to auto-kill opponents with Snare.
- Water Harmony: Learned in watery areas, namely the Lethe River or the Serpent Trench. An excellent attack Dance thanks to El Nino and Plasma, and possibly the best of the Dances.
- Snowman Rondo: Learned in snowy areas, ie Narshe in the World of Ruin. Another good attack Dance, though generally outclassed by Water Harmony.

Strago
An old man of Mysidia. The grandfather of Relm and her primary caretaker, Strago is an eccentric fella with a thirst for life and spunk that puts most of the rest of the cast to shame. Strago hides a few secrets, one of which doesn’t even overtly come up in the game…
Strago is the closest thing the male side of the party has to a dedicated mage. His physical stats all suck, particularly his defence, and his equipment forces him to linger in the back row if you want him to survive hard-hitting foes. On the flip side his magic is pretty solid, and though it won’t end up as high as that of the female members he still makes a pretty decent spellcaster. Still, not one of the better characters in Final Fantasy VI.
Strago’s special command is Lore. If hit by a particular listing of enemy attacks, Strago will learn said attacks and gain them for his own under the Lore heading. His Lores range from fantastic to damn near useless. Even the strongest of Strago’s Lores are typically worse than his spells, and considering both subsets require the use of MP… eh. Not a great command. Strago does not need to survive the use of a Lore-related move to learn it, so long as the battle ends in victory for your party. Strago learns a large number of Lores, so it’s the Final Fantasy Wiki to the rescue yet again.

Relm
A young artist of Thamasa. The granddaughter of Strago, Relm possesses even more pep than her grouchy grandfather, and will happily invite herself along on the most dangerous of activities. Though a latecomer to the party, Relm is a strong enough character that she’s a welcome addition in stopping the Empire.
Relm is a born mage, like her grandfather. Her physical stats are abysmal, she can’t take a hit for her life, and her equipment generally stinks, with a few female-centric exceptions. Unlike Strago, however, Relm has a solid speed stat, which puts her at a significant advantage over most other members of the party. Relm also has the best magic stats in the game, and can outcast even Terra and Celes. She’s a little behind everyone else when she arrives, but Relm is worth teaching spells.
Relm’s special command is Sketch. Sketch allows Relm to create a temporary duplicate of an enemy which will then attack the enemy group, using one of their moves. The results of Sketch range from pretty good to generally useless, especially if you use an elemental attack that will just heal the target. Equipping Relm with the Fake Mustache will change Sketch to Control, allowing you to take over and command one of the enemies. While Controlling an enemy you cannot use Relm’s normal actions. Better than Sketch, but still not that great in most cases as the really strong enemies (ie bosses) can’t be Controlled.

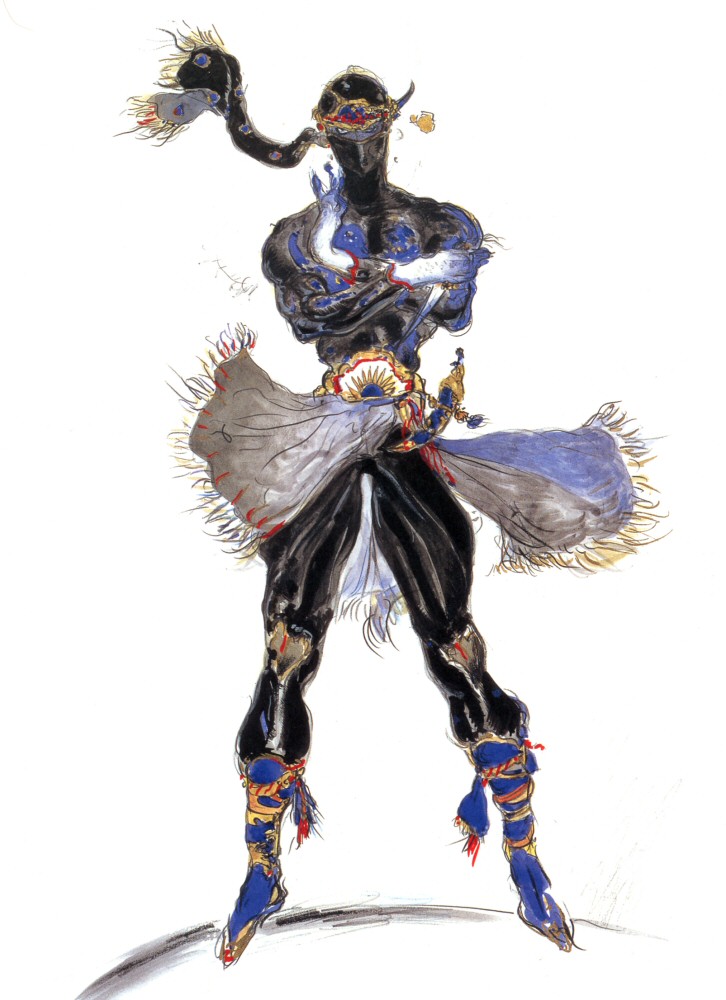
Umaro
A yeti. What more is there to say?
One of the optional characters of the World of Ruin, Umaro is a purely physical fighter. He has the best combat stats in the game, and can usually outhit any other party member fighting at his side. His magic stats are pretty poor, but that doesn’t matter one bit, really, as Umaro doesn’t use magic. Indeed, Umaro is a purely berserk character whom you can’t control in battle. You can’t give him magicite, nor can you change his base equipment. All you can do is give Umaro relics and set him loose. This fact makes him a poor choice for difficult battles, as Umaro doesn’t give a damn about healing your other characters.
Though Umaro has no special command, per se, you can give him additional attacks by outfitting him with three unique relics: the Berserker Ring, the Blizzard Orb, and, in the later versions of Final Fantasy VI, the Bone Wrist. The first two relics will allow Umaro to do things other than straight attacking, while the Bone Wrist gives him some major stat boosts that make him a more viable character… though still not a great one.
Gogo
A mimic. What more is there to say?
The second optional character unique to the World of Ruin, Gogo is really weird. He/she possesses average stats across the board, perhaps a little below average, and he/she will neither excel nor suffer in any great way. Under normal circumstances Gogo would seem utterly useless… save for the fact that he/she can emulate the special commands of every other character. You can equip other commands (Tools, Bushido, Runic, whatever you like) on Gogo’s battle menu via the Status screen. Gogo cannot learn magic normally, so if you equip him/her with the Magic command, he/she will have the accumulated spells of everyone else in the active party. Handy! The inability to upgrade Gogo’s stats via magicite boosts hurts his/her usability, but if you can get past thaaaaat…
Gogo’s special command is Mimic. Using Mimic Gogo will copy the attack of the previous friendly character to take a turn. If the previous character cast Fira, for example, Gogo will also cast Fira. Spells cast this way will not use up MP.