 |
Want to know what happens next in the Chrono saga? Try Chrono Cross - The Radical Dreamers Edition for Nintendo Switch, available now on Amazon! As an Amazon Associate I earn from qualifying purchases, at no extra cost to you.
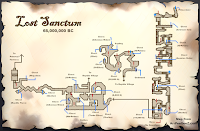
A string of locations exclusive to the PC, Mobile, and DS versions of Chrono Trigger, the Lost Sanctum is a step back to a different time. Featuring a community of friendly Reptites who need help with a variety of tasks, the Lost Sanctum is an optional side area if you want more Chrono Trigger. There are a number of items you can only get by exploring the Lost Sanctum... or, rather, both iterations of the Lost Sanctum.
Editorial Note: The Lost Sanctum is by far my least favorite part of Chrono Trigger. It consists largely of fetch quests, and you'll be retreading the same territory over and over. You do not need to complete the Lost Sanctum to beat the game. You don't even need to do it to access the Dimensional Vortex, another 'new' area that's much more enjoyable. Still, if you're a completionist... here we go.
Lost Sanctum - Vendor (65,000,000 BC)
Lost Sanctum - Nu Merchant (600 AD)
Lost Sanctum - Enemies
The Lost Sanctum first appears when you gain access to the Epoch in its flying form, after recruiting or killing Magus and watching the rise of the Black Omen. Portals into the Lost Sanctum appear in two different time periods:
- 600 AD, north of Ozzie’s Fort
- 65,000,000 BC, west of the Sun Shrine
65,000,000 BC
Entering the Lost Sanctum in 600 AD is a non-starter, thanks to a huge number of monsters, so forget about that era for the moment and try entering in 65,000,000 BC instead. Beyond the entrance you'll find an empty village. There’s nothing to see here right now, so climb the ladders in the far northeast to exit the area.
Millennia Wood - 65,000,000 BC
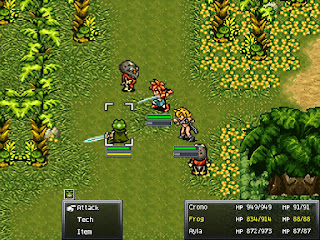
You’re now in a forest known as the Millennia Wood. Follow the path through the trees to find several Ogan Youths. Unlike previous battles with these troll-like creatures, the hammer doesn’t make a difference to their defenses. Further north is a Slate Imp and a Pink Imp accompanied by another Ogan Youth, none of which are difficult. Near them is a Hi-Potion in a chest.
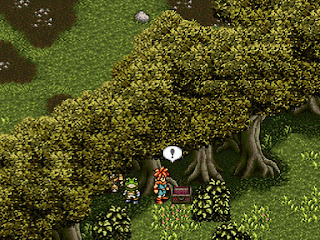
Two of each of the aforementioned enemies are waiting to the southwest. South of them is another Ogan Youth, accompanied by a tougher (but still not very tough) Ogan Chieftain. The latter responds unfavorably to physical attacks, so settle for Techs. South of them you'll find hidden path through the trees that leads to a chest containing 20,000 gil.
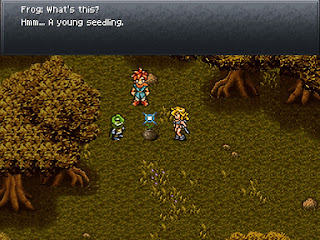
Head north, checking the trees on your left for a path to a chest. It contains a Hi-Ether. There’s another Ogan Youth / Chieftain squad to the north on the main path. Defeat them to find a sparkling seedling, which will be important later. Look north of the seedling for a semi-hidden path through the trees that leads to Athenian Water, then to the west for another obscured path, leading south to an Elixir.
Return to the village. You’ll hit a small cut scene on your way out, revealing that it is inhabited… by Reptites. They’re friendly, though, and by speaking to them you'll begin a lengthy series of side quests that ultimately lead to some fancy rewards. For the moment they’ll give you the Dragon’s Tear, an accessory that boosts its wearer's critical hit rate with normal attacks.
Your first step in side questing is to speak to the Reptite in the southwest corner of the village. He’ll ask you to search for a Golden Hammer. Agree to help him. You can get some extra info about the hammer from a Reptite in the east. You can also speak to the northern Reptite by the save point for items, weapons, and equipment sales, and the Reptite on the cliffs in the northeast opens his home up to you for a free rest, whenever you like.
We’re now going to do some exploring. Get it over with now and you’ll find the later side quests a bit easier to manage, as you’ll already know which direction you need to go.
Great Southern Swamp - 65,000,000 BC
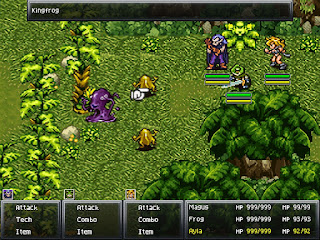
Head south from the village (the exit is south of the two ladders in the east) to find another area, lushly appointed with palm trees. Look to the east upon entering to find a chest containing a Hi-Potion. You’ll face three evasive (but weak) Kingfrogs by following the path to the south. Northeast of them are two more Kingfrogs and a Deathcreeper, an odd creature that can Charm your party. Still not too difficult. South of these enemies is a chest containing 8000 gil.
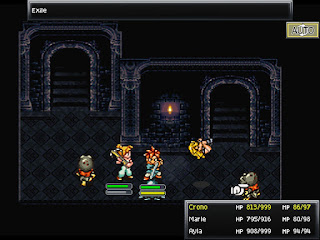
Head south until you reach an intersection, then go as far south as you can. On your right is a chest containing a Shelter. (Further east is blocked by a Nu, so don’t bother trying to go this way. We'll get to him.) On your left, snug in a grove of trees, is a Turbo Ether. Continue all the way west along the bottom of the screen to find a Mid-Potion. There’s another Kingfrog confrontation north of here, along with two Exiles. Not terribly difficult opponents, these, though don’t fall for their resemblance to Reptites - they absorb Light attacks.
To the right of this confrontation is a sparkle on the bushes. Grab it for Golden Sand. North of here and on your left you’ll find a chest containing Athenian Water, and past a battle with more Kingfrogs and a Jackpot (beware its absorbing attack - magic recommended) you’ll find another new area.
Winding Passage - 65,000,000 BC
Head west. A Black Bat bars your path at a crossroads. Easy kill, if a little evasive. Slip through the hidden wall south of the Bat to find a Shelter. Further west of here you'll find a conspicuous dip in the path, partway through the passage. Look on the left side of this dip to find a hidden route to a Reptite Tiara.
North of here is a Black Bat and Deathcreeper combo. Look further north after taking them out for a passage that leads to a Megalixir. The doorway next to the enemies leads to a blackened area that you can’t currently enter, and won’t get through for some time. Ignore it and return to the village.
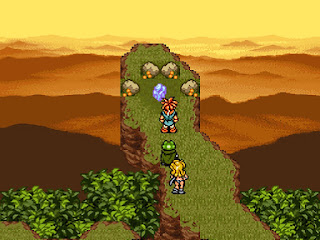
Head back through the village to the Millennia Forest in the north. Run to the sapling you found earlier and use the Golden Sand on it. Now you’re ready to leave.
Millennia Wood - 600 AD
Check out the Lost Sanctum, which is now open for business in this era. The Reptites are still here, and they want you to clear the monsters from the northern forest. Again. Return there and wipe out the monsters. They’re the same as in 65,000,000 BC, though the combinations are different. No curveballs.
There are unopened chests in the same places as before, containing the following items:
- Shelter
- 25,000 gil
- Turbo Ether
- Megalixir
- Dragonhead
In the northwest you’ll find an Ogan with a big, golden hammer. It will run off. Head back towards the village, following the main path (no shortcuts through the trees), and you’ll run into the Ogan in the next large clearing to the south of where the sapling used to be.
Goldhammer
HP: 5,800
Goldhammer is reasonably tough. He uses the following attacks:
- A hammer slam
- Thrash, a series of hammer slams on a single target
- Boulder, a heavy rock dropped on one target
- A counterattack pose that triggers Rush, an attack that lowers one target's HP to 1
Goldhammer specializes in physical attacks on single targets, and has a physical defence that’s very difficult to breach. The only effective way to defeat this guy is to employ magical attacks or Dual Techs. Do that, holding off whenever Goldhammer falls asleep, and this fight's not difficult... though you want to reduce the potential for hard hits by using your strongest attacks, as Goldhammer gains attack power each time he’s hit with magic.
Beating Goldhammer earns you the Golden Hammer. Make tracks back to the village with your prize in hand. The elder gives you a Megalixir in exchange for your heroism.
Southern Glade - 600 AD
Head to the south, through the entrance to the Great Southern Swamp. More forest takes the place of the swamp in 600 AD, though the enemies in the area are the same as in 65,000,000 BC. The main exception are Dire Rats, which aren’t a big deal anyway. There are items to collect while you're here:
- 50,000 gil in the northeast
- A Shelter in the southeast
- A Lapis in the south
- An Elixir in the southwest
- An Athenian Water in the west.
Despite the change from palm trees to oaks, the layout of this area is the same as it was in 65,000,000 BC, and the chests are in more or less the same spots.
Mount Emerald - 65,000,000 BC
Take the Golden Hammer to the southwest Reptite in the village. He’ll give you 100,000 gil as a reward for bringing it to him. Not bad at all. That quest done, speak to the Reptite one house north of the last one. She wants you to help her daughter by finding something called the Prismastone. Apparently some sort of guardian is blocking the path.
Head south, into the Great Southern Swamp, then east. You’ll find a mountain path nearby, guarded by a Nu. You may have seen him before, and now you can do something about him. Speak to the Nu after accepting this quest and you’ll get into a fight.
Nu Guardian
HP: 6,100
Charm: Mop
The Nu Guardian fights like his Nu brethren - and then some. Don't take him lightly. The Nu Guardian uses the following attacks:
- A normal attack
- A headbutt that sets a character's HP to 1
- Telepathy, which can put a character to Sleep
- Time Stop, which can inflict Stop on a character
- Luminaire / Flare / Ice II / Dark Matter, magic counters to elemental attacks that hit your whole party
Most of the time the Guardian will sit in his spot and do absolutely nothing, only occasionally breaking out the signature Nu headbutt. Attack him, though, and the Guardian counters your attack with a strike of the same element or type. Hit him with a Shadow attack, for example, and he’ll counter with Dark Matter. Hit him with Lightning and he’ll come back with Luminaire. Physical and non-elemental attacks get countered by Time Stop or Telepathy.
This is a painful setup, but it also means that you can manipulate the Nu into doing whatever you like. Put together a team that absorbs or resists one of the elements, then trash the Nu with that element alone. He’ll keep healing you, or at least dish out a minimum of damage. Ruby Vests make hitting the Nu Guardian with Fire ideal, though if you’ve been collecting other elemental gear already you’ll have more options. You can also stick to non-elemental attacks and put Vigilant's Hats on your party members, nullifying the status ailments.
You can proceed north up Mount Emerald after trouncing the Nu. Up here you’ll face a Jadewing, a highly-evasive-but-otherwise-just-mildly-annoying enemy. Kill it with magic. Look on a nearby ledge for a chest containing 10,000 gil.
More enemies wait to the east. Check south of them for a Shelter, then proceed up the mountain. To the west is a chest containing an Elixir. Continue tromping along the path and, soon enough, you’ll come to a save point. Heal up and save your game, then continue climbing. There are Hercules Beetles up here, vulnerable to physical attacks only, as well as three chests. To the west is an Aeonian Helm, to the east a Hi-Potion, and to the far north is an Aeonian Suit.
At the top of the mountain is another save point. Head east of here to find the Prismastone on an outcropping of rock. Take it back down the mountain and give it to the Reptite petitioner (northwest home). You’ll receive two Strength Capsules, two Magic Capsules, and two Speed Capsules as thanks for retrieving the Primastone.
Head to the eastern-most Reptite in the village and show her the Prismastone. She’ll ask you to track down another Primastone, and speaks of merging two Primastones together. You won’t find Primastone in 65,000,000 BC, so it's off to 600 AD with you.
Reptite Village - 600 AD
Head into the village and speak to the southwest Reptite. He’ll ask you to check on a ‘lonely figure’ at the base of Emerald Mountain. Then speak to the east-most Reptite, the one who always talks about bridges, and he’ll ask you to procure several items so he can complete his dream:
- Lumber
- Metal
- A hammer
Head to Mount Emerald in 600 AD. The Nu Guardian is waiting at the bottom, and he’ll tell you to find him at the top. Unfortunately, a ladder partway up is busted. Make sure you inspect the ladder before you leave, as you need to trigger the next conversation in this quest.
Return to the village and the Reptite in the southeastern house will tell you to look for vines to repair it in the Southern Glade. You can find the Sturdy Vines in the northeast corner of the map, appearing as a blue gleam on the northern edge of the map. Inspect the ladder again once you have the Sturdy Vines - you must do this - then jump back to 65,000,000 BC. Climb to the top of the ladder and the party will hang the vines beside the ladder, which appear as... another ladder.
Return to 600 AD. You can now climb to the upper ledge. Fight your way up Mount Emerald, collecting chests along the way, which are in the same locations as in 65,000,000 BC. They contain 30,000 gil, a Lapis, an Athenian Water, a Rainbow Helm, a Turbo Ether, and a Mermaid Helm. You’ll find the Nu waiting at the top.
Nu Master
HP: 8,800
Absorbs: Shadow
This fight is almost completely different from the last. The Nu Master uses the following attacks:
- Devil's Drop, which reduces a target's HP by half
- Life Shaver, which reduces a target's HP to 1
- Telekinesis, a weak attack against a single target
- Thunderburst, a Light attack against a single target
- Death's Rainbow, a spell that can OHKO a character
- Overdrive, a spell that hits the whole party
The Nu Master is capable of the usual Nu nonsense of cutting your HP down to one, but he can also cut your HP in half - or just outright kill you if your luck is bad. He can also use a Lightning-based strike, and every time you hit him he’ll absorb about 200 HP back from his attacker. Ouch. Smack him around with your strongest Dual Techs, and only the strongest, to whittle down his HP with a minimum of absorbed health.
About halfway through the fight the Nu Master changes tactics, charging up Overdrive, a spell that gets stronger each time he uses it. At this point the Nu Master begins absorbing elemental damage, so you'll have to move to non-elemental attacks to do damage. Stick to your strongest Techs and you'll eventually bring him down - hopefully sooner rather than later, as Overdrive gets really strong after a few rounds.
The Nu settles down for a nap once he’s defeated, blocking the new bridge that leads to the west. Return to the village and speak to the bottom-left Reptite to receive Nova Armor for fighting the Nu.
Reptite Village - 600 AD / 65,000,000 BC
Visit the elder back in the village, up the ladders in the middle of the area. He won’t allow you to get inside the shrine at his back without something called the Reptmark. You’ll find it in the far northwest corner of the Millennia Woods, not far from the spot where you found the sapling in 65,000,000 BC. Check the path to the west of the northwestern clearing.
Now you need another Primastone. Jump back in time to 65,000,000 BC, enter the village's northern sanctuary (the room blocked by the elder in 600 AD), and set the Prismastone on one of the two rock pedestals in the room. Then jump forward to 600 AD and pick up the Prismastone. Take it back in time to 65,000,000 BC and put it in the sanctuary, beside the existing Prismastone. The two react with one another and merge into a single Saintstone.
Show the Saintstone to the Reptite in the east of 65,000,000, next to the ladder to the Millennia Wood. He’ll give you a Dragon Arm, a weapon for Robo. Then speak to his closest neighbour to learn how to make the Saintstone shine. Take the Saintstone to the top of Mount Emerald in 65,000,000 BC, as instructed, and leave it in the spot where you first collected the Prismastone. Travel to Mount Emerald in 600 AD and collect the Waystone, right where you left the Saintstone.
Return to the village in 600 AD, then leave the Lost Sanctum and reenter. (You may want to travel through time once just to be sure the next segment gets triggered. It drove me nuts.) Speak to the bridge builder's neighbor, in the east of the village, to receive a quest regarding the bridge builder. Apparently the bridge builder vanished while working at the top of Mount Emerald.
Trek back up the 600 AD version of Mount Emerald and speak to the Nu to find the guy. Then backtrack and speak to the Nu, who turns out to be hungry. Return to the village… again… and speak to the Reptite in the southwest house. He’ll give you a Hearty Lunch. Take it up to the Nu… and… and…!
... and he wants something else to eat. Ugh. Okay then. Leave the mountain and climb in the Epoch.
Great Southern Swamp - 65,000,000 BC
Return to the village in 65,000,000 BC and speak to the Reptites in the southwest to learn that the animals nearby carry food items. You need a Sweet Banana to satisfy the Nu, and you can find it in the Great Southern Swamp to the south. While in the village you should also speak to the Reptite in the southeast corner of the area. With the Waystone in hand he’ll give you a quest to check out the darkened area in the west.
Enter the swamp. The enemy carrying the Sweet Banana is south, east, north, and then back to the west a short ways. You’ll face a Deathcreeper and some Kingfrogs. Take them out for the Sweet Banana. (You can also find Smoked Meat by defeating a Deathcreeper inside the Winding Passage, but the Nu will not accept this item. He wants the Sweet Banana.)
At this point you're poised to tackle both of the dungeons found in the Lost Sanctum. You're probably tired of climbing Mount Emerald, so we'll put off delivering the Sweet Banana to the Nu and deal with the dungeon in 65,000,000 BC. Head to the far west end of the Winding Passage and the Waystone will light the darkened cave we checked earlier, opening the path to the Primeval Fortress.
Primeval Fortress - 65,000,000 BC - Enemies
Dead ahead is a quick cut scene and three Twin Snakes. They’re easy to kill with physical strikes. Once they’re gone you’ll jump back to the village, and one of the villagers gives you the Judgment Scythe for Magus. Speak to the merchant by the village's save point for a free Megalixir before you leave again.
Return to the Primeval Fortress. Along the way you’ll get into a number of battles, the first of which introduces you to Chryosaurs. Unlike most lizards they absorb Light attacks, and should be handled via other elements. Eventually you’ll make it back to the Fortress entrance. Check the chests here for 40,000 gil in total. The next room to the north has chests containing an Athenian Water and a Shelter.
In the next set of corridors you’ll face two Chryosaurs. There are three sets of stairs to check here, as well as a dinosaur skull. Go through the western-most stairs to start to find five chests. They contain a Feather, a Petal, a Fang, a Horn, and a TurboShot for Lucca. This room's northeastern stairs connect to the skull, which leads to an extra battle, so you don't have to go this direction.
Return to the central chamber and go up either set of stairs. They lead to the same corridor. The eastern door leads to a battle, 10 gil, a Potion, and a Panacea. The western door leads to another battle, as well as a Megalixir and a Dragon Armor. The central door leads to a save point and a wide corridor. Both sides lead outside.
You’ll find flying creatures named Pteranyxes outside that can’t handle physical attacks but heavily resist magic. Down the western side of the corridor you’ll find a Stardust Bow for Marle and a dead end. Down the east side you’ll find the path onward.
Climb to the top of the tower, avoiding or killing enemies as you go. At the top, protected by a large number of fliers, is a chest containing a Reptite Dress. Backtrack one level and go south to find a save point. Boss time!
Archaeofangs
HP:
- 8,000 (red)
- 7,500 (blue)
Weak:
- Water (red)
- Fire (blue)
Absorbs:
- Fire (red)
- Water (blue)
Blue and red ruling over an ancient kingdom, the Archaeofangs are irritating opponents. They use the following attacks, which are shared between the two monsters:
- A combo attack on a single target
- An earthquake attack against the whole party
- Volcano, a Fire attack against the whole party
- Water II, a Water spell against the whole party
- Flare, a strong Fire spell against the whole party
- Dark Matter, a strong Shadow spell against the whole party
- Osmose, a counter that steals MP from one target
The Archaeofangs' abilities consist primarily of high-level magic that does little damage, though they use each often enough that the HP loss adds up quickly. More annoying than that is their ability to steal MP from your characters after essentially every attack. Yikes. Expect to run low on MP.
As you may expect, the blue Archaeofang absorbs Water damage and takes extra from Fire, while the red does the exact opposite. Either target them one-at-a-time with strong, neutral Dual Techs that go after their specific weakness, or use neutral elements that will take them both down at roughly the same time. Not that difficult, but you may find the battle dragging on if you don’t have items that restore your MP.
The one thing to keep in mind here is an unfortunate ability shared by both Archaeofangs, and that's revivification. When one goes down the other will revive it on its next turn. You need to chip away at their health at roughly the same rate, so that they either perish simultaneously or within seconds of one another. Take turns hitting them if you plan to use single-target attacks, and never go too crazy on either one of them. The blue Archaeofang has slightly less HP than the red and takes much more damage from spells, so focus most of your firepower on the red one.
Winning this battle sends you back to the village, where the villagers reward you with the Valor Crest. This accessory is specific to Ayla, and boosts her critical hit rate, as well as grants her a 50% counterattack rate. Highly recommended. You’re now finished with the Lost Sanctum in 65,000,000 BC.
Mount Emerald - 600 AD
Wander up to the Mountain and give the Sweet Banana to the Nu. You’ll be jumped back to the village and receive some Saurian Leathers, a powerful piece of armor that'll come in handy for any of your physical attackers. From this point on the Nu stays in the village, and you can purchase some cool armor from his store. Check the top of the guide for a list of what he sells.
On the way out you’ll hit a cut scene, and… now… you have to go up Mount Emerald. Again. Cross the bridge at the top, and after a few familiar encounters you’ll wind up in a new area. The enemies living here include Bone Knights, a new foe that can’t handle magic.
Tower of the Ancients - Enemies
You've officially reached the final area of the Lost Sanctum. Give yourself a pat on the back, then get to work. Straight ahead are more Bone Knights and two chests, one containing 50,000 gil and the other a Dinoblade. Use the save point, then begin to climb.
The Tower of the Ancients consists of small, single-hallway floors. The enemies along the way aren’t too tough, and the climb is so straightforward that you won't need a map. You’ll find a save point midway up, if you keep an eye on your right, and near the top you’ll see an area with a red carpet. Look east along the carpet to find a chest containing a Rusted Blade.
The third save point signals the end of the Tower. Beyond that...
Master-at-Arms, Bladesman
HP:
- 14,500 (Master-at-Arms)
- 9,000 (Bladesman)
Absorbs: Shadow (Bladesman)
Immune: Light (Master-at-Arms)
Charm: Elixir (Bladesman)
This is not a difficult fight, but it can be trying. The Master-at-Arms and the Bladesman use the following attacks:
- Tsubame Gaeshi, a single-target counterattack (Master-at-Arms)
- Tsubame Gaeshi, a multi-target counterattack (Master-at-Arms)
- Flash of Steel, a single-target counterattack (Master-at-Arms, defensive stance only)
- Thunder, a Light spell against a single target (Master-at-Arms)
- Holy Light, a Light spell against your whole party (Master-at-Arms)
- First Aid, which restores health to the Master-at-Arms (Bladesman)
- Sword strikes at a single target (Bladesman)
- Desperate Strike, which can hit one or more party members (Bladesman)
The Master-at-Arms is a Light-based creature, and will either use physical attacks or Light spells. Every hit you land on him triggers a counterattack, which, though kinda weak, can get annoying after a while. He’ll occasionally change stances to redirect his stats, and it’s better not to attack when he’s in his defensive stance. The Bladesman has no counters and generally isn’t a great threat, but unlike the Master-at-Arms he’ll absorb any Shadow magic you may use.
Focus strong Dual Techs on the Bladesman to wipe him out before focusing your full might on the Master-at-Arms. Neither is really strong enough to do significant amounts of damage unless you came here early in the game. The Master-at-Arms' reliance on Light attacks can hobble the spectre, as all you need to do to ignore much of his repertoire is equip White Vests or White Plates on your party members.
Check the rear room (northeast) after defeating the Master-at-Arms and the Bladesman to get tossed back to the village. Here you’ll receive the Champion’s Badge, which is basically an upgraded version of the Hero’s Badge for Frog. In addition to boosting his critical hit rate with the Masamune, this also cuts Frog's MP expenditures in half. Accessories don't get much better than this. Speak to the Nu and he'll have more items for you to buy, notably some powerful equipment.
You're almost done. Return to the village in 65,000,000 BC and speak to the Reptite along the top row. Give him the Rusted Blade and he’ll give you an Icewyrm, a weapon for Crono. If you manage to track down Lumicite in a later dungeon, the Dimensional Vortex, you can trade it to the Reptite in this same spot in 65,000,000 BC for an Elemental Aegis. (You can get Lumicite if you happen to run into a Wonder Rock while exploring the Lost Sanctum, but your chances aren't high.)
That's all for the Lost Sanctum. Go do something more fun. Yeesh.
Part Thirty-Seven: Dimensional Vortex (PC, Mobile, and DS Only)
Part Thirty-Seven: Dimensional Vortex (PC, Mobile, and DS Only)

