 |
Part 15: Recruiting Mog
Main Walkthrough
Return to the Imperial Observation Post. A member of your party greets you there, sparking another lengthy cut scene. Once it’s done... well, it was fun flying around for a little while...
It's time to talk to Espers. Of great importance here is putting Terra into your party. Unlike other parts of the game, Terra is not forced to go along with you after you speak to Banon in Narshe - but you can't get through the next dungeon without her. Give her some new equipment and a piece of Magicite and she'll fit right in.
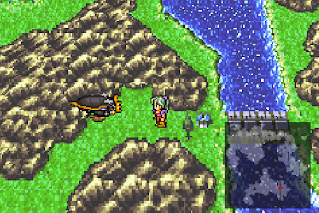
Enter the Imperial Observation Post, the small base in the mountains to the east of Albrook. Normally patrolled by an excess of guards, it has since been abandoned. There’s a single house here, and its basement contains a ton of chests, but you can’t get at them. Yet. Travel around the northern edge of the base to get to the entrance to the Cave to the Sealed Gate, your next destination.
Cave to the Sealed Gate - Enemies
The first thing to note about this area is its excess of powerful enemies. Most of them can do a number on your party if you can’t kill them quickly. Teach Blizzara to the majority of your chosen party (at least Terra) before entering, as it works rather well against most of your enemies. Characters with single-hitting, neutral special attacks also come in handy, and Mog’s Water Harmony can rip apart most of the enemies in the second, larger half of the Cave. (Jump back one article if you didn't get Mog.)
The first section of the Cave to the Sealed Gate contains a few enemies that are very strong when it comes to magic. Kill them as quickly as you can with physical attacks. In the first room you’ll find an Assassin’s Dagger; in the second a Kazekiri; in the third...
… lava. This next area contains appearing and disappearing platforms over a lava floor. If you’re on lava when a platform disappears you’ll take damage and get dumped back at the beginning. You need to watch the movement of the platforms and walk only when it’s safe to walk. If a square opens up to lava when changing, don’t linger on it. There are two chests here - one containing Heiji’s Jitte, the other an X-Potion - and a path onward in the bottom-right corner of the screen. Heiji's Jitte in particular is worth getting, as it changes Setzer's Slots command to Gil Toss, a powerful (but expensive) combat skill.
The next eastbound area comprises the bulk of this dungeon. The enemies down here are quite painful. Of note are the Outcasts, undead creatures that will use their Liveshaver attack after taking damage. Liveshaver can do a ton of damage to your characters, and your best bet for avoiding its effects are to kill these things in a single hit. Healing spells and hard-hitting special attacks work best.
Head east and south from the entrance to find a Hi-Ether, then backtrack and take the south/east route from the entrance. Go up the rocky stairs to the south, hit the switch across the next bridge to drop down to a lower level, and check the cave to your left to find a Genji Glove.
Head back south and continue east. There are two switches to the north. The right switch drops a powerful Ninja into the cave for you to kill. Try to dispatch this guy quickly, as he can use Scroll attacks like Shadow and wreak some serious havoc. You can keep spawning Ninjas for as long as you like if you keep hitting the right switch. The left switch opens a cave between the switches that leads to a save point and a Tent. Handy.
Head east, hitting the switch halfway across the next bridge to make a staircase leading south. Check the chest on the ledge here for a Hi-Ether, then go through the cave on the right and head north. Once you leave the passage you’ll find a chest containing an Elixir.
Step on the next button to the east, then go south. West of here is a switch that opens a secret cave. Inside the cave are chests containing two Magicite Shards, a Hi-Ether, and an Ultima Weapon. The Ultima Weapon is a sword that increases (or decreases) in strength based on its bearer's current HP. The healthier they are, the better it gets. You’ll likely have the Ultima Weapon on one of your characters for the rest of the game, because not only does it get really strong, it ignores defense.
Head east along the bottom of the screen once you’re back in the main area. Hit the switch to the north, then the next switch beyond. This opens the way to a chest containing another switch. It triggers a gap in the final bridge, and isn’t worth touching. Check the chest north of this last bridge for a Magicite Shard, then head south. The final path in this area lays ahead.
(Don't worry too much about healing, or the fact that there's no save point. There's no boss to worry about in the Cave to the Sealed Gate.)
Past one final screen you’ll reach the Sealed Gate, and you’ll get in a minor brawl with a certain someone who followed you through the cave. Smack him once to trigger an epic cut scene that will bring your trip through the Cave to the Sealed Gate to an end. From here you can take a shortcut to the south back to the entrance of the Cave.

-240210-192225.png)


