So, you've completed the main story of Dragon Quest IV and restored peace to the world. What's next? Well, how about we try to pick up another party member, and take down another threat to humanity? Does that sound good?
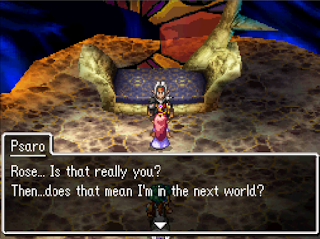
When you reload your game after defeating Psaro the Manslayer you'll wind up in Endor. If you travel to Rosehill you'll find it a little changed, with a grave for Rose, Psaro's beloved, to the east of her tower. Check the grave for a Seed of Magic. If you speak to the NPCs (primarily the woman inside the well) you'll be pointed towards El Forado.
One of the NPCs in El Forado will mention the miraculous flowers of Yggdrasil, and that a sign of their presence is a 'change' somewhere in the world. That tip is quite vague, so we'll take the hunting out of the equation: You need to travel to the Azimuth. Check the stairway in the northwest and you'll find an enormous hole in the ground, which leads to a new dungeon.
Fungeon, Part 1 - Enemies
- Abullddon - 250 HP
- Bloody Hand - 185 HP
- Cerberuff - 300 HP
- Cureslime - 60 HP (summoned as backup only)
- Decayurion - 350 HP
- Demonspawn - 180 HP
- Demon Thunderer - 259 HP
- Div - 380 HP
- Dragooneer - 300 HP
- Draguar - 352 HP
- Drakulard - 520 HP
- Drooling Ghoul - 134 HP
- Emperor Wyvern - 400 HP
- Float-o-Copier - 153 HP
- Gnucifer - 360 HP
- Incineraytor - 98 HP
- Juggular - 375 HP
- Knightshade - 200 HP
- Metal King Slime - 7 HP
- Mimic - 230 HP
- Octophant - 300 HP
- Pandora's Box - 900 HP
- Periwinkle - 190 HP
- Pickeerer - 140 HP
- Picuda - 120 HP
- Prince of Darkness - 200 HP
- Prism Peacock - 456 HP
- Sasquash - 250 HP
- Shelligator - 170 HP
- Spinchilla - 100 HP
- Terminonatator - 380 HP
- Tetsudogre - 360 HP
- Tuskateer - 150 HP
- Vis Mager - 900 HP
- Well Wisher - 210 HP
Welcome to the Fungeon! Easily the largest dungeon in Dragon Quest IV, the Fungeon will put your skills to the test. Filled with monsters that are often pulled from other Dragon Quest games, the Fungeon will take up most of your time in Dragon Quest IV's sixth chapter. There's something you need, located at the bottom of the Fungeon, and you'll need to do a lot of traveling to get that far.
Partway through the Fungeon you'll find a spot you can use to Zoom in and out. This section will get you to that safe area. Make sure you come in ready to fight, as it is a looooong way down.
- Once you drop in the hole you'll be on a straightforward path for a while. Travel through the next few chambers until you come to a crossroads.
- If you head east from the crossroads you'll come to a room full of water, complete with a raft. Sail south of the entrance and you'll find two chests. The left chest contains a Mini Medal, while the right is a Pandora's Box, a more powerful version of the Mimic. Sail west along the north end of the room and you'll find a chest containing a Strength Ring. Sail west along the bottom of the room and you'll find a path to the chest on the platform, which contains an Yggdrasil Leaf.
- Return to the crossroads in the previous area. (Evac and walking back to the entrance is the quickest route.) If you head north from the crossroads you'll wind up in an adjacent chamber full of pathways. Head northeast from the entrance to find a chest containing a Mini Medal, then backtrack and go further northeast to find the exit stairs.
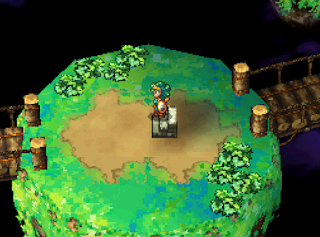
- You'll pop out on a series of circular islands, connected by bridges. Start by crossing the bridge to your left, which will take you to a dead-end island with a chest. The chest contains a Seed of Agility.
- Backtrack to the first island and head east this time. Follow the path of the bridges until you arrive at an island with two bridges leading south. The lower bridge on the right leads to a chest containing a Mini Medal, while the bridge on the left leads to stairs.
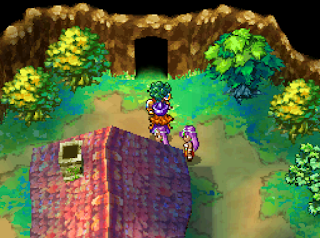
- The stairs will take you to a house with a well. Head inside and you'll shrink down... or the house will grow substantially. Go down the tiny stairs in the northeast of the house and you'll appear outside another, nigh-identical house. An old man is outside this house this time, and if you speak to him a Mini Medal will appear at the bottom of the well.
- Inside this second house - which is also enormous - you'll find a man who will let you rest for the night. There's also another set of stairs in the northeast, and they will take you to a jail of sorts. If you make your way to the northwestern cell you'll find a chest containing a Seed of Magic. The southeastern cell also contains a chest, though this one is a Pandora's Box.
- Return to the house and leave. To the north is a cave. There are two sets of stairs ahead, and if you go down the stairs on your right you'll find a chest containing 1,200 gold. The northern stairs lead deeper into the dungeon...
- ... and wind up in a superheated inferno. Follow the path as it winds around - this will take a while - and you'll eventually end up at an east-west intersection. If you go west you'll find a chest containing a Death Mask, as well as a northbound path. This links up with the path you would have traveled if you'd gone west at the intersection. Head north and you'll eventually come to stairs.
- You'll still be in lava on the next floor, though now you're on bridges. Head west from the entrance to find a chest containing Elevating Shoes, then backtrack a bit and go north. You'll find stairs up to a fortress.
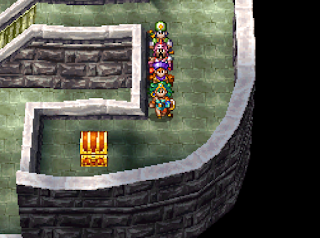
- You'll find steps to the east and west inside the fortress. Check the eastern steps and you'll wind up at a chest containing a Seed of Life. The western steps will eventually lead you to the north of the fortress, where there are stairs in the northeast and the northwest. The northeastern stairs lead to a chest containing a Cobra Claw. The northwestern stairs are the main path.
- You'll wind up near a pit. Drop down and you'll find stairs to a lower level of the fortress. The main path is to the north, though there are two chests in this area. You can get to the one in the middle of the area by going east and around the outer path... though the chest is a Pandora's Box. Not worth the effort.
- The other chest is seemingly inaccessible in the northwest corner of the map, though you can get to it by traveling to the south end of the map. There's a subtle path of watery pools in this area, stretching between the many pillars, and these hint at an invisible path that you can follow to get to the chest. It contains a Robe of Serenity. Be careful on the way to the chest, as a misstep will drop you to the floor below.
- Croaked King - 400 HP
- Div - 380 HP
- Gnucifer - 360 HP
- High Djinks - 350 HP
- Incineraytor - 98 HP
- Juggular - 375 HP
- Mimic - 230 HP
- Pandora's Box - 900 HP
- Periwinkle - 190 HP
- Platinum Jewel King - 200 HP
- Prince of Darkness - 200 HP
- Prism Peacock - 456 HP
- Seasaur - 450 HP
- Shelligator - 170 HP
- Spinchilla - 100 HP
- Terminonatator - 380 HP
- Togre - 440 HP
- You'll find a cluster of graves a short way into the next area. Check the glint in front of them for a Mini Medal. This area consists of a number of twisting paths, and if you take the path leading northwest you'll find a dead-end with a chest containing an Angel Leotard.
- The stairs in the east, both north and south, lead to a living area with several friendly monsters. A wardrobe in the west contains Boxer Shorts, the two pots in the southwest contain Horse Manure, and the wardrobe in the eastern bedroom contains a Demon Spear (good for hunting Platinum Jewel Kings). The stairs in the middle of the map will take you deeper into the Fungeon.
- The next area has several watery patches. Head west from the entrance to find a chest containing a Mini Medal in the southwest. Head north from this chest, then back east. There's a path leading south, to a chest containing a Kerplunk Bracer, as well as a path leading north, to the exit.
- The next large area contains several ladders. Down the first ladder you'll find two more. The ladder on the right leads to a chest that is actually a Mimic, while the ladder on the left is the main path. Head west to find a longer ladder up to a chest. The chest contains a Recovery Ring. Go down the ladder to the south of this chest, then head east along the bottom of the map to find the exit.
- Next up is a series of steps leading progressively upward. Take the steps on the left, which will take you to a Pandora's Box trap chest. Keep climbing and you'll find a chest containing a Ruby of Protection on the east side of the room. Further up, near the exit and on the left, is a chest containing another Demon Spear.
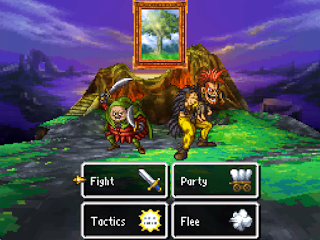
- 3,200 (Chow Mein)
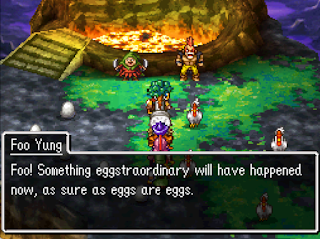
- 2,800 (Foo Yung)
- Chow Mein is largely an offensive character, and sticks to attacks that can hit one or all of your characters. The deadliest is Boulder Toss, which will do over 100 points of damage - and the only way to mitigate that damage is to defend. That aside, Chow Mein can also throw up a strong defense, and if he scatters feathers he'll completely void any physical damage your characters might attempt to inflict on him. Chow Mein will sometimes act twice per turn.
- Foo Yung uses a variety of damaging abilites, including fire and ice breath attacks, the Confusion-inducing Fuddle Dance, and the occasional melee attack. Foo Yung can also heal his team, and will throw out Kabuff to raise Chow Mein's defenses. Last, most annoying, Foo Yung can use Disruptive Wave to render your team's buffs null and void.
- The Hero is best off conserving their MP for Omniheal, given how much damage these goofballs dish out. Spend most turns attacking, then jump in with restorative spells as needed. Using the Zenithian Sword as an item will remove the effects of Kabuff on the enemy party.
- Ragnar is an attacker. 'nough said. Given his high HP Ragnar can also be brought in to take heavy damage when you know it is coming.
- Alena has the same role as Ragnar, though she's a bit faster, and is a good choice for carrying restorative items.
- Borya should use Oomph, Acceleratle, and Sap, as needed. Get him out of the party whenever his services aren't needed, as he doesn't have enough HP to last long against Chow Mein and Foo Yung.
- Kiryl will likely serve as your primary healer, and his Kazing spell can instantly, reliably bring KOed characters back into the fight. He can also use Kabuff to downplay the effects of Chow Mein's physical attacks. Kiryl's a bit better at tanking damage than other healers, but you're still better off keeping him out of the fight.
- Torneko should be brought out as a distraction and a meat shield. His speed also makes him a decent choice for using items.
- Meena's primary role is using Insulatle, which greatly reduces the effects of Foo Yung's breath attacks. She can also heal as needed. Give her the Sage's Stone - hopefully you picked it up in Nadiria - and you'll have another multi-targeting cleric.
- Maya's Kafrizzle spell can inflict some solid damage, though Maya herself is a bit frail for this fight. If Borya gets knocked out you can bring Maya forward to use Sap.
- Sparkie can be used as a sacrifice if you want to protect someone else. That's... about it.
- Pandemonic Shield
- Pandemonic Sword
- Pandemonic Armour
- Boxer Shorts
- Yggdrasil Leaf
- Pandemonic Helm
- An NPC who joins the Immigrant Town
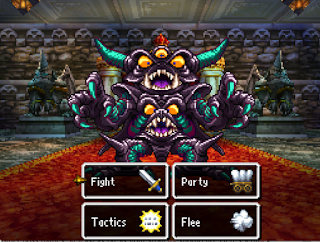
- 1,800 (first form)
- 2,000 (second form)
- 2,000 (third form)
- 3,800 (fourth form)
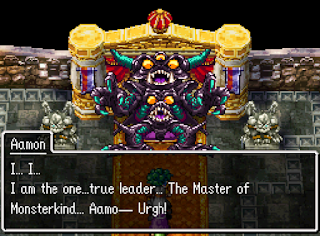
- Aamon starts off with some moderately-powerful fire spells, Meditation to heal himself, and the ability to chew and Paralyze a character.
- Aamon's second phase is more or less the same as the first, though he'll add a stomping attack.
- Aamon's third phase gives him a powerful hand-crushing attack, and brings back his fire magic.
- Aamon's fourth phase adds in an icy breath attack, and can put a character to Sleep without fail. Nothing you can do will resist Sleep status in this case. Aamon's ultimate attack here is Magic Burst, which can inflict up to 200 points of damage to all of your party members. Magic Burst uses up all of Aamon's MP, so he'll need to use Evil Prayer to restore his MP before he can use it again.
- Hero - Omniheal or attack
- Ragnar - Attack
- Alena - Attack or restorative items
- Borya - Oomph, Sap, or Acceleratle
- Kiryl - Kabuff and heal
- Torneko - Attack or restorative items
- Meena - Insulatle, Sap, or heal
- Maya - Kafrizzle


