

The tale of a lost little girl and her massive, monstrous protector, Meg's Monster is a short, story-driven RPG with a few twists. Your main character, a hefty fellow named Roy, has to protect his charge, Meg, from harm. If Meg gets too upset and starts to cry, well... suffice it to say that any more would spoil the story. If you like cute, well-written plots in your video games, this one's for you.
Meg's Monster has nineteen Achievements in all. If you complete all of the optional content, which is listed below, you'll unlock all of the Achievements. It's an easy game to 100%.
Because Meg's Monster is all about the story - mostly, anyway - this guide will remain as spoiler-free as possible. We'll deal primarily with navigation, problematic battles, and finding side quests. Onward!

Research Facility / Underworld
Meg's Monster begins with a blonde-haired woman approaching some sort of abandoned lab. Guide her inside and inspect the transceiver on the desk once you run out of walking space. The game will shift abruptly...
... and you'll gain control of Roy, a monster. You need to fight Spud, another monster. Attacking with Roy's fist twice will put the guy down. After the battle you'll gain access to a world map, of sorts, and you'll only have one choice: Home.

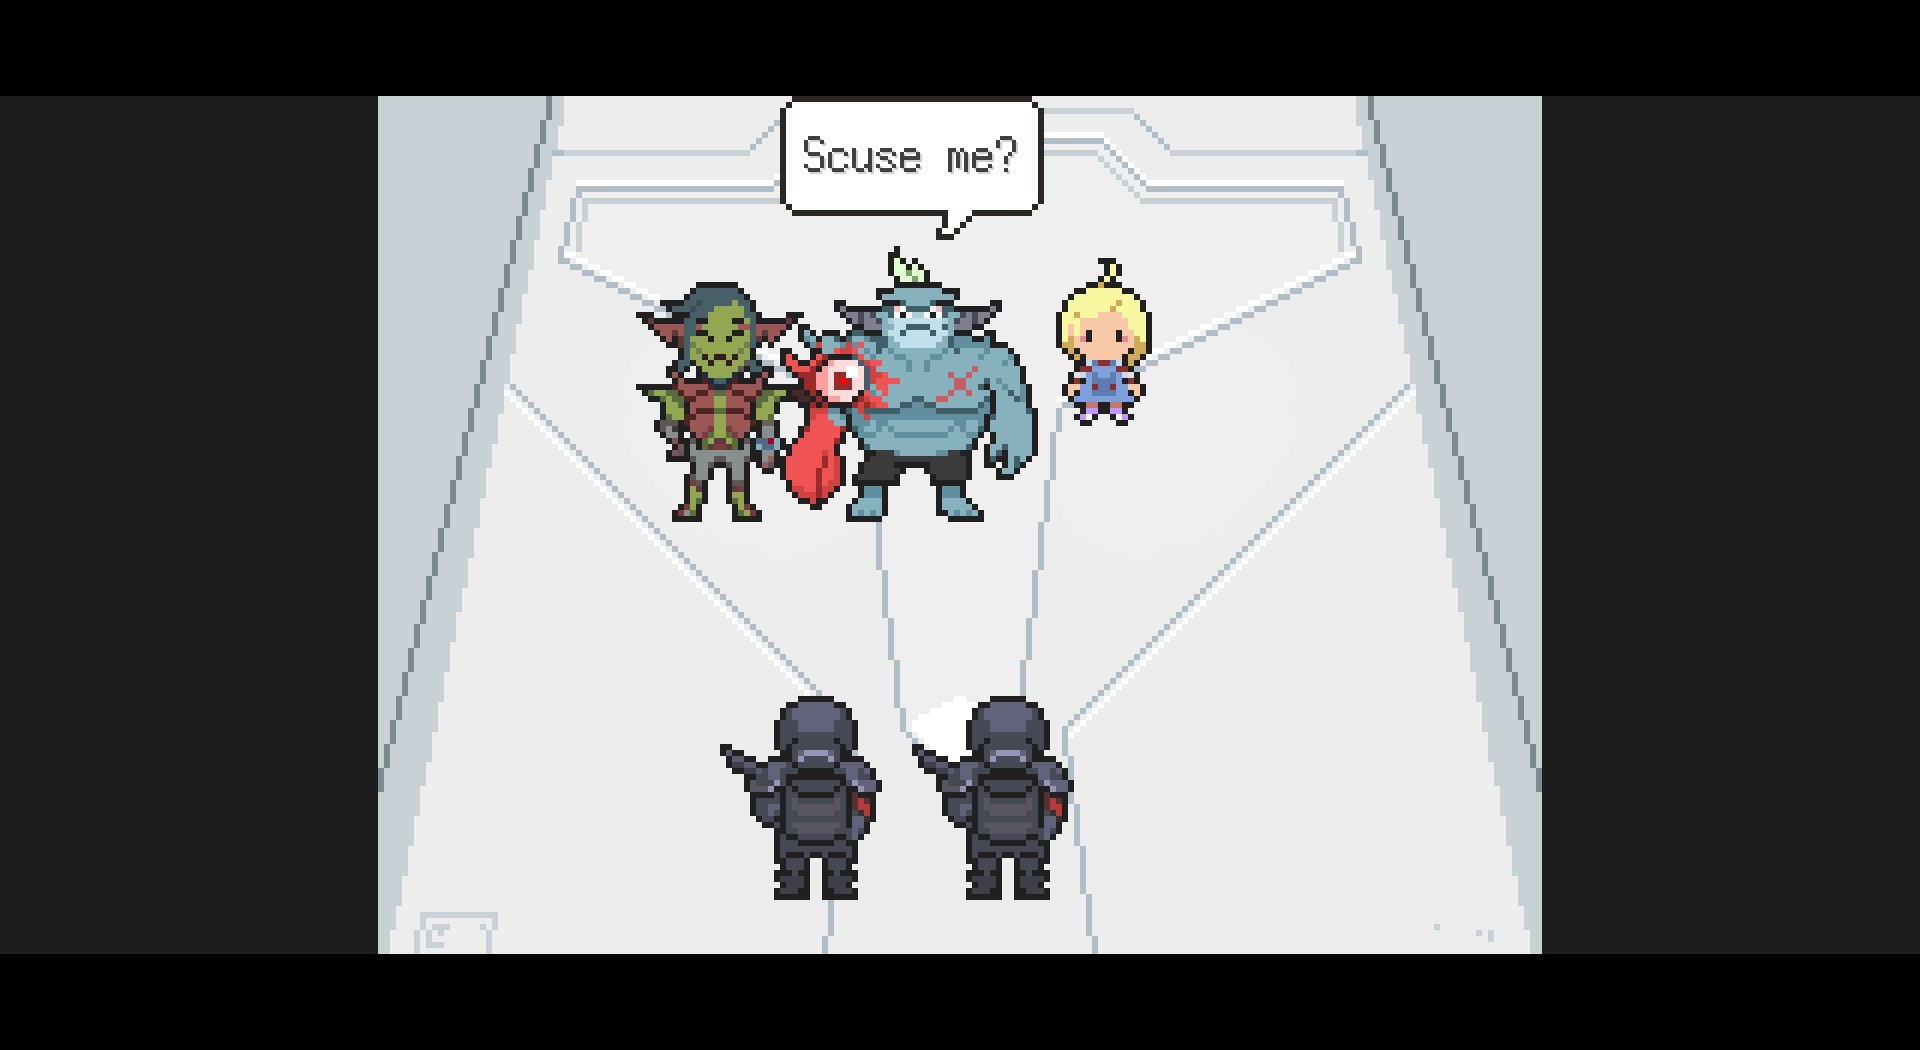
Roy's House - Jason and Spud
Check the sign out front of the house for a bit of dialogue. Head into Roy's House. Check the Magic Tar in the bucket, then speak to Meg. Check the Magic Tar a second time, then speak to Meg again. Check the Magic Tar a third time. Once everyone gathers into a group behind Roy, you can check the Magic Tar a final time for some more dialogue.
Outside you'll need to fight Spud and Jason. This is where the combat system in Meg's Monster starts to kick in.

Combat
For much of the remainder of Meg's Monster battles will consist of Roy standing on the front lines, defending Meg from harm. The creatures Roy battles can't hurt Meg, and they basically can't hurt Roy... but watching Roy get smacked around fouls Meg's mood. This is represented in the bottom-left corner of the screen. If Meg runs out of heart points the game will end. Over time both Roy and Meg will become stronger, granting Meg more heart points with which to withstand her mood swings.
You don't have access to them yet, but Roy will soon receive more powerful punching attacks. These use up Stamina, which accrues each turn. Roy can store up three Stamina per turn. Part of your strategy going forward will be saving up Stamina to use on more powerful attacks, rather than pelting enemies with normal attacks.
Soon there will be ways to restore Meg's heart and cheer her up. For now, just beat the snot out of the enemies. You can speak to Jason and Spud after you take them down. Leave Roy's House either way, and use the map to travel to the Salvage Yard.

Salvage Yard - Territorial Punk
Inspect the yellow sparkles on the right and left side of the Salvage Yard. Then inspect the Toy Rocket Ship that falls down to the north. You'll be confronted by a Territorial Punk.
Battle time. This time around you'll be able to use the Toy Rocket Ship, which restores some of Meg's heart. You can only use the Toy Rockey Ship once per battle, so you need to hold on to it until it's absolutely necessary. As the story progresses you'll receive more toys, expanding your combat options.
Use the Toy Rocket Ship to immediately restore Meg to normal, then either use the Scavenge command to see what Roy finds or just punch the Territorial Punk. Use Guard once he starts talking about finding something 'good' to use or Meg will take a bunch of damage. Scavenge whenever Meg starts to get low on health to find something to restore her mood, and otherwise just beat up the Territorial Punk.
Beating the Territorial Punk will boost Roy and Meg's stats. It will also unlock Super Punch, a more powerful version of Roy's normal punch. Leave the Salvage Yard and return to Home.

Roy's House
Go back inside Roy's House. Inspect the Soccer Ball on the ground to trigger a cut scene. You'll gain the Soccer Ball as a toy, for use in combat. Inspect the desk inside the house, where the Soccer Ball was sitting, for extra dialogue. Return to the world map.
OPTIONAL - Salvage Yard
Use the map to head back to the Salvage Yard. Watch the scene that follows. Check the refrigerator Meg was doodling on for some extra dialogue.
Whether or not you visited the Salvage Yard, head to Monster Village next.

Monster Village - Gustav
There are several things you can do here:
- Speak to Spud near the entrance to the area. New questions will keep popping up the more you talk to him.
- Speak to the vendor where Spud is shopping. Check the stew pot for extra dialogue.
- Speak to the purple-skinned fellow in the north, guarding the door. You can also inspect the poster on the other side of the door.
- Speak to the mantis-like man on the left side of the screen. Ask about humans.
Follow Meg to the east. This will put you in a fight with Gustav. Smack Gustav with normal attacks and Super Punches. Heal Meg with toys as needed. The fight will end long before Gustav runs out of health.
Speak to Jason, as well as the man with the eyepatch. Keep asking questions of the eyepatch guy until you learn that he owns a ladder. Speak to the green-skinned fellow against a crate on the right side of the screen, then ask questions of Jason when he takes over the conversation. Check the cans on the eyepatch man's table for some extra dialogue.
Return to the world map. Travel to Paul's House, in the north.

Paul's House
Enter the house. You'll have to fight a Weird Robot. Alternate between punches and Super Punches, healing Meg with toys, until the Weird Robot engages a countdown. Use Roy's strongest attacks to stop it from blowing up.
Enter the remainder of the house. You can speak to the robot, Joey, as well as inspect the transceiver on the right and the lab court in the north. Speak to Paul, the human, then leave the house once you're done looking around.
OPTIONAL - Paul's House
Leave Roy's House for Paul's House. Speak with Joey inside the house. Travel to the Monster Village and speak to the green-haired vendor on the right about bread and meat. More on this in a while.

Salvage Yard - Morgan
Head to the northern Salvage Yard on the world map. Head north one screen to fight Morgan. Hit Morgan as normal until she starts talking about her masters, then use Guard to prevent her next attack from hitting too hard. She'll keep using these attacks, and you should Guard when appropriate. Eventually she'll go to sleep, and you can finish the battle. (I suspect you can Guard until Morgan goes to sleep.)
Roy will learn Ultra Punch after this battle. Head back south to leave after checking on Golan and Morgan. Go back Home.

Roy's House
Inspect the crayons on the right side of the house to let Meg play with them. A cut scene follows, and you'll receive Crayons as another toy that you can use in combat to soothe Meg. Once back on the world map, head to the eastern point on the map.

Creeper's Domain
Speak to the Creeper. Fight time. The Creeper can smile ominously at Meg and inflict heavier damage. Use the Cray once Meg's health is below 30 health to restore her health, then use Super and Ultra Punches to whittle the creeper down. The Creeper will eventually defend, which restores his health to full.
Attacks will do basically nothing while the Creeper is defending, so heal Meg again and go back on the offensive once the Creeper returns to normal. Smack the Creeper until he defends again. Once he does, use the Snatch Photo command to prevent him from healing. One or two more hits will end the fight. You can then leave.
OPTIONAL - Creeper's Domain
Available if you spoke to Joey at Paul's house. Reenter Creeper's Domain after leaving and speak to the Creeper again. He'll hand over some meat. Take it to Paul's House and speak to Joey. Head back to Creeper's Domain afterward and speak to Creeper again.
Head back Home, whether or not you cover the optional storyline.

Roy's House / Flower Field
Inspect the pack of Playing Cards on the ground to gain them as a toy for Meg in combat. After Roy and Meg sleep you can inspect the contents of Roy's House for some more dialogue, notably the wall picture, the brown dresser on the left, and the Magic Tar pot.
Leave the house for the world map. Head south, to the Flower Field, then back Home once the cut scene is over. You can inspect the flower in the top-left corner of the cave. Check the pike of Storybooks to gain them as a combat item, as well.
Leave Home the next day.
OPTIONAL - Salvage Yard
Travel to the northern Salvage Yard. You can have a conversation with the old Council member.
OPTIONAL - Monster Village
Travel to the Monster Village and speak to Morgan, in the north of the village.

Paul's House / Roy's House
Head to Paul's House and speak to Paul. After the conversation you'll be sent back Home, but you'll need to return to Paul's House for another talk. After that's done you'll need to head to the northern Salvage Yard. Try to use the rope and you'll be sent back to Paul's House once again.
Speak to Paul, Meg, and Joey to trigger the next cut scene. You'll be sent back to Roy's House for another cut scene. Something significant will happen. You can go back to the Monster Village to speak to people and complete side quests, if you want, but otherwise all you can do is climb aboard.
Laboratory Lobby - Spec Ops Units
After some dialogue you'll need to fight four Spec Ops Units. Roy is by himself this time, so you don't need to worry about healing Meg. You can use Magic Tar to heal Roy - and he will take quite a bit of damage in this fight, for once - though you only have nine doses, so you should use it sparingly. Guard until you've accrued plenty of Stamina, then use it to Ultra Punch and obliterate a Spec Ops Unit. They will drop Grenades that Roy can use when defeated, which will help wipe out the remaining enemies.
Leave the Lobby and you'll be on a new world map. You only have one choice of destination.

Experiment Chamber - Spec Ops Unit
Check the glass tube on the right side of the room for a bit of dialogue. Another Spec Ops Unit will try to subdue Roy when you attempt to leave this area. You just beat four, so one shouldn't be a problem. Leave to unlock another new area.

Launchpad / Control Room - Lab Chief Victor
Watch the cut scene, then inspect the rocket. Not much else to do at the Launchpad. Move on to your next destination.
Watch the cut scene, then speak to the man in the Control Room. You'll be sent to another room. Inspect the glass enclosure at the north end of the room to trigger another cut scene.
At this point you'll need to fight Lab Chief Victor and his guardian. Both will attack Roy. Any attack you direct at Victor will just hit the guardian, though Victor seems to attack personally less often if you aim at him. Guard when they rev up for a 'dual attack' or Roy will take heavy damage.
Do enough damage and the guardian will transform. Guard whenever the guardian 'rears up', and heal Roy with Magic Tar if he drops below 40,000ish HP. Once the guardian runs out of HP you can hit Victor one more time to end the battle.
Inspect Victor after the battle's over, then check the door in the north to trigger a cut scene.

Research Facility
Enter the facility and check the transceiver in the second room. Watch the next cut scene, then inspect the figure standing in the light. Continue to inspect each object and figure that appears. Eventually you'll need to inspect a flower.

Roy's House / Monster Village
Eventually you will wind up back in control at Roy's House. Watch the cut scenes that follow, then head to the Monster Village. Speak to the man with the eyepatch on the east side of Monster Village. If you didn't earlier, question him until he reveals that he has a ladder. Then ask for it.
Return to the world map. Head to the northern Salvage Yard.

Salvage Yard - Gustav
Speak to Sebastian, then approach the ladder. Gustav will show up to fight Roy. Get in three hits on Gustav before the battle changes, after which Meg will leave. You're now fighting Gustav with Roy alone. Attack Gustav with punches until Roy is lowered below 40,000 HP, then use Magic Tar to restore his health and go back to punching.
Halfway through Gustav's health he will latch on to Roy, and you'll need to tap a button to force him off. Tap steadily - but don't mash the button, as it won't help your case at all. Past this point use Guard whenever Gustav is gathering his strength, or when he's primed for a follow-up attack, to avoid taking too much damage on his next turn.
Approach the ladder after the battle to leave. Follow the lights in the next area until you reach a cut scene. Wake up Meg and Golan, then leave to the north. A battle follows.

Flesh Tunnel - Nancy
You'll be fighting with Meg at your back again this time. Nancy's attacks do much more damage to Meg than Roy, so when you first need to heal her you should use the Crayons, as they will also raise Meg's Defense. Once you do enough damage Nancy will launch a flurry of attacks, and you'll need to move the cursor up, down, left, or right to deflect her attacks. Press the confirm button to knock the attack away before it lands. Taking a few hits isn't the end of the world, so long as you ward off the majority of the punches.
After the fight you can ask about Sebastian. Leave to the north.

Subterranean Lake - Gargantuan Fish
Walk right to trigger a cut scene. Inspect the mushrooms after the scene for some extra dialogue. Inspect the fishing rod by the water, then speak to Golan until someone else arrives on the scene. Talk to them and they'll leave. Keep talking to Golan until he asks for some bait, then grab the smallest mushroom on the left side of the screen. Speak to Golan again.
Now you're fighting the Gargantuan Fish. For the first little bit it does the most damage on its second attack out of three, so attack, Guard, and attack with Roy. Once the Fish jumps back into the water you can use the Cast Lure command to pull it out again. A bar will pop up, and you need to press the button when the cursor moving across the bar hits the orange, middle section. This will damage the fish and bring it out. You'll get one move to attack before it jumps back in. Repeat the process, healing when necessary, to defeat the Gargantuan Fish.
Leave to the right after the battle.

Crystal Caves
The first part of this area involves an obstacle course filled with flying arrows and broccoli. You'll need to hold down buttons indicated on the screen to guide Meg and Golan across. Have Golan move first each time, avoiding the arrows but positioning him in front of the streams of broccoli. They will bounce off of him. Then move Meg across, again avoiding the arrows. If Meg gets hit by arrows or broccoli, or Golan by just arrows, you'll have to start over.
The next section involves laser traps, and you can swap between the three characters and move them around. Roy is the only one who can walk freely through the lasers, so use him to block the left-most laser on the northern path. Then move Meg and Golan between the lasers. Move Roy over to block the right laser so his friends can pass by to the other side of the trap.

The next laser trap section involves some crumbled ground that only Meg can safely navigate. Roy's laser-blocking only helps a little bit here, bringing Golan into play. Have Golan inspect the colored panel beside the laser trap and he can use the switches to deactivate some of the lasers. Which ones he deactivates depends on the button you push. Do the following to complete the puzzle:
- Move Roy in front of the left-most laser
- Have Golan hit the red (first) or blue (second) button
- Move Meg so she's parallel to Roy, but on the lower, crumbling path
- Have Golan hit the green (third) button
- Move Meg over one space
- Move Roy over to block the fourth laser from the left
- Move Meg over to grab the machine part - a cut scene will interrupt this movement
- Reverse the opterations to get Meg back out so she can give the machine part she found to Roy
- Hit the 'Off' button on the panel with Golan to deactivate the lasers


- Gustav's grappling attack, where you need to tap a button to overpower Victor
- Nancy's flurry of fists, where you'll need to knock away incoming punches
- Sebastian's memory game device, though in this case it's a bomb that will go off in three rounds - you get three chances to Defuse Bomb before it explodes
