

All maps created using GridMapper.
Welcome to the world of Dragon Quest! Originally released on the NES as Dragon Warrior - and released many times since then, on a variety of different systems - Dragon Quest is a fantasy RPG, distilled to the most basic of concepts. The Sphere of Light, sacred relic of the realm of Tantegel, has been stolen by the evil Dragonlord, and it's up to a lone youth to get it back. There are bumps in the way, of course, but your target is, and always will be, the elusive Dragonlord, who waits in a castle that is just out of reach of the mainland.
Before we get into the game it's wise to note that, while the game in general is the same between versions, you'll see some changes between the original NES version and the remakes of later years:
- Most of the items, spells, and locations have different names. It's not too difficult to puzzle out which items are which if you're playing the NES version and using this walkthrough, but there will inevitably be some moments of confusion.
- While the overworld and town layouts are the same, there are some differences in the dungeons. This is especially true of the final dungeon, which has a very different layout in its darkened sections. You'll need different maps for earlier versions of the game.
- You receive more experience in the newer versions, and will require less grinding to get your character to a new level. (Though grinding is still a big part of Dragon Quest.)
- In the earliest versions of Dragon Quest you needed to access the menu and use specific commands to speak to NPCs, open chests, and go up stairs. This is no longer the case in later versions.

The Basics
Dragon Quest puts you in the shoes of a solitary adventurer. You begin at level 1 and will work your way up to around level 20 by the end of the game, depending on how much time you put into killing monsters. Combat in Dragon Quest is turn-based, like most RPGs of its day, and your adventurer will always face enemies one-at-a-time. Monsters are only encountered in dungeons or while exploring the overworld. Defeating enemies will earn you experience and gold, and receiving enough experience will allow you to level up, gaining higher stats and new spells in the process.
In short, it's an RPG. If you've playing an RPG before you'll know exactly what you're getting with Dragon Quest.
Unlike other RPGs, where you can typically save your game wherever you like, all saving in Dragon Quest is done via King Lorik, the lord of Tantegel Castle. If you are ever defeated in combat you'll immediately be sent back to Lorik's chambers, and your gold will be reduced to half its total amount. For these two reasons you can expect to use Tantegel Castle as a sort of hub area, proceeding outward from it whenever you embark on a new venture into the overworld and returning to it when you're done.
The other major departure from (most) other RPGs is your limited inventory. In Dragon Quest your character can only carry ten items at a time. The items you have equipped count as part of your inventory, further limiting your carrying capacity. This becomes less of an issue as you gain spells that replace items, but you will inevitably run into moments of item management. Fortunately, there are two places in the game where you can store items you no longer need, and you can pick them up any time you like.
The rest we will get into as it becomes pertinent. Speaking of which... shall we?

Tantegel Castle
You'll start off Dragon Quest in the throne room. The king of Tantegel will explain the situation, then offer you the contents of three chests in the center of the room. They contain 120 gold, a Torch, and a Magic Key. You will need all three, so make sure you open these chests before you go downstairs, via the stairs in the south. (The key is needed to open the door to the south, unfortunately, but you'll get many more over the course of your adventure.) Make sure, also, to check your inventory, as you carry another item: A Bamboo Spear, your first weapon. Be sure to equip it before you leave the castle.
Downstairs you'll find the rest of Tantegel Castle. The people within will give you a sense of the world and the urgency of your mission, though the most important parts of the castle are all blocked off by doors that require Magic Keys. We'll come back and explore them later. The one item you can pick up now is a Medicinal Herb, hidden in a pot to the right of the sleeping guard in the southeast of the castle. Until you receive some healing magic you'll need Medicinal Herbs to keep you alive.

Just south of the sleeping guard you'll find a man behind a counter who will 'shine light' upon your character. This will fully restore your character's MP, which will be handy once you have a restorative spell, allowing you to avoid a rest at an Inn. He's the last notable thing here, so take your leave through the southern exit of Tantegel Castle.

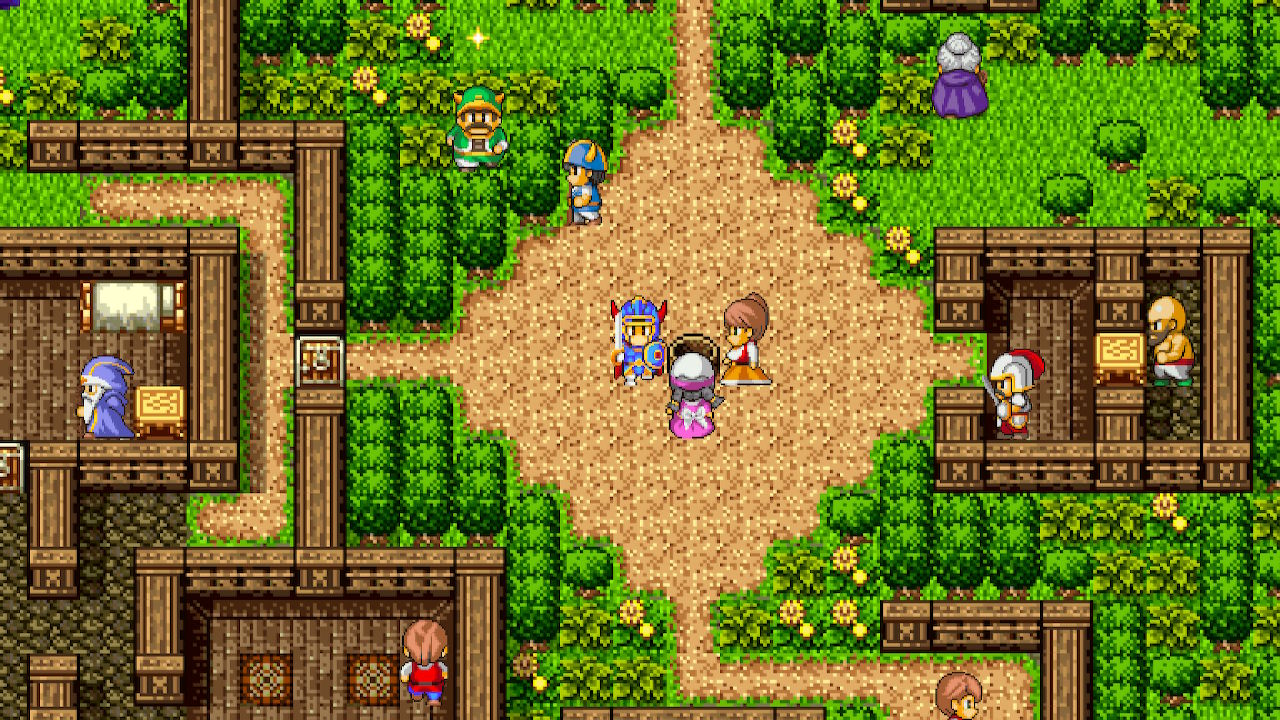
Tantegel Castle Town
When you leave Tantegel Castle you'll wind up on the world map. You can immediately begin exploring the world, if you like, though first you should pay Tantegel Castle Town a visit. It's a short walk east of Tantegel Castle, and you won't run into any monsters making the trip unless you wander around. There are things to see, do, and purchase here that will make the early stages of your journey a little easier.
- North of the western entrance of Tantegel Castle Town is the Armory. Here you can purchase basic weapons and pieces of armor. You already have a Bamboo Spear, so you may want to buy some armor instead. Fighting monsters on the outskirts of town will give you the chance to upgrade to the best this area can offer: A Copper Sword, a Leather Suit, and a Leather Shield.
- South of the western entrance is an Inn. Thanks to the old man in Tantegel Castle you may never need to use it, once you have healing magic. Also in here is a Bank, where you can store gold and items. You'll absolutely want to make use of the Bank as your inventory begins to overflow. A dresser in this building contains a Chimaera Wing, which you can use on the world map to instantly teleport back to Tantegel Castle.

- In the south of the town is an Item Shop. You may want to buy a few Medicinal Herbs, assuming you have money left over from the Armory. Torches are useful for lighting up dungeons, which you'll do in a little while. The Dragon Scale is a defensive item that you can equip to slightly improve your Defense.
- In the east of town is the home of an old man who claims that he can remove curses. Keep him in mind should you ever be afflicted by one. (This won't happen for a while, and if you're smart it won't happen at all.)

World Map - Tantegel Region
- Slime (Recommended level 1+)
- She-Slime (Recommended level 1+)
- Dracky (Recommended level 2+)
- Ghost (Recommended level 3+)
Step out onto the world map and you'll immediately put yourself at risk of running into battles. The monsters within the vicinity of the castle are a piece of cake, and you should make sure you stick close until you have better equipment and a few levels under your belt. Try to boost your character to at least level 3 before proceeding with the game, as you'll gain access to the Heal spell and can travel without relying completely on Medicinal Herbs. Battling Slimes and She-Slimes in the forests and mountains near Tantegel Castle will do nicely, and you can battle Drackies to the north once the Slimes become too easy.
Unlike a lot of modern RPGs you are not barred from exploring most of the world in Dragon Quest right from the start. As a result it is very easy to wander into areas populated by monsters that are far too strong for you to defeat. If you cherish your gold and your time, don't travel too far until you know you're ready for greater challenges. Avoiding bridges is a good guideline for this part of the game.
Head north of Tantegel Castle once you've reached level 3, acquired at least some rudimentary armor and an Oaken Club, and purchased a Torch or two. Near the coast you'll see a small cave surrounded by desert. This is your next destination.

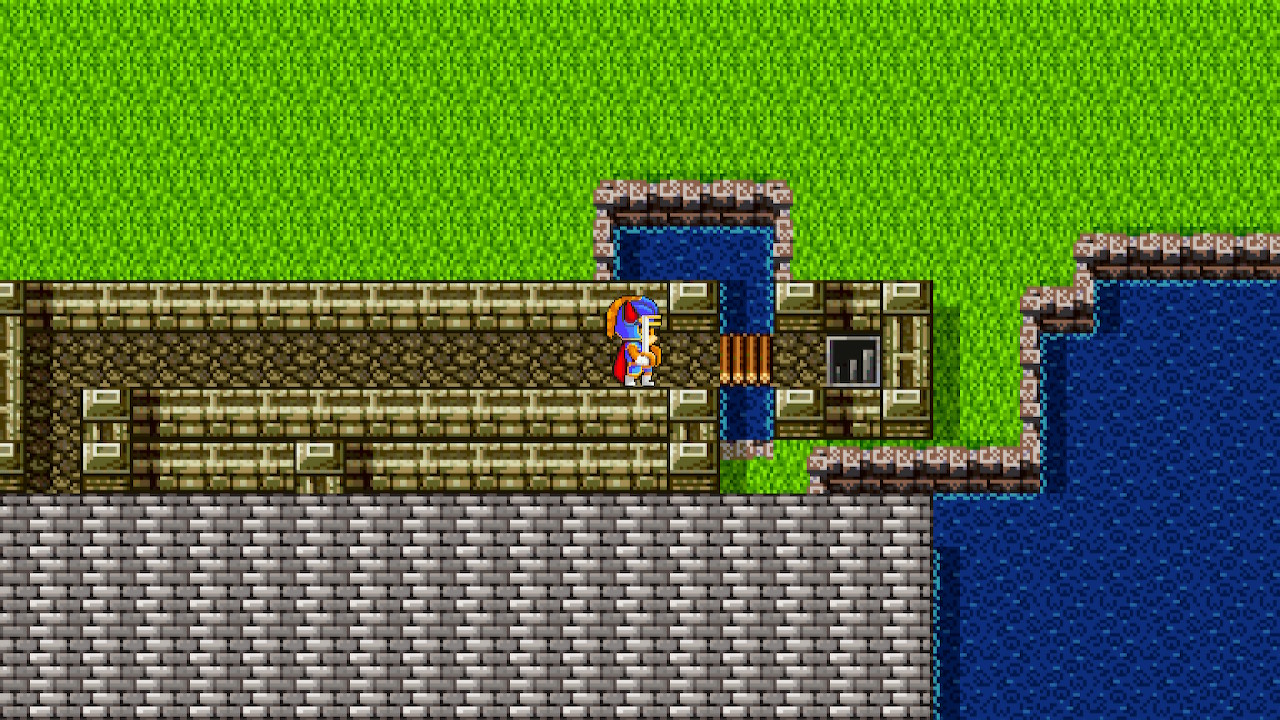
Erdrick's Cave
Despite having the appearance of a dungeon, Erdrick's Cave is utterly devoid of monsters. You can walk straight through this place, into the basement, and find Erdrick's Tablet. The map below outlines the path to the Tablet so you can save your Torches. Follow the red line.

The Tablet is a stone structure that covers what you need to do to reach the Dragonlord's island, namely gather three artefacts. They're scattered throughout the land of Alegard, and finding them will encompass the rest of your journey. Once you've learned this you can make your way back out of Erdrick's Cave to the world map.
Head back to Tantegel Castle if you feel the need to rest up and save, then head north until you reach the coast again. If you travel west of here you'll find the town of Galenholm, where you can find some better gear for your character - if you have the money to afford it. To continue the game, however, you'll need Magic Keys. This requires a trip to the east, where you'll find two more towns. Consider getting to level 4 so you have the Sizz spell before you make the journey.

World Map - Kol Region
- Ghost
- Drackolyte (Recommended level 3+)
- Prestidigitator (Recommended level 4+)
- Scorpion (Recommended level 5+)
- Skeleton (Recommended level 7+)
- The Armory is the first building you can enter, to the north of the entrance. If you don't have one already you should buy a Copper Sword, though you can also use the battles outside Kol to pretty quickly save up for an Iron Axe instead. The Iron and Full Plate Armor are likely still outside your price range.
- North of the central well and to the left you'll see a yellow sparkle on the ground. Step onto it and check the ground to receive the Faerie Flute. You can use it to put enemies to sleep in battle, and will need it to enter a town later in the game. Handy, though you'll eventually gain the Snooze spell, so to free up inventory space you may want to put the Faerie Flute in the Bank in Tantegel Castle Town at your first opportunity.
- In the northeast of Kol is the Inn. If you plan to use Kol for leveling - and you absolutely should - you'll use the Inn a lot to restore your HP and MP.

- West of the Inn are the public baths. You can, uh... get a puff-puff in here for 20 gold. Figure it out for yourselves. Inside the drawers in the baths you'll find Plain Clothes and a Seed of Strength. Use the Seed of Strength immediately to give your character a small, permanent Strength boost (and to free up space in your inventory). Do the same with any Seeds you find.
- In the northwest of Kol, past the bath house, you'll see a small home surrounded in poisonous swamps. Stepping into them will inflict one point of damage on your character per step, and you'll be seeing plenty more of them going forward. Inside the house is a man who will tell you to seek out the sword of Erdrick, which is secreted somewhere in Alefgard.
- South of the swampy house you'll find an entrance to the large building on the west side of Kol, bypassing one of the locked doors. In here you'll find an Item Shop, as well as a few useful tidbits of NPC info.


- Ghost
- Lunatick (Recommended level 6+)

- Skeleton
- Legerdeman (Recommended level 8+)
- Bewarewolf (Recommended level 9+)
- Iron Scorpion (Recommended level 9+)
- If you travel almost directly west from the southern exit of Quagmire Cave you'll come to a small cape that almost touches another cape to the west. This path will eventually be bridged and give you access to the Dragonlord's castle. You're still a ways off from that, however.
- If you travel south, hugging the east side of the island and going around two mountain ranges, you'll find a lake in the middle of the island. Here is the town of Rimuldar, which we'll be visiting next. If you're running through here under-leveled with the intention of getting Magic Keys, you'll want to rush to Rimuldar post-haste.
- South of Rimuldar is a small island that will eventually be important to your journey, though for now entering the shrine on the island will just get you ejected. This island is populated by Gold Golems, and though they're a bit tough to beat at this stage in the game doing so will earn you 650 gold. If you want to buy good gear ahead of time, this is the place to pad your wallet.

- Just north of the entrance is the Armory. The equipment available here is a step up from Kol, though you probably can't afford a Steel Broadsword yet, let alone any of the armor. The Iron Armour at least is a solid acquisition if you level up around Rimuldar and earn enough money.
- Standing just north of the Armory is a merchant who serves as the Item Shop. He's useful for the purchase of Chimaera Wings, given that you'll be coming back to Rimuldar a few times.
- There are two homes west of these shops. In the first is a dresser containing a Chimaera Wing.
- The Inn is south of the entrance. There are two locked doors that we will get to momentarily.


Magic Keys - Tantegel Castle
On the west side of Tantegel Castle is a locked room with four chests inside, as well as a guard. The chests contain 337 coins, a Seed of Magic, a Seed of Agility, and a replacement Magic Key.


- Galenholm has the usual Inn, Armory, and Item Shop. The only new item that's worth getting, if you have the money, is the Iron Shield from the Armory (though you can also get one for free in the next dungeon, if you're willing to wait). A few Torches might not hurt, either, assuming you don't yet know the Glow spell at level 9.
- In the north of Galenholm is a large, locked building. Inside you'll find a bunch of NPCs, as well as three chests containing a Copper Sword, a Torch, and 630 gold. If you want to be efficient you will not enter this place until after you've completed the next dungeon.
- Also inside the locked northern building is an old woman inside a locked room. She'll give you another Magic Key. Thanks?


- Ghost
- Lunatick
- Prestidigitator
- Skeleton
- Drackyma
- Legerdeman
- Drohl Drone (Recommended level 7+)
- Fightgeist (Recommended level 8+)
- Go left past the large pool of water on the first floor rather than heading south. You'll find a chest at a dead end containing 349 gold.
- There are four chambers in the north of the second floor that you'll be passing by on the way to the end. The middle two contain 536 gold and a Torch.
- The east-west and north-south hallways connected to the final chamber of Craggy Cave lead to chests. The hallway to the east of the final chamber contains an Iron Shield, while the southbound passage to the west of the final chamber leads to a Seed of Strength and a Seed of Magic. All three items are worth getting.


- Legerdeman
- Drohl Drone
- Drackyma
- Bewarewolf
- Drohl Diabolist - Third floor (Recommended level 11+) - Use Fizzle
- Spitegeist - Third floor (Recommended level 11+) - Use Fizzle
- Skeleton Soldier - Third floor (Recommended level 12+) - Use Fizzle
- The main path takes you east of the entrance, then south. If you go north first you'll find passages leading to a treasure room. The chests inside contain a Seed of Life, 537 gold, and a Magic Key.
- The trip through the second floor requires you to make a long walk west, then south. At the point where you need to turn south you'll find stairs. Go down them and follow the connecting passages west, past a small water pit, until you wind up on the western edge of the map. North of here you'll find a chest containing 337 gold.


- Gold Golem (Recommended level 12+)
- Skeleton Scrapper (Recommended level 12+)
- Scarewolf (Recommended level 12+)

- Chimaera (Recommended level 12+)
- Dark Skeleton (Recommended level 15+)
- Knight Errant (Recommended level 15+)
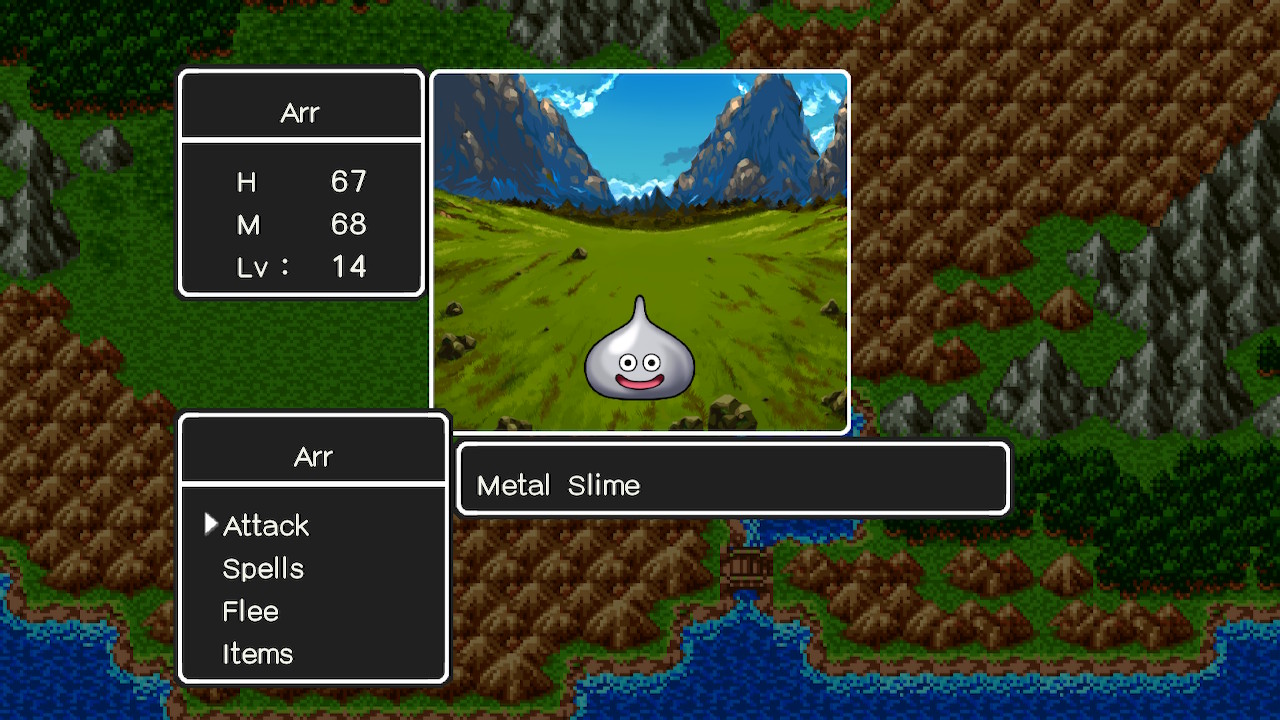
- Metal Slime (Recommended level 16+)

- Tearwolf (Recommended level 14+)
- Hocus Chimaera (Recommended level 14+) - Use Fizzle
- Vis Mager (Recommended level 14+) - Use Fizzle
- Cosmic Chimaera (Recommended level 15+)
- Green Dragon (Recommended level 16+)


- There's an Armory right near the entrance of Cantlin, though it sells a bunch of low-tier items at this point. Another Armory in the southeast of town is a bit better, but is similarly behind the times. The Armory you want is in the locked house on the east side of Cantlin. The vendor sells the Fire Blade and the Silver Shield, both of which are quite powerful - and very expensive. The Silver Shield is the best in the game, while the Fire Blade is second only to a sword you won't get until you reach the final dungeon, so you'll ultimately want both. Also in this shop is a man who sells Magic Keys.
- There are Item Shops on the east and west side of Cantlin, and they both sell the same items. Very useful.
- The Inn is right by the entrance of Cantlin. Inside it is a chest of drawers containing a Seed of Resilience.
- In the northwest corner of Cantlin is a Bank for storing your items. It's connected to the Bank in Tantegel Castle Town, so anything you stored there will be available in Cantlin, and vice versa. If you stored the Princess's Pledge earlier you should pick it up now. You can also put the Faerie Flute in here, if putting enemies to sleep is not typically part of your battle strategy.

- In the southwest of Cantlin is a house with two locked doors, though you only need one Key to get inside. A man in here will give you a hint about Damdara, the town you passed earlier. Check the dresser in his home for a replacement Magic Key.
- In the southeast of Cantlin is the aforementioned subpar Armory, as well as a nun who will sell you Holy Water. By this point you probably know the Holy Protection spell (level 15), and won't need Holy Water clogging up your inventory. Attached to this building is a small room with a dresser containing a Seed of Magic.
- In the south of Cantlin is a large, contained building that you can enter on the left side. It leads to a series of blue tiles that will inflict 14 points of damage every time you step on one. Ouch. Keep a close eye on your HP and use Heal whenever your health is low. The old man on the other side will give you a vital clue as to your next destination. (So, yeah, with the walkthrough in hand, you don't need to come through here.)


- Vis Mager - Use Fizzle
- Cosmic Chimaera
- Green Dragon
- Stone Golem
- Blue Dragon
- Knight Aberrant - Use Fizzle
- Red Dragon (Fifth Basement) - Use Fizzle
- Knight Abhorrent (Seventh Basement) - Use Fizzle
- The first floor is a standard castle layout. Make your way into the throne room in the north and you'll find a sparkle behind the throne. Checking it will reveal a staircase, and of the three on this floor this one is the one you want to use. You'll need to use the first Magic Key on the next floor.
- When you reach the third basement you'll start out in the south, and the staircase will be wedged between two sections of wall. To proceed forward you need to go east. If you go west first you'll find a dead end with a pair of chests. They contain a Medicinal Herb and 500 gold.

- The fourth basement will start you off in the northwestern corner of the area, and you need to go southeast to proceed. Go south first and you'll see a set of stairs on the other side of the wall to your right. Go around the wall to get at it and the stairs will take you back upstairs. Keep following the straightforward passages beyond and they will eventually bring you to a chest containing Erdrick's Sword. This is the most powerful weapon in the game, and will make the battles to come much easier.
- If you're headed in the right direction the fifth basement will be a straightforward walk to the next floor. If you're headed in the wrong direction, however, the path will continually loop back on itself. Go back up the stairs the way you came and backtrack to find the proper path.
- Once you reach the final level the lights will come back on, and you'll need to follow a path north and along the edges of the castle to reach your destination. Before you swing left from the entrance you can head north to find a locked room filled with treasure chests. Use a Magic Key to get inside and retrieve the contents of the chests: A Wasteband (don't equip this thing, it is cursed), a Seed of Magic, a Medicinal Herb, a total of 924 gold, a Magic Key, and a Chimaera Wing. Two of the chests are empty.


